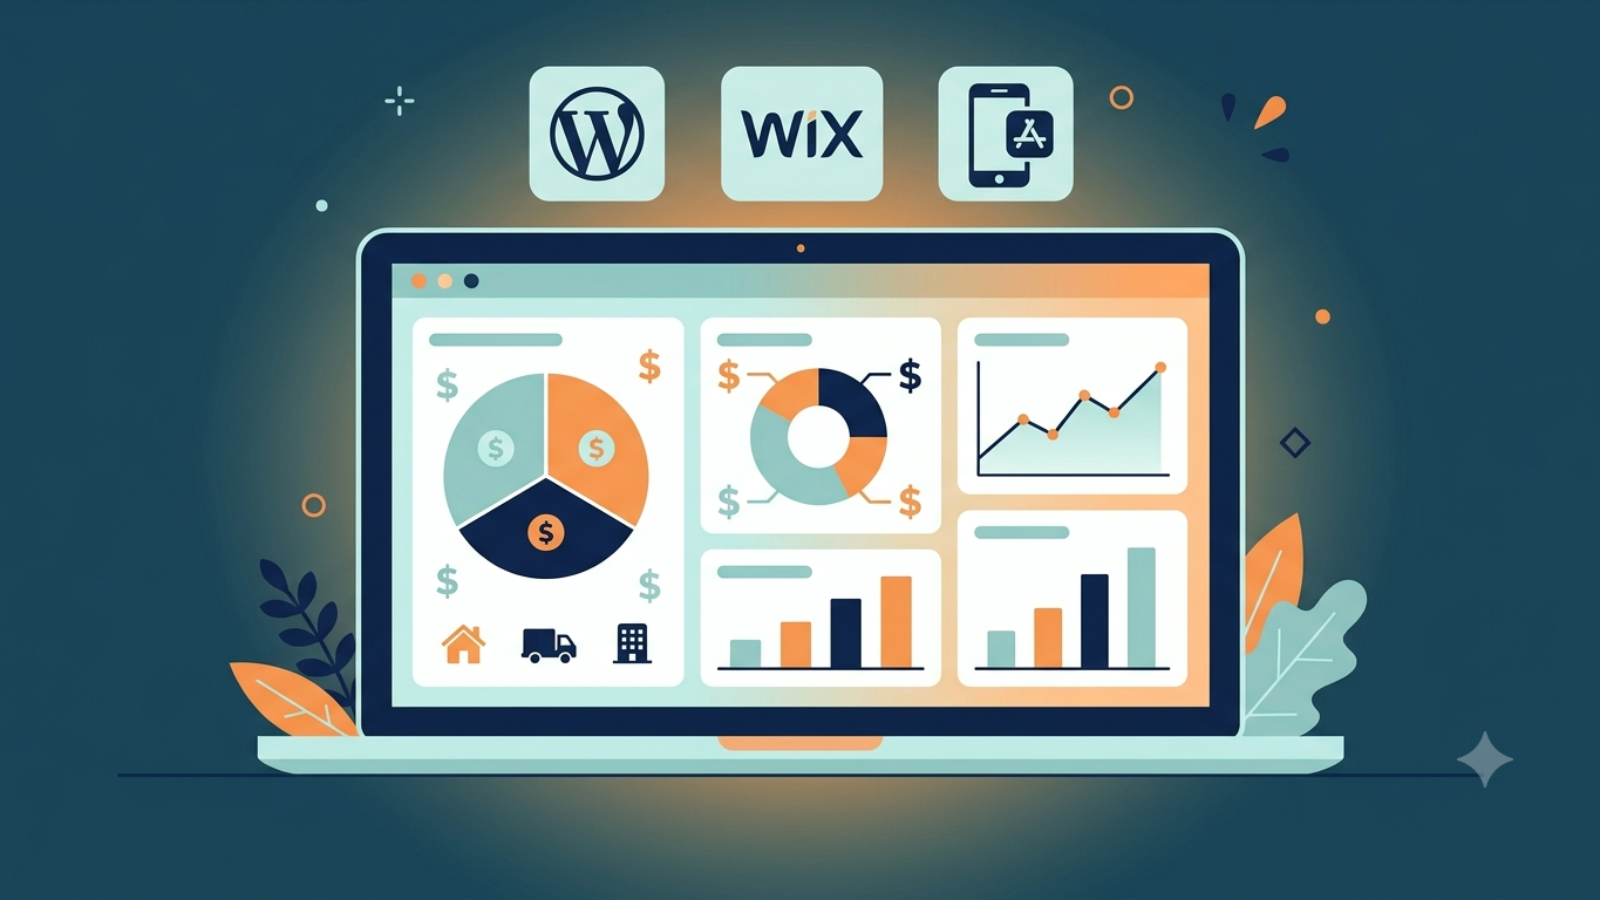
Website development cost comparison dashboard showing pricing tiers by platform

Website Development Cost in 2026: The Complete Pricing Guide

Quick answer: Website development in 2026 typically costs between $1,000 and $15,000 for most small businesses, with basic sites at the low end and custom-featured builds at the high end. WordPress ranges roughly $500–$30,000+ depending on complexity, Wix Studio sites usually fall in a similar low-to-mid range with more predictable bundled pricing, and mobile apps (like Flutter builds) start higher due to backend and platform requirements. The real number depends far more on scope — integrations, e-commerce, custom design, and ongoing maintenance — than on which platform you choose.

If you’ve searched this question and found ranges anywhere from $500 to $500,000, you’re not imagining things — that’s genuinely how wide the market is. This guide breaks down why, using real 2026 market data, so you can budget with actual numbers instead of guesses.

Why “How Much Does a Website Cost” Has No Single Answer

A recent industry-wide survey of over 300 web development firms across 31 countries found that fixed-price web development projects in 2026 range from $1,000 to $150,000 or more, with 63% of agencies quoting between $1,000 and $15,000. That’s the honest starting point: most small business projects land in a fairly predictable band, but the ceiling is genuinely open-ended once you add complexity. YouTube

The same survey found that basic websites and MVPs cost $1,000 to $3,000 for 60% of agencies, with 71% delivering them in under four weeks, while enterprise builds show the widest spread — 36% quote $20,000 to $50,000, and 7% go as high as $200,000 to $500,000. Two businesses can both say “I need a website” and mean completely different projects. YouTube

WordPress Pricing: The Full Range

WordPress remains the most commonly used platform among web development firms — the same 2026 survey found 83% of respondent agencies build on WordPress, far ahead of any competitor. That popularity is exactly why its pricing spans so widely. YouTube

Basic WordPress sites: According to industry pricing data, simple WordPress websites typically cost $500 to $5,000, while fully custom builds with advanced features range from $5,000 to $30,000. Wix

Mid-range custom builds: Looking at the market more broadly, WordPress’s $3,000 to $10,000 modal range reflects its versatility, while complex builds handled by experienced WordPress development companies regularly reach $40,000 or more when custom plugin development, multisite architecture, or advanced editorial workflows are involved. YouTube

What actually drives the price up: One detailed 2026 pricing breakdown notes that the important factor isn’t a flat number but what kind of WordPress site you’re buying and what has to keep working after launch — deeper planning, custom design systems, cleaner development, more QA, migration planning, and long-term support all separate a $5,000 site from a $25,000 one. Omi AI

Maintenance — the cost most people forget: This is where budgets get blindsided. WordPress maintenance through a managed service typically runs $79 to $200 per month for a small business site, with the industry average across major providers landing around $246 per month. That’s an ongoing cost on top of the initial build — and it’s rarely mentioned in the first quote. Wix

For a full breakdown specific to smaller projects, see our WordPress website cost guide for 2026.

Custom WordPress Development: Plugins, Themes, and Integrations

If your project needs something WordPress doesn’t do out of the box — a custom plugin, a fully bespoke theme, or an integration with an external system — pricing shifts into a different bracket entirely. A detailed 2026 custom development pricing guide puts it plainly: custom WordPress development typically ranges from $2,000 to $15,000 or more, depending on whether you need a plugin, theme, or integration, and the level of complexity involved — and vague ranges like “$500 to $50,000” aren’t a budget, they’re a guess. Wix

At the higher end of custom plugin work specifically, plugins with complex logic, custom admin dashboards, or integration with third-party services — like booking systems or custom reporting tools — typically run $4,000 to $6,000 or more. Wix

This is directly relevant if you’re building something like a booking system or an AI-powered feature — these fall squarely into “custom integration” territory, not template pricing.

Wix Studio Pricing: How It Compares

Wix Studio sits in a genuinely different pricing model — instead of piecing together hosting, themes, plugins, and developer hours separately, most of that gets bundled into a plan. This tends to make Wix pricing more predictable upfront, though it comes with less long-term flexibility once you’re locked into the platform’s ecosystem (a tradeoff we cover in detail in our Wix Studio vs WordPress comparison).

For most small-to-medium projects, Wix Studio costs land in a broadly similar range to a mid-tier WordPress build — the real differentiator isn’t raw cost, it’s what you’re trading for that predictability: less control over hosting and long-term portability, in exchange for less maintenance overhead.

Enterprise and Corporate Website Pricing

If you’re planning something bigger — a full corporate site, a lead-generation platform for a mid-market company, or an e-commerce build at scale — the numbers jump substantially. Recent 2026 pricing data shows midmarket and corporate marketing sites typically span $15,000 to $75,000 for a complete project, with a median around $36,500. Wix

E-commerce specifically scales even higher: full custom e-commerce builds on platforms like Shopify Plus, or headless architectures, typically land between $45,000 and $250,000 depending on catalog complexity, ERP integration, and front-end requirements. Wix

Interestingly, even with AI tools now standard across the industry, prices haven’t dropped at this tier. The same data notes AI coding assistants have compressed production timelines by 22 to 34%, yet average project invoices have held steady or increased slightly, because buyers now expect more for the same budget — Core Web Vitals compliance, accessibility standards, and conversion optimization are no longer optional extras. Wix

Mobile App Development: Flutter and Firebase Costs

If your project is a mobile app rather than a website, the cost structure shifts again — apps typically involve backend infrastructure (like Firebase) from day one, which websites often don’t need. We cover this in detail in our Flutter app development cost guide, but the short version: a simple MVP app costs meaningfully less than a full-featured app with real-time data, authentication, and payments, and the smartest budgeting approach is scoping your exact feature list before requesting quotes — generic per-app pricing ranges are even less reliable for mobile than they are for websites.

What Actually Pushes Any Project’s Price Up

Across WordPress, Wix, and custom app development, the same cost drivers show up repeatedly:

  • Custom design work — Original UX research and bespoke visual design adds real hours, not just template customization
  • Content operations — Professional copywriting and image direction is frequently underestimated in a first budget
  • Third-party integrations — Payment gateways, CRMs, booking systems, or AI features all add scoped development time
  • Technical instrumentation — Analytics, tag management, and search monitoring are increasingly standard but rarely included in the cheapest quotes
  • Ongoing maintenance — Security updates, backups, and monitoring are a recurring cost, not a one-time fee

One 2026 industry breakdown puts it simply: the right price for a project is determined more by scope clarity and integration complexity than by which vendor or platform you choose, and spending even a few hours defining scope in detail before requesting proposals typically reduces quoted price variance by 30 to 50%. Wix

How to Get an Accurate Quote (Not a Guess)

Given how widely these numbers swing, the only reliable way to budget is to define your scope before asking for a price. That means listing out:

  1. Every page or screen your project needs
  2. Whether you need e-commerce, bookings, or user accounts
  3. Any third-party integrations (payments, CRMs, booking systems, AI features)
  4. Whether content and copywriting are included or handled separately
  5. Your expectations for ongoing maintenance and support after launch

A developer working from that list can give you a scoped, defensible number. A developer working from “how much for a website?” is guessing just as much as you are.

Frequently Asked Questions

Is WordPress cheaper than Wix Studio?
Not necessarily — for comparable small business projects, both land in a similar overall range. The real difference is in what you’re paying for: WordPress offers more long-term flexibility and plugin variety, while Wix bundles hosting and maintenance into more predictable pricing.

Why do WordPress quotes vary so much between freelancers and agencies?
Freelancers typically charge 30–100% less than agencies for comparable scope, since agency pricing includes project management, QA processes, and broader accountability structures that freelancers often don’t carry as overhead.

Does a cheaper website cost more in the long run?
Often, yes — if it lacks proper technical foundations (clean code, security practices, scalable structure), it can require a costly rebuild sooner than a slightly more expensive, properly built site would have.

Is AI making websites cheaper to build in 2026?
For basic sites, yes — AI-assisted tools have compressed timelines and lowered entry-level pricing. For complex, custom, or enterprise builds, overall invoices have held steady or risen slightly, since expectations for quality and functionality have risen alongside the efficiency gains.

What’s the single biggest hidden cost people forget to budget for?
Ongoing maintenance. A website’s launch cost is only part of the picture — hosting, security updates, and content upkeep are recurring costs that should be part of the original budget conversation, not a surprise afterward.


Not sure what your specific project should actually cost? Contact us with your requirements for a scoped, honest estimate — not a generic range.


WordPress booking plugin calendar interface for restaurant table reservations

Best WordPress Booking Plugins for Restaurants & Tours (2026)

Quick answer: There’s no single “best” WordPress booking plugin — the right choice depends on what you’re booking. Restaurants need table and party-size logic (Five Star Restaurant Reservations, WPCafe), tour and activity businesses need departure-based inventory (FareHarbor, Yatra Pro), and WooCommerce store owners selling bookable products should use WooCommerce Bookings directly inside their existing store. Picking based on category — not a generic “top 10” list — is what actually matters.

If you’ve searched “best WordPress booking plugin” and found a dozen conflicting lists, that’s because the word “booking” covers very different workflows. Here’s how to actually choose, based on your business type.

Why “Best Overall” Doesn’t Really Exist Here

An appointment plugin built for a salon handles staff schedules and service slots. A restaurant reservation system needs to think in tables, covers, and party size. A tour booking plugin needs departure dates, capacity limits, and anti-overbooking logic. A rental plugin needs inventory and pricing tiers. Stretching one tool to do all of these usually leads to a clunky setup — the smarter approach is matching the plugin to the category your business actually falls into.

If You Run a Restaurant or Café

Restaurant bookings are about tables, service windows, and party size — not staff calendars. For this category, dedicated restaurant reservation tools tend to outperform generic appointment plugins because they’re built around the actual guest-flow problem: party size rules, service hours, blocked dates, and reducing no-shows through automated reminders.

If you’re also running food ordering alongside reservations (not just bookings), an all-in-one restaurant plugin that handles both menus and table bookings in one dashboard tends to be less messy than stitching two separate tools together.

This connects directly to a project we’ve covered before — see our case study on migrating a restaurant from Gloria Food to WooCommerce, where ordering and booking needed to work together on one platform.

If You Run Tours, Activities, or Rentals

This is a completely different problem: you’re managing departure dates, capacity per date, and often multi-day availability — not single time slots. Tools built specifically for this space handle departures as core objects (with cutoffs and anti-overbooking locks), rather than treating dates as an afterthought bolted onto a generic booking form.

We’ve built this exact kind of system before — see our FareHarbor booking integration case study and the accompanying step-by-step FareHarbor + WordPress setup guide for a real example of how this works in practice.

If You Already Run a WooCommerce Store

If you’re selling physical products and want to add bookable services (equipment rental, workshop seats, photography sessions) without leaving your existing store, WooCommerce’s official Bookings extension is built specifically for this — every booking flows through the same order management, payment gateways, and reporting you’re already using, so you’re not managing two disconnected systems.

What to Actually Check Before Choosing Any Plugin

Regardless of category, these matter more than feature-list length:

  • Real-time availability — booked slots should close immediately, with no double-booking risk
  • Reminder automation — email/SMS reminders meaningfully reduce no-shows
  • Payment/deposit support — especially important for tours and higher-value reservations
  • Elementor or page-builder compatibility — if your site is built in Elementor, confirm the plugin’s booking widgets work natively inside it, rather than needing a separate shortcode workaround
  • Support and update history — check the plugin’s WordPress.org page for recent updates and real user reviews, not just the vendor’s own marketing page

A Word on “Free” Plugins

Many booking plugins offer a free tier, but it’s worth checking exactly what’s excluded before committing — commonly, free versions limit you to one staff member/location, no payment processing, and no SMS/WhatsApp reminders. If your business genuinely needs multi-location support or automated payment collection, budget for a paid tier from the start rather than hitting a wall mid-setup.

Frequently Asked Questions

Can one plugin handle both restaurant reservations and tour bookings?
Generally not well. These require fundamentally different data models — tables/party size versus departures/capacity — so using a dedicated tool for each category gives a cleaner result than forcing one plugin to do both.

Do I need WooCommerce to add booking functionality to WordPress?
No. Standalone booking plugins work independently of WooCommerce. WooCommerce Bookings is only the right choice if you’re already running a WooCommerce store and want bookings integrated into that existing setup.

What’s the biggest mistake businesses make when choosing a booking plugin?
Picking based on a generic “best of” list rather than their actual booking category — an appointment plugin, a restaurant reservation tool, and a tour booking system solve genuinely different problems.

Does Elementor work with booking plugins?
Many do offer Elementor-compatible widgets (search forms, booking calendars, listing shortcodes), but this varies by plugin — always confirm before building your page layout around it.


Not sure which booking system fits your restaurant, tour business, or rental operation? Contact us and we’ll help you scope the right setup.

AI features being added to a Wix Velo website through custom code integration

How to Add AI Features to Your Wix Velo Website (2026 Guide)

Quick answer: You can add AI features to a Wix Velo website by using Velo’s backend code environment to connect your site to an AI API (like OpenAI), storing your API key securely in Wix’s Secrets Manager, and building a frontend interface (chatbot, content generator, or smart search) using Wix’s $w elements. Basic AI chat features can be added in a few days; more advanced automation takes longer depending on complexity.

Wix has come a long way from being “just a drag-and-drop builder.” With Velo — Wix’s custom code layer — you can build genuinely smart, AI-powered features directly into a Wix site. Here’s exactly how it works, what’s possible, and what it actually costs to build.

Why Add AI to a Wix Velo Site

Most Wix sites are still static — they look good but don’t do much. Adding AI changes that:

  • Instant customer answers through an AI chatbot, without needing separate live-chat software
  • Automated content help — AI-assisted blog drafts, product descriptions, or FAQ generation
  • Smarter search and recommendations based on what visitors are actually looking for
  • Lead qualification — an AI assistant that asks the right questions before a lead reaches your inbox

For small businesses, this often replaces tools they’d otherwise pay for separately (chat widgets, content assistants, form logic).

How Velo Connects to AI: The Technical Basics

Velo gives you a backend coding environment inside Wix, and that’s where AI integration happens. According to Wix’s own developer documentation, calling external APIs from the backend avoids CORS issues and keeps sensitive keys secure, and any API keys should always be stored using the Secrets Manager rather than exposed on the frontend. Google

The general flow looks like this:

  1. Enable Dev Mode on your Wix site to access the Velo code panel
  2. Create a backend .jsw file — this is where your AI API calls live, completely separate from the visible frontend
  3. Store your AI provider’s API key in the Secrets Manager — never hard-code it into your site
  4. Write a backend function that sends visitor input to the AI API and returns a response
  5. Build a simple frontend UI using Wix Editor elements ($w) — a text box, a button, and a response area is enough for a basic chatbot
  6. Test in Preview mode before publishing, checking both the request and response carefully

Wix’s own documentation on integrating third-party services in Velo walks through this exact backend-to-API pattern in more depth, including how the Secrets Manager and fetch() function work together.

Common AI Features You Can Build

1. AI Chatbot
The most common request. A visitor types a question, it’s sent to an AI model on the backend, and the response streams back into a chat-style widget. This can be trained on your specific business content so it doesn’t give generic answers.

2. AI Content Assistant
A form where a site owner (or admin) inputs a topic, and the backend calls an AI API to draft blog content, product descriptions, or FAQ answers — useful for sites that publish regularly but don’t have a full-time writer.

3. Smart Search / Recommendations
Instead of basic keyword search, AI can help match visitor intent to the right product, service, or page — particularly useful for larger catalogs or service menus.

4. Automated Lead Qualification
An AI assistant asks a few smart follow-up questions before handing a lead to a human — filtering out low-intent inquiries before they hit your inbox.

What Makes This Different From Just Installing a Plugin

Unlike WordPress, Wix doesn’t have the same plugin ecosystem for AI tools — most meaningful AI integrations on Wix go through Velo’s custom code layer rather than a one-click install. This means:

  • More flexibility — you can train responses on your exact business content, not a generic template
  • More setup work upfront — there’s genuine backend coding involved, even if it’s relatively lightweight
  • Better long-term control — you’re not dependent on a third-party app’s pricing changes or feature limits

What This Typically Costs

  • Basic AI chatbot (FAQ-style, pre-set responses): Lower cost, faster turnaround — often just a few days of setup
  • Custom-trained AI assistant (trained on your specific business content, with lead capture): Mid-range project cost, typically a week or so of development
  • Advanced automation (content generation tools, smart recommendations, multi-step workflows): Higher cost and longer timeline, scoped based on exact requirements

As with most custom development, the honest answer is: it depends on your feature list. A scoped conversation with a developer beats any generic price estimate.

Mistakes to Avoid

  • Skipping the Secrets Manager — never place API keys directly in frontend code; this is a real security risk
  • Not testing thoroughly in Preview mode — AI responses can behave unexpectedly with edge-case inputs
  • Building without a fallback — always include a way for visitors to reach a human if the AI can’t help
  • Over-scoping the first version — start with one AI feature (like a chatbot), prove it works, then expand

Frequently Asked Questions

Can Wix Studio sites use AI without coding?
Some basic AI-adjacent features exist in Wix’s built-in tools, but genuinely custom AI functionality (chatbots trained on your content, smart automation) requires Velo’s backend code environment.

Is Velo required for AI integration on Wix?
Yes, for anything beyond Wix’s built-in generic tools. Velo is what allows a Wix site to securely call external AI APIs and process responses.

Does adding AI features slow down a Wix site?
Not if implemented properly — backend API calls don’t block frontend load times when built correctly, since the heavy lifting happens server-side.

How do I keep my AI API key secure on Wix?
Always store it in Wix’s Secrets Manager and access it only from backend code — never expose it in frontend elements or client-side code.


Want an AI chatbot or custom AI feature built into your Wix Velo site? Contact us with what you have in mind for a scoped quote.

Side-by-side comparison of Wix Studio and WordPress website platforms

Wix Studio vs WordPress: Which Should You Choose in 2026?

Quick answer: Choose WordPress if you need maximum flexibility, plugin variety, and long-term scalability for a growing business. Choose Wix Studio if you want a faster build, easier design control, and don’t need deep custom functionality. Neither is universally “better” — the right choice depends on your technical needs, budget, and how much control you want over the backend.

If you’re starting a new website project in 2026, this is one of the first decisions you’ll make. Here’s an honest, practical comparison — not just a features list.

The Core Difference

  • WordPress is open-source and self-hosted. You control everything, but you’re also responsible for updates, security, and hosting.
  • Wix Studio is a hosted, all-in-one platform. Wix manages hosting and security, and you build using their visual editor, with Velo (Wix’s custom code layer) available for advanced functionality.

When WordPress Makes More Sense

  • You need specific plugins (advanced booking systems, complex WooCommerce stores, membership sites)
  • You expect to scale significantly and want full control over performance and hosting
  • You want the flexibility to switch developers or hosts freely — WordPress isn’t locked to one platform
  • Your project needs deep custom functionality beyond what page builders support

When Wix Studio Makes More Sense

  • You want a faster turnaround with strong built-in design tools
  • You don’t want to manage hosting, security updates, or plugin conflicts
  • Your site needs moderate custom functionality — Velo handles a lot without needing a fully custom build
  • You’re a small business or startup that values simplicity over maximum flexibility

Cost Comparison

  • WordPress: Hosting and plugin costs vary, but you have full control over spend — from cheap shared hosting to premium managed hosting
  • Wix Studio: Pricing is bundled into plans, generally predictable, but less negotiable since you’re tied to Wix’s ecosystem

Neither is inherently cheaper — it depends on scope, plugins/apps needed, and long-term maintenance.

Performance and SEO

Both platforms can rank well in 2026 if built correctly. WordPress historically has more SEO plugin options (like Yoast), giving more granular control. Wix Studio has significantly improved its native SEO tools in recent years and is no longer the weak point it once was.

Long-Term Flexibility

This is often the deciding factor: WordPress gives you full ownership and portability — you can move hosts, developers, or platforms anytime. Wix Studio, while flexible in design, keeps you within its ecosystem.

Frequently Asked Questions

Is Wix Studio good enough for a business website?
Yes, especially for small-to-medium businesses that want a fast, professional site without managing technical maintenance.

Can Wix Studio handle custom functionality like WordPress plugins?
To a large extent, yes, through Velo (Wix’s custom code platform), though highly specialized plugins available in the WordPress ecosystem may not have a direct Wix equivalent.

Which platform is better for e-commerce?
Both handle e-commerce well. WordPress (via WooCommerce) offers more customization for complex stores; Wix offers a simpler, more guided e-commerce setup.

Can I switch from Wix to WordPress later?
Yes, but it typically requires rebuilding the site rather than a direct migration, since the platforms work differently under the hood.


Not sure which platform fits your project? Contact us and we’ll help you decide based on your specific needs.

WooCommerce vs Shopify 2026 comparison showing both e-commerce platform logos and store interfaces

WooCommerce vs Shopify 2026: Which Should You Choose?

WooCommerce vs Shopify is the first decision most people face when starting an online store, and it’s a genuinely hard one because both platforms are excellent — just built on completely different philosophies.

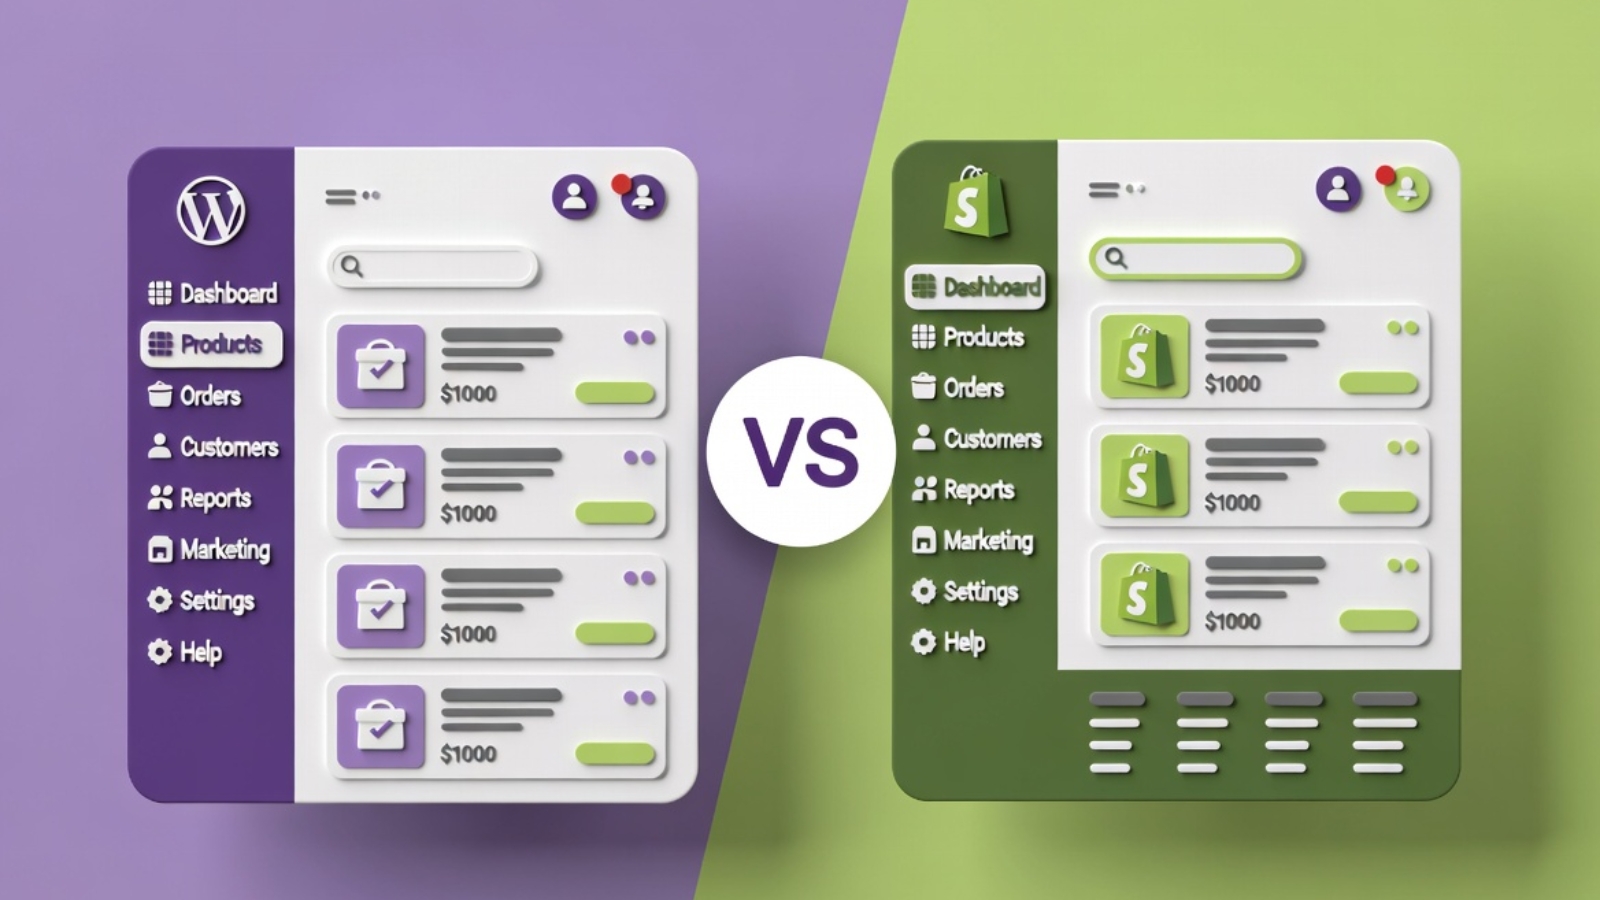
Shopify is a fully hosted, all-in-one platform. WooCommerce is a free plugin that turns WordPress into a store. That single difference explains almost everything else about how these two platforms compare.

I’ve built stores on both. This comparison breaks down real differences in cost, ease of use, customization, and long-term ownership — not just a feature checklist copied from each platform’s marketing page.

The Core Difference You Need to Understand First

Shopify hosts everything for you. You pay a monthly fee, and Shopify handles the server, security, updates, and uptime. You’re renting a fully built store.

WooCommerce is self-hosted. It’s a free plugin you install on WordPress, but you need your own hosting, and you’re responsible for updates, security, and backups — either yourself or through a developer.

This one distinction drives every other difference between the two platforms.

✅ Pro Tip: If the idea of managing hosting, updates, and backups sounds stressful, Shopify removes that entirely. If you want full ownership and control over every part of your store, WooCommerce gives you that — at the cost of more responsibility.

Pricing Comparison

Shopify Pricing

Shopify charges a monthly subscription regardless of your sales volume:

  • Basic: $39/month
  • Shopify: $105/month
  • Advanced: $399/month

On top of the subscription, Shopify charges transaction fees if you don’t use Shopify Payments — typically 2%, on top of your payment processor’s fees. Using Shopify Payments removes this extra fee but locks you into their payment system.

Apps for extra functionality (reviews, upsells, advanced shipping) often carry their own monthly fees, which can add $50–$200/month depending on your store’s needs.

WooCommerce Pricing

WooCommerce itself is free. Your actual costs are:

  • Hosting: $5–$30/month depending on provider and traffic
  • Domain: $10–$20/year
  • SSL: Usually free through hosting
  • Premium plugins/themes: $0–$300/year depending on what you need
  • Payment processing: Standard Stripe/PayPal fees (around 2.9% + $0.30 per transaction) — no additional platform fee

For a small to medium store, WooCommerce typically costs significantly less per month than Shopify once you account for Shopify’s transaction fees and app costs.

⚠️ Watch Out: WooCommerce’s low sticker price doesn’t include your time or a developer’s time. If you’re not comfortable managing WordPress yourself, factor in either your own learning curve or the cost of hiring a developer for setup and maintenance.

Ease of Use

Shopify wins clearly here. It’s designed for non-technical store owners from day one. The setup wizard walks you through everything, the admin dashboard is intuitive, and you can have a functional store live within a few hours without touching any code.

WooCommerce has a steeper learning curve. You’re working within WordPress, which means understanding plugins, themes, and general WordPress management on top of the store itself. It’s not difficult once you’re familiar with it, but the initial setup requires more patience — or a developer.

If you want the fastest path to a live store with zero technical involvement: Shopify.

If you’re comfortable investing time to learn WordPress, or hiring someone who already knows it: WooCommerce gives you more control for less ongoing cost.

Customization and Flexibility

This is where WooCommerce genuinely outperforms Shopify.

Because WooCommerce is a WordPress plugin, you have access to WordPress’s entire ecosystem — over 60,000 plugins, unlimited theme customization, and full code-level control if you or your developer want it. Custom checkout flows, unique product configurators, complex membership logic — all of this is achievable with the right development work.

Shopify’s customization is more restricted. You’re working within Shopify’s Liquid templating system and app ecosystem. Shopify apps can extend functionality significantly, but you’re still operating within Shopify’s platform boundaries. Deep custom functionality often requires Shopify Plus (their enterprise tier, starting around $2,000/month) or complex app-based workarounds.

✅ Pro Tip: If your business model requires anything unusual — a subscription box with complex logic, a marketplace connecting multiple vendors, a highly custom product configurator — get a clear answer from a developer on both platforms before committing. WooCommerce almost always makes unusual requirements easier to build.

SEO Capabilities

Both platforms can rank well on Google, but WooCommerce has a structural advantage because it’s built on WordPress — historically the strongest CMS for SEO due to its flexibility.

With WooCommerce, you have complete control over URL structure, meta data, schema markup, and content strategy through plugins like Yoast SEO or Rank Math. You can build a full blog alongside your store, which Shopify also supports but with less flexibility in how blog and product content interact for SEO purposes.

Shopify has improved SEO significantly in recent years, but some structural limitations remain — like less control over URL structure for certain page types.

For a store planning heavy content marketing and blog-driven SEO alongside product sales, WooCommerce generally provides more flexibility.

Payment Processing

Shopify Payments is built in and works seamlessly if you’re in a supported country — no third-party gateway needed, and it avoids the extra transaction fee mentioned earlier. If Shopify Payments isn’t available in your country, you’ll need a third-party gateway and will pay the additional transaction fee.

WooCommerce works with virtually any payment gateway — Stripe, PayPal, Square, and hundreds of regional and local options through free plugins. This is particularly useful for businesses needing region-specific payment methods, like MobilePay for Danish customers or other local payment preferences.

Which One Should You Actually Choose

Choose Shopify if:

  • You want to launch fast with minimal technical involvement
  • You don’t want to manage hosting, security, or updates yourself
  • Your product catalog and business logic are relatively standard
  • You value having one company responsible for the entire platform
  • You’re comfortable with a predictable monthly cost

Choose WooCommerce if:

  • You want full ownership of your store and data
  • Your business needs custom functionality beyond standard e-commerce
  • You’re planning significant content marketing and blog-driven SEO
  • You want lower long-term costs and are willing to invest in setup
  • You already have a WordPress site and want to add a store to it
  • You need specific regional payment gateways

What About Migrating Later

Moving from WooCommerce to Shopify, or Shopify to WooCommerce, is possible but involves real work — migrating products, customer data, order history, and rebuilding your design. Neither platform makes this a simple one-click process.

Because of this, it’s worth thinking through your 2–3 year plan before choosing rather than picking based only on what’s easiest to start with today. A business planning to scale into complex custom functionality is often better served starting on WooCommerce, even if the initial setup takes longer.

Common Questions

Q: Is WooCommerce really free?
A: The WooCommerce plugin itself is free. Your actual costs are hosting, a domain, and any premium themes or plugins you choose to add. Most small stores can run WooCommerce for $10–$30/month total.

Q: Can I switch from Shopify to WooCommerce later?
A: Yes, though it requires migrating your product catalog, customer data, and rebuilding your site design. Several plugins exist to help with product data migration, but a smooth transition usually benefits from developer assistance.

Q: Which platform is better for a small restaurant or local business?
A: WooCommerce is often a better fit for local businesses because of lower ongoing costs and the ability to add regional payment methods like MobilePay. It also integrates naturally if you already need a WordPress site for your broader business presence, not just online ordering.

Q: Does Shopify or WooCommerce handle more traffic better?
A: Shopify’s hosting is built to handle traffic spikes automatically since it’s a managed platform. WooCommerce can handle high traffic too, but this depends entirely on your hosting quality — a cheap shared host will struggle under heavy traffic where Shopify wouldn’t.

Q: Which is cheaper in the long run?
A: For most small to medium stores, WooCommerce is cheaper over 12+ months once you account for Shopify’s monthly fee, transaction fees, and app costs. The gap narrows if your WooCommerce site needs significant developer time for setup and maintenance.

Final Thoughts

WooCommerce vs Shopify isn’t really a question of which platform is objectively better — it’s a question of which tradeoff fits your business. Shopify trades flexibility for simplicity and predictability. WooCommerce trades a steeper setup process for lower long-term cost and far greater customization.

If you’re still unsure after reading this, the deciding question is usually this: do you want a platform that does everything for you, or do you want full control over everything, even if it takes more work to get there?

If you’re planning a WooCommerce store and want it built properly from day one — including payment gateway setup, product configuration, and SEO foundations — Contact me and I’ll help you get it right.

DNS propagation issue during restaurant website migration showing old and new site conflict

DNS Propagation Issues When Migrating a Restaurant Website — How to Fix Them

DNS propagation issues during a restaurant website migration can bring your entire online ordering system to a halt at the worst possible moment — during a busy lunch service, on a Friday evening, or right after you’ve told customers about your new site.

I’ve migrated multiple restaurant websites including Danish restaurants registered at Punkt.um, and DNS propagation problems came up every single time. This guide covers exactly what causes DNS propagation issues, how to fix them fast, and how to structure your migration so your restaurant never goes dark during the switch.

If you’re mid-migration and your site is currently down or flipping between old and new — scroll straight to the Fix section. If you’re planning a migration, read everything so you don’t hit these problems at all.

What DNS Propagation Actually Means

Before fixing the problem, it helps to understand what’s actually happening.

Every domain name (like yourrestaurant.com) points to an IP address — the physical location of the server where your website lives. DNS (Domain Name System) is the global system that translates your domain name into that IP address so browsers can find your site.

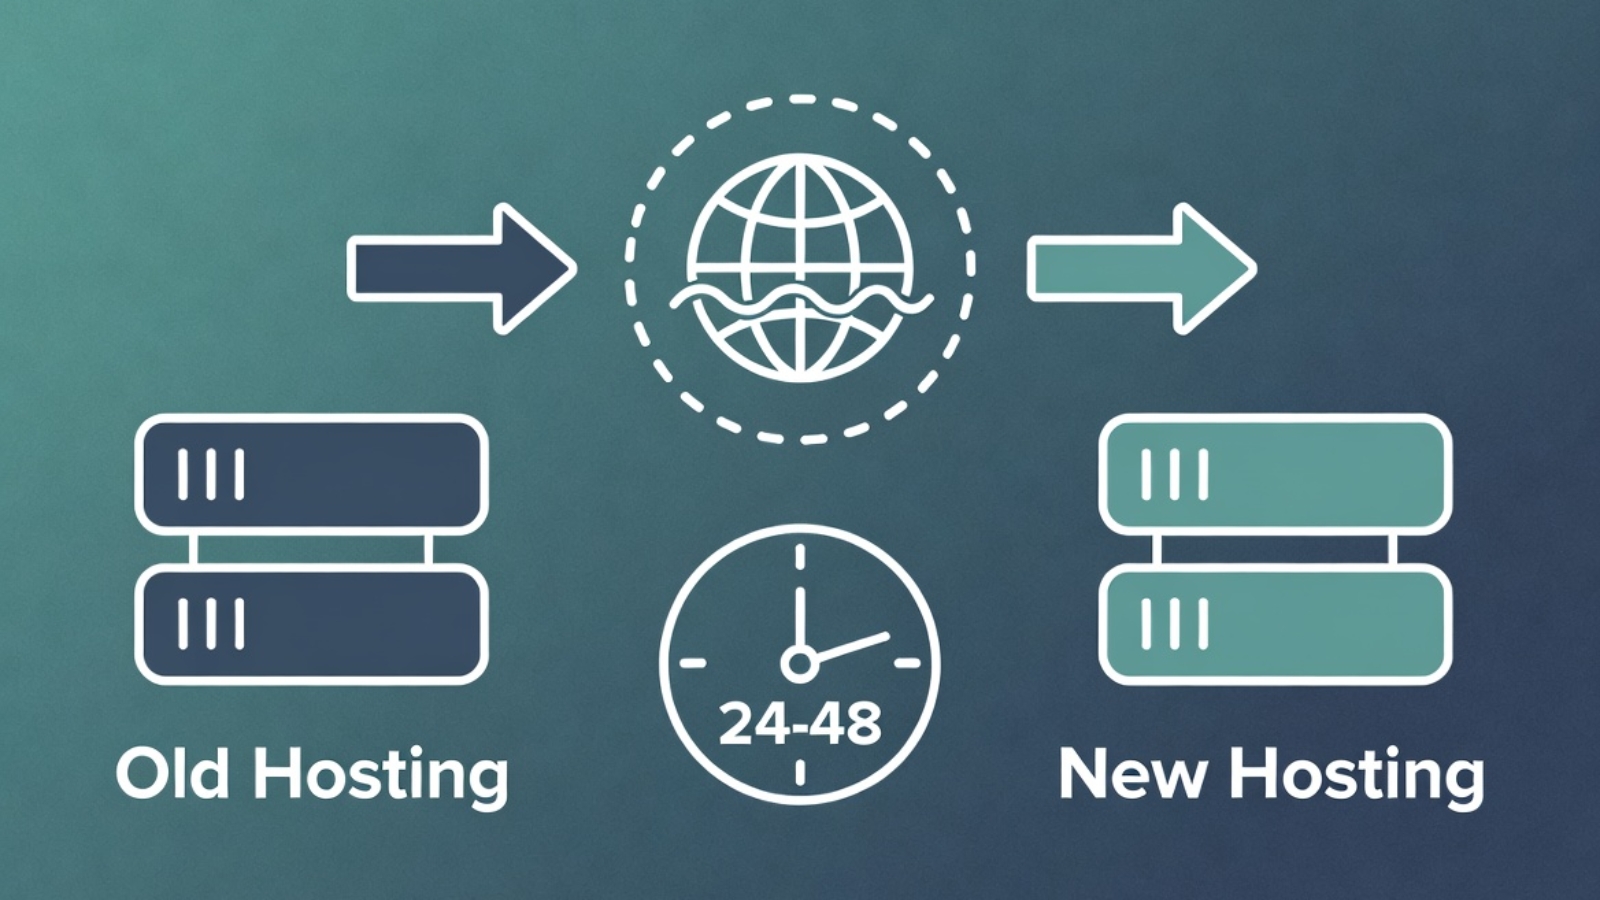
When you migrate a restaurant website to new hosting, you change the IP address your domain points to. DNS propagation is the time it takes for this change to spread across all DNS servers worldwide.

The problem: DNS servers around the world cache (store) your old IP address. Until their cache expires and they fetch the new record, some visitors see your old site and some see the new one — depending on which DNS server their internet provider uses.

This propagation period typically takes 24–48 hours. Some providers update within minutes. Others hold the old record for the full 48 hours. You have no direct control over this.

⚠️ Watch Out: During propagation, you might test your new site from your laptop and see it working perfectly — while a customer in another city still sees the old site or gets a blank page. This is normal propagation behavior, not a sign something is broken.

Why Restaurant Websites Are Especially Vulnerable

Most websites can afford a few hours of reduced visibility during a DNS change. Restaurant websites can’t — especially ones taking online orders.

A customer who hits a blank page or error during your migration doesn’t wait for propagation to finish. They order from somewhere else. If your DNS change happens on a Friday evening before a busy weekend, that’s real lost revenue.

Restaurant websites also typically involve more moving parts than a simple brochure site:

  • An active ordering system (WooCommerce, Gloria Food, or a booking platform)
  • Payment gateway connections that are IP or domain-specific
  • Email order notifications that may be tied to the old hosting
  • Google My Business listing pointing to the domain
  • Third-party delivery platform integrations

All of these need to keep working during and after the migration.

✅ Pro Tip: Never schedule a DNS change on a Friday, Saturday, or any day before a known busy period for your restaurant. Tuesday or Wednesday morning is ideal — lower traffic, your hosting support team is available, and you have the rest of the week to fix anything unexpected.

The Right Way to Migrate — Zero Downtime Approach

The single most important thing you can do to avoid DNS propagation problems is to never actually take your restaurant offline during the migration.

Here’s the approach I use for every restaurant migration:

Step 1 — Build the New Site on a Temporary URL

Build and fully test the new WordPress site on a staging URL or a temporary subdomain provided by your new host. For example:

staging.yourrestaurant.com
OR
yourrestaurant.newhost.com/staging

The old site stays completely live and taking orders throughout this entire phase. Customers never see anything different.

Step 2 — Test Everything on the Staging URL

Before touching any DNS settings, confirm all of the following work on the staging URL:

  • Full menu loads correctly with all items and prices
  • Add to cart and checkout work end to end
  • Payment processes successfully (use a real test transaction)
  • Order confirmation email arrives
  • All images load correctly
  • Site loads on mobile in Safari and Chrome

Do not change DNS until every item on this list passes.

Step 3 — Lower Your TTL Before Changing DNS

TTL (Time To Live) is the number of seconds DNS servers cache your record before checking for updates. Most domains default to 3600 seconds (1 hour) or 86400 seconds (24 hours).

Lower your TTL to 300 seconds (5 minutes) at least 24 hours before you plan to change your DNS records. This means when you do make the change, it propagates in minutes rather than hours.

To lower TTL:

  1. Log in to your domain registrar (Punkt.um, GoDaddy, Namecheap, etc.)
  2. Go to DNS management
  3. Find your A record for @ (root domain) and www
  4. Change the TTL value to 300
  5. Save and wait 24 hours before proceeding

✅ Pro Tip: Most restaurant owners don’t know about TTL and skip this step. It’s the single most effective thing you can do to speed up propagation. A 5-minute TTL means your DNS change reaches most of the world within 15–30 minutes instead of 24–48 hours.

Step 4 — Change Your DNS Records

Once your new site is fully tested and your TTL has been lowered for 24 hours, make the DNS change.

Option A — Change Nameservers (Recommended)

Nameservers control all DNS for your domain. Pointing them to your new host means the new host manages all DNS records.

Find your new host’s nameservers in your hosting control panel — they look like:

ns1.hostinger.com
ns2.hostinger.com

At your registrar, replace the current nameservers with these. Save.

Option B — Update A Records Only

If you want to keep your domain’s DNS managed at your registrar, update only the A records:

  1. Find your new hosting server’s IP address in your hosting control panel
  2. At your registrar, edit the A record for @ (root domain) — change IP to new hosting IP
  3. Edit the A record for www — same new IP
  4. Save

A record changes propagate faster than nameserver changes in most cases.

Step 5 — Keep the Old Site Live During Propagation

This is critical. Do not cancel your old hosting until propagation is fully complete.

During the propagation window, some visitors will reach the old site and some will reach the new one. If your old hosting is still live, old-site visitors still see a working restaurant — they can still order. The only downside is you’re running two hosting accounts temporarily.

Wait at least 48 hours after the DNS change before cancelling old hosting. Check propagation status at whatsmydns.net — enter your domain and confirm it shows the new IP from locations around the world before cancelling anything.

Punkt.um Specific — Danish Domain Registrar

If your restaurant domain is registered at Punkt.um — common for Danish restaurants — here’s what you need to know that their documentation doesn’t make obvious.

Finding DNS settings in Punkt.um:

Punkt.um’s interface is in Danish. The sections you need:

  • Nameservers: look for “Navneservere” in your domain management panel
  • DNS records (A records): look for “DNS-zoner”

Punkt.um propagation is slow. In my experience migrating Danish restaurant domains through Punkt.um, propagation consistently took 36–48 hours — longer than most registrars. Build this into your timeline and warn the client upfront.

Punkt.um TTL settings: TTL adjustment is available in the DNS-zoner section. Lower it to 300 before your migration window exactly as described above — it makes a significant difference even with Punkt.um’s slower propagation.

⚠️ Watch Out: Punkt.um requires you to confirm DNS changes via email. After saving your nameserver or A record change, check the email address registered with your Punkt.um account immediately — the change won’t apply until you click the confirmation link. This confirmation requirement catches people out, especially if the registered email is an old address they don’t check regularly.

How to Check If DNS Has Propagated

Don’t rely on your own browser to check propagation — your local DNS cache may be showing you the old site even after the change.

Use these tools instead:

whatsmydns.net — shows your domain’s DNS resolution from servers in 20+ countries simultaneously. Enter your domain, select A record, and click Search. Green checkmarks mean that location sees the new IP. This is the most reliable way to see real-world propagation status.

dnschecker.org — similar tool with a slightly different server list. Use both for a complete picture.

Clear your local DNS cache:

On Windows:

ipconfig /flushdns

On Mac:

sudo dscacheutil -flushcache; sudo killall -HUP mDNSResponder

On Chrome browser: go to chrome://net-internals/#dns → click Clear host cache.

After clearing cache, open your domain in an incognito window to see which version of the site your connection currently resolves to.

Common DNS Propagation Problems and Fixes

Problem: Site shows blank page or connection error during propagation

This usually means your new hosting is live but SSL hasn’t been issued yet for the domain. Most hosting providers issue a free SSL certificate automatically when your domain points to their servers — but this can take 10–30 minutes after DNS resolves.

Fix: Wait 30 minutes after DNS propagates and check again. If still no SSL, log in to your hosting control panel and manually trigger SSL issuance (Hostinger: hPanel → SSL → Install, SiteGround: Site Tools → Security → SSL Manager).

Problem: Old site showing after 48 hours

Fix: Your local DNS cache is still showing the old site. Clear your cache using the commands above and test in incognito. If whatsmydns.net shows the new IP globally but you still see the old site locally, it’s definitely a local cache issue — not a real propagation problem.

Problem: Email stops working after migration

Fix: When you change nameservers, you move DNS management to your new host — which may not have your MX records (email routing) set up. Before changing nameservers, log your existing MX records at your old registrar and recreate them at the new host.

Check MX records with:

nslookup -type=MX yourrestaurant.com

Problem: WooCommerce ordering breaks after migration

Fix: Check two things. First, your SSL certificate is active on the new host — WooCommerce checkout requires HTTPS. Second, your WordPress site URL is set correctly. Go to Settings → General and confirm both WordPress Address and Site Address show the correct domain with https://.

Problem: Google My Business still showing old site

Fix: This isn’t a DNS issue — it’s a Google cache issue. After migration, log in to your Google Business Profile and update the website URL to confirm it’s correct. Google will recrawl your site within a few days.

Migration Checklist — Full Timeline

One week before migration:

  • Build and fully test new site on staging URL
  • Confirm all payment gateways work on new host
  • Screenshot all existing DNS records at old registrar
  • Lower TTL to 300 on all A records

Day of migration:

  • Confirm TTL has been low for at least 24 hours
  • Run final test on staging URL
  • Change nameservers or A records at registrar
  • Confirm Punkt.um email confirmation if applicable
  • Monitor whatsmydns.net every 30 minutes

48 hours after DNS change:

  • Confirm full propagation on whatsmydns.net
  • Test complete ordering flow on live domain
  • Confirm order confirmation emails arriving correctly
  • Confirm SSL active with green padlock in browser
  • Clear your local DNS cache and test in incognito

After full confirmation:

  • Cancel old hosting
  • Restore TTL to 3600 on DNS records
  • Submit new sitemap to Google Search Console
  • Update any hardcoded old hosting URLs in WordPress database using Search Replace DB

Common Questions

Q: How long does DNS propagation actually take?
A: Typically 24–48 hours globally. With a low TTL set in advance it can be as fast as 15–30 minutes for most locations. Punkt.um specifically tends toward the 36–48 hour end of the range.

Q: Can I speed up DNS propagation?
A: Yes — lower your TTL to 300 seconds at least 24 hours before the change. This is the most effective method. You cannot force other DNS servers to update faster than their cache expiry.

Q: Will my restaurant lose orders during migration?
A: Not if you keep the old hosting live during propagation. Visitors hitting the old site during propagation still see a working restaurant and can still order. Only cancel old hosting after full propagation is confirmed.

Q: Do I need to change DNS if I’m keeping the same domain?
A: Yes — if you’re moving to new hosting, you need to update DNS regardless of whether you keep the same domain. The domain name stays the same but it needs to point to the new server’s IP address.

Q: What if my domain registrar doesn’t let me change TTL?
A: Some budget registrars don’t expose TTL settings. In this case, change your DNS records on a Tuesday morning when traffic is lowest and accept the standard 24–48 hour propagation window.

Final Thoughts

DNS propagation issues during a restaurant website migration are almost entirely avoidable with the right preparation. Lower your TTL a day before the switch, keep the old site live during propagation, use whatsmydns.net to monitor in real time, and never schedule a DNS change before a busy trading period.

The Punkt.um-specific issues — Danish confirmation emails, slower propagation, Danish-language interface — add complexity that catches people out if they haven’t worked with that registrar before. Now you know what to expect.

If you’re migrating a restaurant website — from Gloria Food to WooCommerce, from one host to another, or from a third-party platform to a self-hosted WordPress site — and want a developer who has done this before without taking the restaurant offline, Contact me and let’s get it done properly.

Privacy policy page for Google AdSense approval shown on a WordPress website

How to Create a Privacy Policy Page for Google AdSense Approval

A privacy policy page for Google AdSense is not optional — Google will reject your AdSense application without one. It is one of the first things their review team checks, and getting it wrong is one of the most common reasons new sites fail AdSense approval even when everything else looks fine.

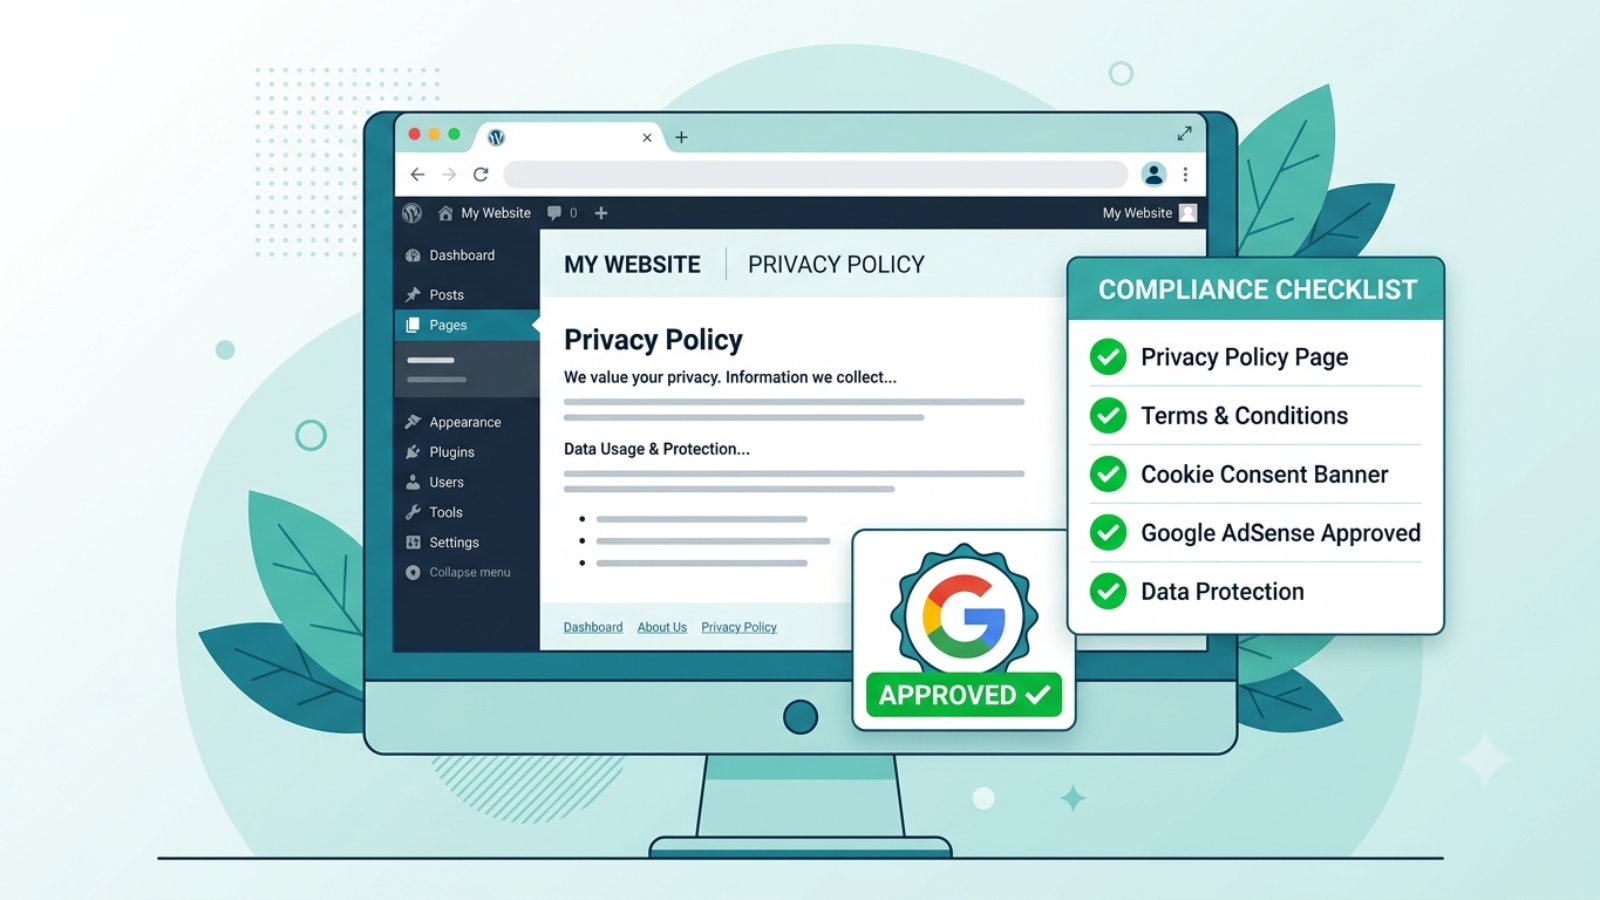
This guide covers exactly what your privacy policy needs to say, how to create one for free, where to add it on your WordPress site, and what else Google checks alongside it during the AdSense review process.

If you’re preparing your WordPress site for AdSense and want to get approved on your first application rather than going back and forth with rejections — read this before you apply.

Why Google AdSense Requires a Privacy Policy

Google AdSense displays personalized ads based on visitor behavior and cookies. Privacy laws in the US (COPPA), EU (GDPR), and UK (UK GDPR) require any website displaying behavioral advertising to disclose this to visitors clearly.

Google enforces this requirement as a condition of AdSense participation. Your privacy policy must specifically disclose that third-party ad networks — including Google — use cookies and collect data to serve personalized ads.

A generic privacy policy template that doesn’t mention advertising cookies will not satisfy AdSense requirements even if it covers everything else correctly.

⚠️ Watch Out: Don’t copy someone else’s privacy policy from another website. Google’s review team checks for this. Copied policies also create legal liability — a policy written for someone else’s business may not accurately describe yours.

What Your Privacy Policy Must Include for AdSense

Google publishes its own requirements for publisher privacy policies. Your policy must cover all of these areas:

1. What Data You Collect

List every type of data your site collects from visitors:

  • Name and email (if you have contact forms or email signup)
  • IP addresses (collected automatically by your server)
  • Browser type and device information
  • Pages visited and time spent (via Google Analytics)
  • Cookies placed by your site and third-party services

2. How You Use That Data

Explain why you collect each type of data:

  • Contact form data — to respond to enquiries
  • Analytics data — to understand how visitors use the site
  • Advertising data — to display relevant ads through Google AdSense

3. Google AdSense and Advertising Cookies

This section is the most critical for AdSense approval. You must specifically state:

  • Your site uses Google AdSense to display advertisements
  • Google uses cookies to serve ads based on visitor behavior
  • Visitors can opt out of personalized ads via Google’s Ads Settings
  • Third-party vendors including Google use cookies to serve ads based on prior visits

Google provides exact required language for this disclosure in their AdSense program policies.

4. Google Analytics

If you use Google Analytics (which you should), disclose this separately:

  • Your site uses Google Analytics to collect anonymous usage data
  • This data helps you understand visitor behavior and improve the site
  • Visitors can opt out via the Google Analytics opt-out browser add-on

5. Cookies

Explain what cookies your site uses and why:

  • Essential cookies — required for the site to function (WooCommerce cart, login sessions)
  • Analytics cookies — Google Analytics tracking
  • Advertising cookies — Google AdSense personalized ads
  • Third-party cookies — any other services (Stripe, WPForms, etc.)

6. Third-Party Links

If your site links to other websites, state that you’re not responsible for the privacy practices of those external sites.

7. Children’s Privacy (COPPA)

State clearly that your site does not knowingly collect data from children under 13. This is required for AdSense regardless of your site’s topic.

8. How to Contact You

Include a contact method — email address or contact form link — so visitors can ask questions about your privacy practices.

9. Policy Last Updated Date

Add a “Last Updated: [date]” line at the top or bottom of the policy. Google wants to see that the policy is maintained and current.

✅ Pro Tip: After AdSense approval, update this date any time you add a new plugin, service, or data collection method to your site. A policy that says “Last Updated: 2023” on a site actively collecting data in 2026 is a red flag during any audit.

How to Create Your Privacy Policy for Free

You have three options — from fastest to most thorough:

Option 1 — Privacy Policy Generator (Fastest)

Use a free privacy policy generator that covers AdSense requirements specifically. The best free options:

  • Termly.io — generates a comprehensive policy covering GDPR, CCPA, and AdSense requirements. Free tier available.
  • PrivacyPolicies.com — clean generator with AdSense-specific options. Free for basic use.
  • GetTerms.io — simple and fast, covers the essentials.

When using any generator:

  • Select “Google AdSense” when asked about advertising services
  • Select “Google Analytics” when asked about analytics
  • Enter your website URL and contact email accurately
  • Download or copy the generated policy

Option 2 — WordPress Privacy Policy Tool (Built In)

WordPress has a built-in privacy policy generator at Dashboard → Settings → Privacy. It creates a draft policy page automatically with common sections pre-filled.

The limitation: the default WordPress policy doesn’t include AdSense-specific language. Use it as a starting point, then add the Google AdSense disclosure section manually from Option 1 above.

Option 3 — Write It Yourself

If you want full control and accuracy, write your policy manually based on the section headings above. This takes longer but produces a policy that accurately describes your specific site rather than a generic template.

For a WordPress developer site like syedaounraza.online, a self-written policy covering all eight sections above is both legally more accurate and more credible to Google’s reviewers than an obvious template.

✅ Pro Tip: Whatever method you use, read the full policy before publishing it. Make sure every service it mentions is actually on your site and every service on your site is actually mentioned. A policy that lists services you don’t use or omits services you do is worse than having no policy at all.

How to Add the Privacy Policy to WordPress

Once your policy is written, adding it to WordPress takes about two minutes.

Create the Page

  1. Go to WordPress Dashboard → Pages → Add New
  2. Title: Privacy Policy
  3. Paste your policy content into the editor
  4. Set the slug to /privacy-policy/
  5. Publish

Tell WordPress About It

WordPress has a specific setting for the privacy policy page:

  1. Go to Settings → Privacy
  2. Under “Change your Privacy Policy page,” select the page you just created
  3. Click Use This Page

This setting tells WordPress — and any privacy-related plugins — which page is your official privacy policy.

Add It to Your Footer Menu

Google’s review team looks for the privacy policy link in your footer. Add it there:

  1. Go to Appearance → Menus
  2. Select your Footer menu (create one if it doesn’t exist)
  3. Under Pages, find and add your Privacy Policy page
  4. Save Menu

Your footer should show: Privacy Policy · Contact · [any other legal pages]

⚠️ Watch Out: Don’t put your privacy policy only in the header navigation. Footer placement is the standard location Google expects and reviewers look for. You can add it to both, but the footer is non-negotiable.

Other Pages Google Checks During AdSense Review

Your privacy policy is the most important requirement but not the only one. During AdSense review, Google also checks:

About Page

Google wants to know who runs the site. Your About page should include your real name, what the site is about, and what kind of content visitors can expect. An anonymous site with no About page is a red flag.

Contact Page

A working contact method must be accessible. A contact form is fine — you don’t need to publish your email address publicly. Go to your contact page and submit a test message to confirm the form actually works before applying.

Content Quality

Google checks that your site has genuine, original content — not thin pages, copied text, or auto-generated content. Before applying, make sure you have at least 15–20 real, original blog posts published. Posts should be at least 800 words each and cover topics relevant to your site’s niche.

Site Age

Google generally prefers sites that have been live for at least 3–6 months before applying. A brand new site with 5 posts is very unlikely to be approved regardless of policy quality.

No Policy Violations

Your existing content must not violate AdSense policies — no adult content, no copyrighted material used without permission, no misleading claims, no content promoting illegal activity.

The AdSense Application Checklist

Before you submit your AdSense application, confirm every item on this list:

  • Privacy policy page published at /privacy-policy/
  • Privacy policy linked in footer menu
  • Privacy policy includes Google AdSense cookie disclosure
  • Privacy policy includes Google Analytics disclosure
  • About page published with real name and site description
  • Contact page with working contact form
  • Minimum 15 original blog posts published
  • All posts minimum 800 words each
  • Google Analytics installed and tracking
  • Site live for at least 3 months
  • No AdSense policy violations in existing content
  • Site loads on mobile without errors
  • No broken links on key pages

✅ Pro Tip: Install Google Site Kit on your WordPress site before applying. It connects Google Analytics, Search Console, and AdSense in one dashboard — and having Search Console data already flowing when you apply shows Google your site is actively indexed and receiving real traffic.

What to Do If Your AdSense Application Is Rejected

AdSense rejection emails are frustratingly vague — they rarely tell you exactly what’s wrong. Common rejection reasons and what they actually mean:

“Insufficient content”
You don’t have enough original posts, or your posts are too short. Add more content — aim for 20+ posts of 1000+ words before reapplying.

“Site does not comply with AdSense policies”
Something on your site violates a policy. Check for: copied content, broken pages, thin pages with less than 300 words, any adult or violent content, or misleading claims.

“Site is under construction”
Your site has pages that are blank, show placeholder content, or have coming soon notices. Remove all placeholder content before applying.

“Privacy policy issues”
Your privacy policy is missing, incomplete, or doesn’t include the required AdSense disclosure. Use the section headings above and confirm the AdSense cookie language is explicitly present.

After fixing the issue, wait at least 2 weeks before reapplying to give Google time to re-crawl your site.

Common Questions

Q: Does my privacy policy need to be written by a lawyer?
A: Not for AdSense approval — a comprehensive policy generated by a reputable tool covers Google’s requirements. For full legal compliance with GDPR or CCPA, professional legal review is advisable but separate from AdSense requirements.

Q: Can I use the same privacy policy on multiple sites?
A: No. Each site needs its own policy accurately describing that specific site’s data practices. A policy listing services you don’t use on that site creates both legal and AdSense compliance issues.

Q: How long does AdSense review take?
A: Typically 1–2 weeks for the initial review. If additional review is needed, it can take up to 4 weeks. You’ll receive an email either approving your account or listing issues to address.

Q: Do I need a cookie consent banner?
A: If your site has visitors from the EU, yes — GDPR requires explicit cookie consent before placing non-essential cookies. Install a free plugin like CookieYes which handles the consent banner and integrates with Google’s Consent Mode for AdSense.

Final Thoughts

Creating a privacy policy page for Google AdSense approval is a one-hour task that most people either skip entirely or do poorly with a three-line template. Neither approach gets you approved.

Use a proper generator like Termly, make sure the AdSense cookie disclosure is explicitly present, publish it at /privacy-policy/, link it in your footer, and check every other item on the application checklist before you submit.

The privacy policy is the easiest part of AdSense approval to get right — the harder part is having enough original, quality content published. Focus on both simultaneously rather than rushing an application before your site is genuinely ready.

If you need help setting up your WordPress site for AdSense — including privacy policy, Google Analytics, Search Console, and Site Kit configuration — Contact me and I’ll get everything in place correctly before you apply.

Slow WordPress restaurant website speed test showing poor mobile score before optimization

How to Speed Up a Slow WordPress Restaurant Website

A slow WordPress restaurant website loses you customers before they even see your menu. Studies by Google show that 53% of mobile visitors leave a page that takes longer than 3 seconds to load — and restaurant customers searching for a place to eat are not patient people.

If your WordPress restaurant website feels sluggish, ordering pages take forever to respond, or your Google PageSpeed score is embarrassingly low — this guide covers every real fix, in order of impact. I’ve optimized WordPress restaurant sites for clients across Europe and the Caribbean, so these are hands-on solutions, not theoretical advice.

Start with a baseline score before touching anything. Run your site through Google PageSpeed Insights and GTmetrix — both are free. Screenshot your current scores. You’ll want to compare before and after each fix.

Why Restaurant Websites Are Especially Slow

Restaurant websites have specific speed problems that generic WordPress sites don’t always face.

Food photography is heavy. A single unoptimized hero image of your signature dish can be 4–6MB — enough to tank your entire page load on mobile. Multiply that across a full menu with 40 items and you have a serious problem.

Ordering plugins add weight. WooCommerce plus a restaurant ordering plugin like Orderable loads significantly more JavaScript and CSS than a simple brochure site. Every extra plugin adds to the page weight.

Google Maps embeds are slow. Almost every restaurant site has a map embed — and Google Maps is one of the heaviest third-party scripts you can load on a page.

Third-party ordering widgets add latency. If you’re using FareHarbor, Gloria Food, or any external booking widget, each one makes additional network requests that slow initial page load.

⚠️ Watch Out: Don’t try to fix everything at once. Make one change, test your PageSpeed score, then make the next. If you change ten things simultaneously and something breaks, you won’t know what caused it.

Fix 1 — Compress and Convert All Your Food Photos

This is the single highest-impact fix for almost every restaurant website. Food photos are the #1 cause of slow load times and the easiest problem to fix.

What to do:

Convert every image on your site to WebP format. WebP files are 25–35% smaller than JPEG at the same visual quality — invisible difference to the customer, massive difference to load time.

Use Squoosh.app — it’s free, runs in your browser, and converts images to WebP with a quality slider so you can see the difference before downloading.

Target file sizes:

  • Hero images: under 200KB
  • Menu item photos: under 80KB each
  • Logo: under 30KB

In WordPress, install Smush or ShortPixel — both have free tiers that automatically compress new uploads and bulk-optimize your existing media library.

Enable lazy loading so images below the fold only load as the visitor scrolls down — not all at once when the page first opens. Smush handles this automatically. WordPress also has native lazy loading built in since version 5.5.

✅ Pro Tip: Resize images before uploading, not after. WordPress generates multiple image sizes from every upload — if you upload a 4000px wide photo, WordPress creates five versions of that massive file. Resize to 1200px wide maximum before uploading and you cut the storage and processing load significantly.

Fix 2 — Install a Caching Plugin

Caching stores a static version of your pages so WordPress doesn’t rebuild them from scratch on every visit. For a restaurant site, this alone can cut load time in half.

LiteSpeed Cache (Best Option if on Hostinger)

If your restaurant site runs on Hostinger — which supports LiteSpeed servers natively — install LiteSpeed Cache. It’s free and the most powerful caching plugin available for WordPress because it works directly with the server rather than around it.

After installing, go to LiteSpeed Cache → Presets → apply the recommended preset for WooCommerce sites.

WP Rocket (Best Paid Option)

WP Rocket is the gold standard paid caching plugin at $59/year. It handles page caching, file minification, lazy loading, and database cleanup in one dashboard — without requiring any technical knowledge. Worth it if you’re managing multiple restaurant sites or want a set-and-forget solution.

W3 Total Cache (Free Alternative)

W3 Total Cache is a solid free option if you’re not on a LiteSpeed server and don’t want to pay for WP Rocket. More configuration required than LiteSpeed Cache but very capable.

Fix 3 — Enable a CDN (Content Delivery Network)

A CDN stores copies of your site’s static files (images, CSS, JavaScript) on servers around the world. When a customer visits your site from Denmark, they load files from a nearby server rather than wherever your hosting is physically located — dramatically reducing latency.

Cloudflare free plan is the easiest option. Go to cloudflare.com, add your site, and update your domain’s nameservers to Cloudflare’s. The free plan includes a CDN, basic DDoS protection, and SSL — all relevant for a restaurant site taking online orders.

Hostinger also has a built-in CDN in their hPanel — enable it under your hosting settings if you’re on a Business plan or higher.

✅ Pro Tip: After enabling Cloudflare, go to Cloudflare dashboard → Speed → Optimization → enable Auto Minify for JavaScript, CSS, and HTML. This removes unnecessary whitespace from your code files, reducing their size without any visible change to your site.

Fix 4 — Fix Your Google Maps Embed

Google Maps is one of the heaviest things you can put on a restaurant website — and almost every restaurant has it. A standard Google Maps iframe loads the entire Maps JavaScript API, which can add 500KB–1MB to your page weight.

The fix: lazy load your map.

Replace your standard Google Maps iframe with a click-to-load version. The map shows as a static image initially — only loading the full interactive map when the visitor clicks on it.

Install WP Google Maps or use this simple approach — replace your iframe with a static map image linked to Google Maps:

html

<a href="https://maps.google.com/?q=YOUR+RESTAURANT+ADDRESS" target="_blank">
  <img 
    src="https://maps.googleapis.com/maps/api/staticmap?center=YOUR+ADDRESS&zoom=15&size=600x300&key=YOUR_API_KEY" 
    alt="Restaurant location map — click to open in Google Maps"
    loading="lazy"
  />
</a>

This loads a static image instead of the full Maps JavaScript library — much faster, still shows your location, still links to full Google Maps when clicked.

Fix 5 — Minify CSS and JavaScript

Your WordPress theme and plugins generate a lot of CSS and JavaScript files. Minification removes unnecessary whitespace, comments, and formatting from these files — making them smaller without changing how they work.

LiteSpeed Cache handles this automatically under its CSS/JS settings. WP Rocket does the same. If you’re using W3 Total Cache, enable Minify under the performance settings.

⚠️ Watch Out: Minification occasionally breaks things — especially JavaScript. After enabling it, click through your entire site including the ordering flow. If anything breaks, disable JS minification first (CSS minification is almost always safe).

Fix 6 — Reduce Plugin Bloat

Every active WordPress plugin adds load to your site — some a tiny amount, some a significant amount. Restaurant sites often accumulate plugins over time without anyone reviewing whether they’re all still needed.

Audit your plugins:

  1. Go to Plugins → Installed Plugins
  2. Deactivate any plugin you’re not actively using
  3. Delete deactivated plugins entirely — deactivated plugins still appear in file scans

Test each plugin’s impact:
Install Query Monitor — a free developer plugin that shows exactly how much load time each plugin adds. You might discover one plugin is responsible for 40% of your page load time.

Common restaurant site plugin offenders:

  • Page builder plugins loaded on pages that don’t use them
  • Slider plugins loading JavaScript on every page even when the slider only appears on the homepage
  • Social media feed plugins that make external API calls on every page load

Fix 7 — Optimize Your WooCommerce Database

WooCommerce stores a lot of data — every cart session, every order, every product revision. Over time this bloats your database and slows down queries.

Install WP-Optimize — free plugin that cleans up:

  • Post revisions (WordPress saves a new revision every time you save a post)
  • Expired transients (temporary data WooCommerce stores that builds up over time)
  • Orphaned order data
  • Spam comments

Run a database cleanup once a month. Schedule it to happen automatically overnight so it doesn’t interfere with ordering hours.

✅ Pro Tip: In WooCommerce → Settings → Advanced, limit the number of saved product revisions to 3 or 5. By default WordPress saves unlimited revisions — on a menu with 50+ products that gets updated regularly, this adds up fast.

Fix 8 — Choose Better Hosting

If you’ve done everything above and your site is still slow, the problem might be your hosting. Shared hosting plans at the cheapest tier put hundreds of sites on one server — when other sites on that server get traffic spikes, your restaurant site slows down too.

For a restaurant site taking live orders, consider:

  • Hostinger Business plan — good performance, LiteSpeed server support, reasonable price
  • SiteGround GrowBig — excellent performance, good WooCommerce support
  • Cloudways — managed cloud hosting on DigitalOcean or AWS, more technical to set up but significantly faster than shared hosting

Migrating hosting is the most disruptive fix on this list — do it last, after trying everything else first.

Checking Your Results

After making these fixes, run your site through Google PageSpeed Insights and GTmetrix again. Compare to your baseline scores.

Target scores for a restaurant site:

  • Google PageSpeed Mobile: 70+ (aim for 85+)
  • Google PageSpeed Desktop: 85+
  • GTmetrix Grade: B or higher
  • Fully loaded time: under 3 seconds on mobile

If you’re still under 70 on mobile after all fixes, the problem is almost always unoptimized images or hosting quality.

Common Questions

Q: Will caching break my WooCommerce ordering?
A: Good caching plugins like LiteSpeed Cache and WP Rocket automatically exclude cart, checkout, and account pages from caching. These pages need to be dynamic. Always test your full ordering flow after enabling caching.

Q: My site was fast before, now it’s slow — what changed?
A: The most common causes are a recently added plugin, a large image upload, or a hosting issue. Install Query Monitor and check which queries are slowest. Also check if a new plugin was installed around the time the slowdown started.

Q: Does page speed affect my Google ranking?
A: Yes — Google uses Core Web Vitals (LCP, CLS, FID) as ranking signals, especially on mobile. A faster site ranks better and converts better. Both matter for a restaurant taking online orders.

Q: How often should I check my speed?
A: Run a PageSpeed check once a month and after any major change — new plugin, theme update, or large content addition.

Final Thoughts

Speeding up a WordPress restaurant website comes down to four things done well: compressed images, server-side caching, a CDN, and a lean plugin setup. Fix those four and most restaurant sites go from embarrassingly slow to genuinely fast without touching a line of code.

The order matters — start with images, then caching, then CDN. These three fixes alone will move the needle more than anything else on the list.

If your restaurant website is slow and you’d rather have a developer handle the optimization properly — including WooCommerce performance tuning and hosting migration if needed — Contact me and I’ll get it running fast.

Best WordPress plugins for restaurant online ordering shown on a website

Best WordPress Plugins for Restaurant Online Ordering in 2026

The best WordPress plugins for restaurant online ordering let you take full control of your menu, delivery zones, and customer data — without paying ongoing commissions to third-party platforms like Gloria Food or Just Eat.

If you run a restaurant and you’re still relying on a third-party ordering platform, you’re giving away two things: money (platform fees on every order) and data (your customer order history lives on their server, not yours). Moving your online ordering to WordPress with WooCommerce puts both back in your hands.

This guide covers the best plugins for restaurant ordering on WordPress in 2026— what each one does, who it’s for, and how they compare. I’ve worked with several of these directly while building and migrating restaurant websites, so these recommendations come from real project experience.

Why Use WordPress for Restaurant Online Ordering

Before diving into plugins, it’s worth being clear on what you actually get by running ordering through WordPress instead of a dedicated platform.

You own everything. Your menu lives in your WordPress database. Your customer orders are yours. You can export them, analyze them, run promotions on them — without asking anyone’s permission.

You pay less over time. Gloria Food, Just Eat, and similar platforms charge per-order commissions or monthly fees that compound fast. With WordPress you pay hosting (typically $5–$15/month) and a one-time or annual plugin cost. That’s it.

You control the experience. Your ordering page looks like your website, not a generic platform template. Your brand stays consistent from homepage to checkout.

✅ Pro Tip: If you’re migrating from Gloria Food to WordPress, keep Gloria Food live during the transition. Run both systems in parallel until your WooCommerce ordering is fully tested — then switch DNS and retire the old platform. Never go dark between systems.

The Best WordPress Plugins for Restaurant Online Ordering

1. Orderable — Best Overall for Restaurants

Orderable is built specifically for restaurant ordering on WordPress and WooCommerce. It’s the plugin I recommend first to any restaurant client because it solves the problems standard WooCommerce doesn’t handle out of the box — delivery time slots, opening hours enforcement, and a checkout flow designed for food ordering rather than physical product shipping.

Key features:

  • Time slot selection for delivery and pickup
  • ASAP ordering toggle
  • Opening hours enforcement — no orders when you’re closed
  • Minimum order value for delivery
  • Product add-ons (extras, sauces, toppings)
  • Clean, mobile-friendly ordering layout

Pricing: Free tier available. Pro starts at $149/year.

Best for: Restaurants that need a complete, dedicated ordering experience without heavy custom development.

⚠️ Watch Out: Orderable’s free tier is functional but limited. If you need time slots and opening hours enforcement — which most restaurants do — you’ll need the Pro version. Factor this into your budget before starting the build.

2. WooCommerce — The Foundation Every Plugin Builds On

WooCommerce itself isn’t a restaurant plugin, but it’s the e-commerce layer that makes all of these solutions possible. It handles the product catalog (your menu), cart, checkout, and payment processing.

On its own, WooCommerce treats food items like physical products — which means you’ll need at least one additional plugin (like Orderable or one of the others below) to turn it into a proper food ordering system. But as the foundation, it’s free, incredibly well-supported, and powers millions of online stores worldwide.

Key features:

  • Product catalog with categories and variants
  • Cart and checkout
  • Payment gateway integrations (Stripe, PayPal, MobilePay, and 100+ more)
  • Order management dashboard
  • Customer email notifications

Pricing: Free. Extensions vary.

Best for: Every restaurant ordering setup on WordPress — this is the base layer, not optional.

3. WooCommerce Product Add-Ons — Best for Extras and Toppings

WooCommerce Product Add-Ons solves a specific but critical restaurant problem: how do customers add extras, toppings, or special instructions to an item during ordering?

Standard WooCommerce product variants work for size (small/medium/large), but they don’t handle optional extras cleanly. This plugin adds checkboxes, dropdowns, and text fields to any product — so a customer ordering a pizza can tick “extra cheese” and “extra jalapeños” and see the price update in real time.

Key features:

  • Checkboxes, radio buttons, dropdowns, and text fields on products
  • Per-extra pricing that updates the cart total live
  • “Special instructions” text field for custom requests
  • Works with variable products (size variants)

Pricing: $79/year (official WooCommerce extension).

Best for: Any restaurant with menu items that have add-ons, extras, or customization options.

4. Delivery Drivers for WooCommerce — Best for Managing Delivery

If your restaurant does its own delivery rather than using a third-party courier, Delivery Drivers for WooCommerce gives you a driver assignment and tracking system built into WordPress.

Restaurant owners can assign orders to specific drivers from the WooCommerce orders panel. Drivers get a mobile-friendly interface to accept and update orders. Customers can track their delivery status.

Key features:

  • Driver accounts with mobile-friendly order dashboard
  • Order assignment from WooCommerce admin
  • Customer delivery status notifications
  • Driver location tracking (Pro version)

Pricing: Free core plugin. Pro version available.

Best for: Restaurants running their own delivery fleet rather than outsourcing to a courier service.

5. WP Mail SMTP — Essential Supporting Plugin

This isn’t a restaurant-specific plugin, but it belongs on this list because without it your WooCommerce order confirmation emails will frequently land in spam — and customers who don’t receive confirmation emails cancel orders, call the restaurant, and leave bad reviews.

WP Mail SMTP replaces WordPress’s unreliable built-in mail with a proper SMTP connection through Gmail, Brevo, or another mail provider, making sure every order confirmation actually reaches the customer.

Pricing: Free tier handles most restaurant needs.

Best for: Every WordPress restaurant site — this should be installed before you take a single live order.

Comparing the Top Plugins

PluginPurposeFree TierPaid From
OrderableFull restaurant orderingYes (limited)$149/year
WooCommerceE-commerce foundationYesFree
Product Add-OnsExtras and toppingsNo$79/year
Delivery DriversDriver managementYesPaid Pro
WP Mail SMTPOrder email deliveryYesFree

Which Setup Is Right for Your Restaurant

If you want the simplest possible setup: WooCommerce free + Orderable free tier. Gets you a functional ordering page with basic delivery and pickup options. Good starting point before committing to paid plugins.

If you have extras and toppings: Add WooCommerce Product Add-Ons to the above. Most restaurants with any menu complexity need this.

If you run your own delivery drivers: Add Delivery Drivers for WooCommerce so you can manage and track your own fleet inside WordPress.

If you’re migrating from Gloria Food: Start with WooCommerce + Orderable Pro. The time slot and opening hours features in Orderable Pro directly replace what Gloria Food handled, making the transition feel seamless to customers.

What About Payment Gateways for Restaurants

Payment gateways are configured inside WooCommerce settings, not as separate ordering plugins. For most restaurants:

  • Stripe — best all-around card payment option, works globally
  • MobilePay — essential for Danish restaurants, large share of Danish customers pay this way
  • PayPal — useful if your customer base expects it, less common for restaurant ordering
  • Cash on Delivery — always enable this as a fallback for pickup orders

Each gateway installs as a WooCommerce extension. Stripe’s official WooCommerce plugin is free and available at wordpress.org/plugins/woocommerce-gateway-stripe.

Common Problems With Restaurant Ordering Plugins

Orders arriving at wrong times
Fix: Enable opening hours in Orderable so customers can’t order outside your working hours. Set your timezone correctly in WordPress Settings → General first.

Extras not showing at checkout
Fix: Make sure WooCommerce Product Add-Ons is active and the add-ons are assigned to the correct products. Check that the product type is set to Simple — add-ons sometimes don’t display on Variable products without additional configuration.

Order confirmation emails going to spam
Fix: Install WP Mail SMTP immediately and connect it to a Gmail account or Brevo free tier. Test by placing a real order and checking the inbox, not just the spam folder.

Delivery zone not restricting correctly
Fix: In WooCommerce → Settings → Shipping, set up Shipping Zones with specific postcodes or regions. Only customers within those zones see the delivery option at checkout.

Final Thoughts

The best WordPress plugins for restaurant online ordering in 2026 give you everything a third-party platform offers — ordering, payment, delivery management — without the ongoing commissions and without giving up ownership of your customer data.

Start with WooCommerce as your foundation, add Orderable for the restaurant-specific ordering flow, and layer in Product Add-Ons if your menu has extras. Install WP Mail SMTP before you go live — it’s a five-minute setup that prevents a lot of headaches.

If you need help setting up WordPress online ordering for your restaurant — including migrating from Gloria Food or configuring MobilePay for a Danish audience — Contact me and I’ll get it running correctly from day one.

Danish restaurant website migration from Gloria Food to WooCommerce case study

How I Migrated Two Danish Restaurants from Gloria Food to WooCommerce

Most restaurant owners don’t think about their online ordering platform until something goes wrong — a feature disappears behind a paywall, the menu editor stops cooperating, or they realize they have no idea who their online customers actually are because all that data sits on someone else’s server.

That’s roughly where both of these clients were when they came to me. Two separate Danish restaurant businesses, both using Gloria Food, both running into different walls — and both wanting to move to WooCommerce for the same core reason: ownership. Their menu, their orders, their customer data, their platform. No middleman.

This post walks through how both migrations went, what was harder than expected, and what I’d do differently if I were starting today.

Client 1 — Express Pizzeria

Express Pizzeria is a fast food restaurant in Denmark that had been on Gloria Food for a couple of years. The platform had worked well enough early on, but by the time they contacted me, the ordering experience felt dated, they had no control over the checkout flow, and they were paying platform fees they didn’t think were justified.

The menu was reasonably sized — around 40 items across six categories — but had a number of items with size options (small, medium, large) and optional add-ons (extra toppings, sauces) that needed to carry over accurately into WooCommerce’s variant system.

The domain situation

Their domain was registered at Punkt.um, a Danish domain registrar with a fairly specific DNS management interface. This turned out to be one of the more time-consuming parts of the project — not technically complex, but requiring careful navigation of a Danish-language admin panel to locate the correct DNS zone settings and update the A records pointing to the new WordPress hosting.

⚠️ Watch Out: Punkt.um’s DNS propagation can take up to 48 hours — longer than many registrars. If you’re managing a restaurant migration on a tight timeline, build this into your schedule and warn the client early. Don’t promise a Monday launch if DNS changes go in on Sunday.

The migration process

I kept Gloria Food live throughout the entire build — the restaurant was still taking orders through it every day, and there was no acceptable window to go dark. The WooCommerce build happened entirely in parallel on a staging URL, only going live once it passed a full end-to-end test including a real test order through Stripe.

Menu rebuild in WooCommerce:

  • Each menu category became a WooCommerce product category
  • Size options (small, medium, large) became WooCommerce variable products with price-per-variation
  • Add-ons (extra toppings) were handled with the WooCommerce Product Add-Ons plugin, which lets customers check optional extras during ordering with a per-item price
  • Photos were sourced from the client’s existing Gloria Food menu where available, resized, converted to WebP, and uploaded to the WordPress media library

Payment setup for Danish customers

Standard Stripe handled card payments. MobilePay was the critical addition — in Denmark, a large proportion of customers pay with MobilePay as their first preference, and a restaurant ordering site without it loses a real segment of potential orders. The MobilePay WooCommerce plugin connects to MobilePay’s business API and requires completing business verification on the MobilePay side before processing live payments.

✅ Pro Tip: Start the MobilePay business verification process as early as possible in the project — it requires documentation review on their end which can take several business days. Don’t leave it until the week of launch.

Ordering configuration

Standard WooCommerce is built around physical product shipping, not food delivery. I installed Orderable — a WooCommerce extension specifically built for restaurants — to add:

  • Time slot selection (customers pick a delivery or pickup window)
  • ASAP ordering toggle for immediate delivery
  • Minimum order value for delivery
  • Opening hours enforcement so orders can’t be placed when the restaurant is closed

The DNS switch

Once the WooCommerce site was fully built, tested, and approved by the client, I updated the A records at Punkt.um to point to the new hosting. Gloria Food was left live during propagation — since it was still answering to the old IP, any customer who hadn’t yet received the DNS update would still reach the old ordering page, meaning zero orders were lost during the transition.

After 36 hours of propagation (Punkt.um was on the longer end), the WordPress site was fully live. Gloria Food was then closed out.

Client 2 — Café au Lait

The second migration was a different scenario. Café au Lait was a café rather than a fast food restaurant — smaller menu, lower order volume, but a client who also had a broader website maintenance arrangement with me that had surfaced a separate problem.

During routine maintenance I discovered the site had been running a nulled (pirated) copy of Elementor Pro. This was a significant security issue — nulled plugins are a common vector for malware injection and were actively preventing the site from receiving legitimate security updates. The Gloria Food migration became one part of a broader project that also included replacing the nulled plugin with a properly licensed version and doing a full security audit of the site.

⚠️ Watch Out: If you’re taking over maintenance of a WordPress site from someone else, always check the plugin list for unlicensed premium plugins immediately. A single nulled plugin can expose the entire site to compromise, and the client often doesn’t know it’s there — the previous developer may have installed it without telling anyone.

Menu differences

Café au Lait’s menu was smaller and simpler than Express Pizzeria’s — mostly fixed-price items without complex variants. This made the WooCommerce product setup significantly faster. The main complexity was the bilingual nature of some content and ensuring the ordering categories reflected how the café actually organized its menu rather than defaulting to generic WooCommerce category naming.

The DNS situation

Same Punkt.um registrar as the first client, which meant the same 36–48 hour propagation window to manage. By this point I’d already learned to set DNS update expectations with the client upfront rather than promising a same-day launch.

What Was the Same in Both Migrations

Looking across both projects, a few things were consistently true:

Gloria Food data doesn’t export cleanly. There’s no official export tool that spits out a WooCommerce-compatible product CSV. Every item had to be rebuilt manually in WooCommerce — which is time-consuming but also an opportunity, because it forced a review of whether every item on the old menu still belonged on the new one. Both clients ended up trimming and reorganizing their menus slightly during the rebuild, which they saw as a side benefit.

Clients underestimate how many items have variants. Both clients initially described their menus as “simple” and were surprised by how many items had size options, add-ons, or pricing tiers once we actually went through everything. This is worth factoring into any quote for a restaurant migration — “simple menu” rarely means simple product setup.

MobilePay verification took longer than expected. In both cases, the MobilePay business API verification added days to the timeline that weren’t originally accounted for. This is now the first thing I kick off in any Danish restaurant project, before touching any code.

Parallel operation during migration is non-negotiable. Neither restaurant could afford even a few hours without an ordering system. Running both platforms simultaneously until after DNS propagation was confirmed is not optional — it’s the only responsible approach.

What Changed After Migration

Both restaurants gained things that Gloria Food simply doesn’t offer:

  • Full ownership of their customer order history, which lives in their WooCommerce database — not on a third-party server
  • The ability to run WooCommerce-native promotions (discount codes, percentage-off sales, free delivery above a threshold)
  • A real website, not just a Gloria Food ordering subdomain — with proper SEO, their own domain on their own hosting, and the ability to add pages, blog posts, and content over time
  • No ongoing platform commission on orders beyond standard payment gateway fees

What I’d Do Differently

If I were starting either of these migrations today:

  • Kick off MobilePay verification on day one, not day five
  • Budget more time for the menu variant audit — assume more complexity than the client describes
  • Set explicit DNS timing expectations with the client before starting rather than managing surprises later
  • Create a shared checklist the client can sign off on before any DNS switch, so there’s no ambiguity about what “ready to go live” means

If you’re a restaurant owner currently on Gloria Food and thinking about making the switch, or a developer taking on a similar project, Contact me — I’m happy to talk through what the process would look like for your specific setup.