How to Choose a Freelance Web Developer in 2026: 10 Essential Tips

How to Choose a Freelance Web Developer in 2026: 10 Essential Tips

Hiring the right freelance web developer can make or break your project. In 2026, with so many options and AI tools available, knowing what to look for is more important than ever.

As Syed Aoun Raza, a freelance developer specializing in WordPress, Wix Velo, WooCommerce, and Flutter, I’ve seen both successful partnerships and costly mistakes. Here’s practical advice to help you choose wisely.

1. Define Your Project Clearly First Before contacting anyone, write down your goals, target audience, must-have features, and budget. This helps freelancers give accurate quotes and timelines.

2. Check Real Experience & Portfolio Look for developers who have worked on similar projects. For example, if you need a booking system, check for tourism or restaurant sites. Don’t just look at pretty designs — ask about results (speed, SEO performance, lead generation).

3. Verify Technical Skills

  • For WordPress/WooCommerce: Ask about custom plugins, performance optimization, and security.
  • For Wix: Inquire about Velo custom coding.
  • For mobile: Confirm Flutter or React Native experience.

4. Communication & Process Good freelancers respond quickly, ask clarifying questions, and explain things clearly. They should provide a clear scope, milestones, and revision process.

5. Pricing Transparency Beware of extremely low prices — they often lead to hidden costs later. Expect detailed breakdowns rather than vague estimates. In 2026, realistic budgets for professional sites start from a few thousand dollars depending on complexity.

6. Ask for References or Case Studies Request examples of completed projects and, if possible, client feedback. I always share real case studies from Aruba tourism booking sites and Danish restaurant migrations.

7. Understand Maintenance & Support A good developer offers post-launch support, updates, and training so you can manage the site.

8. Modern Optimization Knowledge The best developers in 2026 understand not just design and code, but also Core Web Vitals, schema markup, AEO (for AI answers), and GEO strategies for generative search visibility.

9. Contract & Payment Terms Use clear contracts with milestones and payments. Avoid large upfront payments — 30-50% deposit is common.

10. Trust Your Gut You should feel comfortable communicating with the developer. Long-term collaboration works best when there’s good chemistry.

Red Flags to Avoid

  • No portfolio or only generic templates.
  • Poor English/communication.
  • Promises of “guaranteed #1 ranking”.
  • No questions about your business goals.

Why Work with a Freelance Developer? You get personalized attention, faster delivery, and often better value compared to agencies. I focus on clean, fast, conversion-ready websites that perform well in both traditional and AI-powered search.

Conclusion Choosing the right freelance web developer in 2026 requires research, clear requirements, and attention to communication and expertise.

If you’re ready to move forward with your project, feel free to contact me. I’ll provide a honest scope and quote tailored to your needs — no pressure.

Wix Studio vs WordPress 2026: Which Is Better for Your Business Website?

Wix Studio vs WordPress 2026: Which Is Better for Your Business Website?

In 2026, choosing between Wix Studio and WordPress is one of the biggest decisions for businesses building or rebuilding their online presence. Both platforms have evolved significantly, but they serve different needs.

As Syed Aoun Raza, a freelance developer specializing in both Wix Velo custom coding and WordPress development, I’ve built websites on both for clients across the US, UK, EU, and beyond. This in-depth guide shares real-world experience to help you decide.

Quick Verdict

  • Choose Wix Studio for speed of launch, built-in tools, and designer-friendly workflows.
  • Choose WordPress for ultimate flexibility, SEO power, ownership, and scalability.

Let’s break it down in detail.

Platform Overview

Wix Studio (2026) Wix’s advanced platform for agencies and professionals. It includes powerful drag-and-drop, Velo coding for custom logic, better hosting, and CMS capabilities.

WordPress (2026) The open-source powerhouse. With Elementor, Gutenberg, and thousands of plugins, it powers over 40% of the web.

Detailed Comparison

1. Ease of Use Wix Studio wins for beginners and designers — intuitive editor, no hosting hassles. WordPress has a learning curve but offers more control once mastered. I use Elementor to make it almost as visual.

2. Design Freedom Wix Studio: Excellent templates and advanced editor. WordPress: Unlimited freedom with custom code, themes, and builders. Winner for complex designs.

3. Speed & Performance Wix has improved but can be bloated. WordPress, when optimized (caching, CDN, good hosting), often outperforms. My WordPress sites regularly hit 95+ PageSpeed scores.

4. SEO Capabilities WordPress is stronger with plugins like Rank Math/Yoast and full control over structure. Wix has improved significantly but still lags in some advanced areas.

5. Cost Wix: Subscription model with limits. WordPress: Lower ongoing costs but requires hosting/maintenance.

6. Scalability & Custom Development WordPress wins for large sites and custom features. Wix Studio + Velo is good for medium projects.

7. E-commerce Both capable. WooCommerce on WordPress offers more flexibility.

Real Client Examples from My Work

  • Tourism Booking Site (Aruba): Chose WordPress + FareHarbor for maximum control and SEO. View project.
  • Restaurant Sites (Denmark): WordPress + WooCommerce for full menu and ordering control.
  • Wix Velo Projects: Used when clients wanted faster launch with custom coding.

When to Choose Wix Studio

  • Need a site live quickly.
  • Prefer all-in-one platform.
  • Team has designers, not developers.
  • Smaller to medium projects.

When to Choose WordPress

  • Want full ownership and no platform lock-in.
  • Need advanced SEO and traffic growth.
  • Complex functionality or e-commerce.
  • Long-term scalability.

Migration & Hybrid Approaches Many clients start on Wix and move to WordPress as they grow. I help with both migrations and custom Velo coding.

Performance & Security in 2026 WordPress requires maintenance but offers better long-term security when updated properly. Wix handles more automatically.

My Recommendation as a Freelance Developer For most businesses targeting organic growth in the US/UK/EU — WordPress provides better ROI. For speed-to-market or specific design needs — Wix Studio with Velo.

I offer development services on both platforms. Contact me for an honest assessment of your project.

Conclusion Wix Studio and WordPress are both excellent in 2026, but the right choice depends on your goals, budget, and technical needs.

Ready to build or rebuild your website? Let’s discuss the best option for your business. Message me on WhatsApp .

Google AdSense approval 2026 checklist for WordPress websites

Google AdSense Approval in 2026: What Actually Gets You Approved

Getting Google AdSense approved in 2026 is harder than it was two years ago and easier than most rejected bloggers think. The gap between rejection and approval is almost always the same problem — content that Google’s reviewers, human or automated, open and immediately decide isn’t worth showing ads on.

I built syedaounraza.online as a WordPress developer portfolio with the secondary goal of earning AdSense revenue. I went through the setup process, the waiting, the Search Console indexing issues, and the technical checklist that most AdSense guides skip entirely because their writers don’t actually understand the WordPress backend. This is what I learned.

Why AdSense Approval Is Harder in 2026

Google made a major change to AdSense in early 2024 that most guides haven’t caught up with. The platform shifted from a predominantly click-based revenue model to a CPM (cost per thousand impressions) model. This matters for approval because it changed what Google’s reviewers are actually evaluating.

Under the old model, Google needed sites that drove clicks. Under the impression model, Google needs sites that attract real, returning human visitors who will see ads. That means the question reviewers are asking when they look at your site has changed. It’s no longer “does this site get traffic?” It’s “would a real person come back to this site?” Those are different standards.

The result: generic article farms, thin AI content, and sites with 20 identical listicles on vague topics are being rejected consistently. Sites with genuine expertise, real author identity, and content that solves specific problems are being approved even with modest traffic.

⚠️ Watch Out: The “publish 15 posts and apply” advice that circulated for years no longer works. I’ve seen sites with 30 posts get rejected and sites with 12 exceptional posts get approved in 8 days. Post count is not the metric. Content quality and site credibility are.

The Real Approval Checklist for 2026

These are the things that actually matter, in the order they matter.

Content First — Everything Else Is Secondary

Google’s reviewers open random pages on your site. What they see in the first 30 seconds determines most of the approval decision. Here’s what they’re looking for and what gets sites rejected.

Thin content is the most common rejection reason. An article under 600 words that covers a topic broadly with no real depth, no examples, no personal insight, and no information a reader couldn’t find in the first line of a Wikipedia article — that’s thin content. The fix is not more words. It’s more useful words. A 900-word article that solves a specific problem clearly is worth more than a 2,000-word article padded with repetition.

AI content without human editing is being flagged. Google doesn’t outright ban AI-assisted writing but its detection has become significantly more sophisticated in 2026. A post written entirely by an AI tool with no personal experience, no original examples, and no editing will read as generated content. The fix is not avoiding AI — it’s adding the layer of human experience that AI can’t provide. Your real project outcomes, your actual mistakes, your specific client scenarios. That’s what makes content pass.

Topical scatter gets sites rejected. A site with five posts about WordPress, three posts about healthy recipes, two posts about cryptocurrency, and one post about travel looks to Google like a content farm with no real authority on any topic. Pick your niche and go deep before applying. For a developer portfolio site, that means staying in web development, app development, and related technical topics.

✅ Pro Tip: Before applying for AdSense, open your site in an incognito window and click on five random blog posts. Read the first three paragraphs of each. If you find yourself skimming because the content feels generic or repetitive, Google’s reviewer will feel the same. Fix those posts before applying.

The Essential Pages Google Checks

AdSense reviewers look for specific pages that signal your site is a legitimate, professionally operated web property. Missing any of these is a fast rejection.

Privacy Policy — mandatory. Not optional. AdSense requires disclosure of how you collect visitor data, what cookies you use, and that Google may serve ads using visitor data. A generic privacy policy copied from another site is better than nothing but a proper one specific to your site, your tools, and your ad setup is what you need. I built a free privacy policy generator at syedaounraza.online specifically for this — it creates a proper AdSense-compliant privacy policy for your WordPress site.

About Page — your About page is where Google’s reviewer confirms that a real person with real credentials operates this site. It needs your name, your relevant background, and enough information to make you credible on the topics you’re writing about. “Hi I’m John and I love sharing tips” is not an About page. Your education, your work experience, your real projects — that’s what builds credibility.

Contact Page — a working contact form or email address. This signals you’re reachable and accountable. Sites with no contact method look anonymous and untrustworthy to both Google and potential advertisers.

Disclaimer or disclosure page — particularly if you plan to earn from affiliate links or sponsored content alongside AdSense. Not strictly required for approval but it’s a trust signal that matters.

Technical Requirements That Reject Sites Silently

This is the section most AdSense guides skip entirely because most bloggers don’t understand their own WordPress setup.

HTTPS is non-negotiable. Your site must have a valid SSL certificate and serve all pages over HTTPS. Any pages serving over HTTP, or a mixed content warning where some elements load over HTTP while the page itself is HTTPS, will cause problems. Check your SSL status in your browser — a padlock icon in the address bar with no warning is what you need. Most decent WordPress hosts (Hostinger, SiteGround, Kinsta) include free SSL via Let’s Encrypt. Enable it and force HTTPS site-wide from WordPress Settings → General.

Mobile responsiveness — Google reviews your site on mobile. A site that looks fine on desktop but has overlapping text, broken layouts, or tiny tap targets on mobile will get rejected. Test every page on an actual phone, not just a browser developer tools preview.

Page speed — this is a trust signal. A site that takes 8 seconds to load on mobile tells Google’s automated review system that the site is poorly maintained. Getting your mobile PageSpeed score above 60 before applying significantly improves your chances. I’ve written a full guide on WordPress speed optimization at syedaounraza.online that covers exactly how to fix this.

No broken links or 404 errors — Google crawls your entire site before making an approval decision. A site with multiple 404 errors, broken navigation links, or pages that return errors looks abandoned and unmaintained. Check your Google Search Console for 404 reports and fix or redirect every one before applying.

Clean robots.txt and sitemap — your XML sitemap should be submitted in Google Search Console and your robots.txt should not be accidentally blocking important pages. Yoast SEO generates both automatically in WordPress. Confirm the sitemap is at /sitemap_xml and submitted in Search Console under Sitemaps.

What AdSense Rejection Emails Actually Mean

Google sends rejection emails with vague reason codes. Here’s what they actually mean in plain language.

“Low value content” — your articles are thin, generic, or read as AI-generated without enough human editing. The fix is rewriting your weakest posts with more depth and personal insight, not publishing more posts.

“Site does not comply with AdSense policies” — you have content in a restricted category (gambling, adult content, weapons, or certain health topics) or your site structure violates placement policies. Review every page carefully and remove or rewrite anything that falls into prohibited categories.

“Insufficient content” — Google could not find enough indexed pages to evaluate your site properly. This usually means your site has indexing issues in Search Console, not that you literally don’t have enough posts. Check Search Console for “Crawled — currently not indexed” pages and request indexing for your most important articles.

“Site navigation” — reviewers couldn’t navigate your site clearly. Your menu structure is broken, important pages are buried, or your internal linking is so weak that a visitor landing on one page has no obvious path to the rest of your site.

⚠️ Watch Out: Do not reapply immediately after a rejection. Google imposes cooldown periods and rapid reapplications without meaningful changes result in longer review queues and repeated rejections. Make the fixes, wait at least two weeks, publish two to three new quality posts during that time, and then reapply.

How Long Does AdSense Approval Take in 2026?

Google’s official review time is listed as up to two weeks. In practice, sites with clean technical setups and quality content are being reviewed in 3–8 days. Sites with indexing issues, thin content, or missing pages can sit in review for the full two weeks and still come back rejected.

The review timeline does not tell you anything about whether you’ll be approved. A fast review is not necessarily a good sign. A slow review is not necessarily a bad one. Apply, make no major changes to the site while under review, and wait.

What to Do After Approval

Approval is not the finish line. It’s the start of the part where you actually have to maintain policy compliance.

Ad placement — start conservatively. One ad unit at the end of each blog post and one in the sidebar. Do not place ads so aggressively that they overwhelm your content. Google’s auto ads feature handles placement automatically if you enable it. I recommend using auto ads initially and then manually adjusting placement after reviewing which positions perform best.

Don’t click your own ads — this gets AdSense accounts banned permanently. Don’t ask friends or family to click your ads. Don’t refresh your pages repeatedly while logged into AdSense. Invalid click activity is one of the most common reasons accounts get suspended post-approval.

Keep publishing — AdSense approves your site based on its state at the time of application. A site that stops publishing after approval and starts serving stale content can have ad serving limited or suspended over time. Keep publishing at least two to four quality posts per month to maintain the quality signal that got you approved.

Monitor policy violations in your AdSense dashboard — Google will alert you if new content violates policies. Act on those alerts immediately. Ignoring them leads to account suspension.

✅ Pro Tip: Once approved, enable Google Search Console’s Core Web Vitals report and aim to keep your site in the “Good” category across all metrics. Advertisers pay higher CPMs for ad placements on fast, high-quality sites. Your approval gets you into AdSense. Your site quality determines what you actually earn per thousand visitors.

FAQ

How many blog posts do I need for AdSense approval in 2026?
There is no official minimum. Sites with 12 exceptional posts have been approved. Sites with 40 thin posts have been rejected. The quality and depth of your content matters far more than the count. Before applying, every published post should solve a specific problem clearly and be at least 800–1,000 words of genuinely useful content.

Do I need traffic to get AdSense approved?
No. Google does not publish a traffic minimum for AdSense approval. However, some organic traffic from Google Search signals that real people are finding your content valuable — which supports the approval decision. Applying with zero traffic from any source is not disqualifying, but a site with some real visitors looks more credible than one with none.

Can AI-written content get AdSense approved?
Yes, with significant human editing. Purely AI-generated posts without personal experience, real examples, or editorial rewriting are being flagged and rejected. AI as a drafting tool, followed by thorough human editing that adds your own insights and experience, can produce content that passes review.

How do I know if my site is ready to apply?
Open your site in incognito mode and ask: does every page solve a specific problem for a specific reader? Does the site look professionally maintained on mobile? Are the About, Contact, and Privacy Policy pages complete and credible? Is there a clear niche focus rather than scattered topics? If yes to all of these, you’re ready to apply.

What’s the difference between AdSense and Ezoic or Mediavine?
AdSense has no traffic minimum. Ezoic requires 10,000 monthly visits. Mediavine requires 50,000 monthly sessions. For a new site, AdSense is the right starting point. As your traffic grows, Ezoic and Mediavine typically pay significantly higher CPMs than AdSense for the same traffic, making them worth switching to once you reach their thresholds.

My site was rejected for “low value content” — what do I fix?
Start by identifying your weakest three to five posts. Rewrite them completely — not expand them, rewrite them. Add a real example, a specific outcome, a comparison, or a step-by-step process that wasn’t there before. Delete any posts under 400 words that don’t cover a specific topic with enough depth to justify existing. Wait two weeks after making changes before reapplying.

Final Thoughts

Google AdSense approval in 2026 rewards exactly what it always should have rewarded — a real site, run by a real person, publishing content that real visitors find useful enough to return for. The technical checklist matters. The essential pages matter. But none of that saves a site whose actual content a reviewer would close after 10 seconds.

Build the site for the reader first. Fix the technical setup second. Apply for AdSense third. In that order, approval follows naturally.

If you’re building a WordPress site and need help with the setup — privacy policy, speed optimization, Search Console configuration, or the full build — get in touch at https://syedaounraza.online/contact/

How to speed up a WordPress website in 2026 — developer guide

How to Speed Up a WordPress Website in 2026 (What Actually Works)

Speed up your WordPress website and you fix two problems at once — Google ranks you higher, and visitors actually stay long enough to become customers. Ignore it and you’re bleeding traffic from both ends.

I’ve worked on WordPress sites for restaurants in Denmark, tourism businesses in Aruba, nonprofits in the US, and e-commerce stores in the UK. Every single one of them had speed problems when they first came to me. Not because WordPress is slow — WordPress itself is fine. The problems were almost always the same three things: bad hosting, unoptimised images, and a bloated page builder doing ten times more work than necessary.

This guide covers what I actually fix on client sites, in the order I fix it. Not a generic checklist of 23 things you’ll never do. Real fixes, real order of priority, real results.

Why Your WordPress Site Is Slow (The Actual Reasons)

Before you install any plugin or change any setting, you need to know what’s making your site slow. Guessing wastes time. A free speed test takes two minutes.

Open Google PageSpeed Insights and run your homepage URL. Do it in a new incognito window so browser cache doesn’t skew the results. You’ll get two scores — mobile and desktop — and a list of specific issues ranked by their impact.

Most WordPress sites I audit fail on mobile. Desktop scores look acceptable, sometimes even good. But mobile is what Google uses to rank your site. If your mobile score is below 50, your rankings are being actively suppressed.

The most common issues I see in PageSpeed reports:

Largest Contentful Paint (LCP) too slow — usually caused by a large unoptimised hero image loading above the fold. The browser has to download a 3MB JPEG before it can show the page.

Cumulative Layout Shift (CLS) too high — elements jumping around as the page loads. Usually caused by images without defined dimensions, web fonts loading late, or ad slots appearing after content.

Interaction to Next Paint (INP) failing — the page is technically loaded but feels sluggish to interact with. Almost always JavaScript bloat — too many scripts running on page load from plugins that don’t need to load everywhere.

Fix these three and you fix your Core Web Vitals. Fix your Core Web Vitals and your Google rankings improve. It’s that direct.

Fix 1 — Your Hosting Is Probably the Root Cause

I’ll say this directly: cheap shared hosting is a performance ceiling you cannot overcome with plugins.

You can install WP Rocket, optimise every image, minify every script, and your site will still load slowly if your server response time (TTFB — Time to First Byte) is above 600ms. No frontend optimisation fixes a slow server. It’s like trying to make a slow car faster by changing the tyres.

For small to medium WordPress sites in 2026, Hostinger Business or Hostinger Cloud handles most needs at a reasonable price. For high-traffic or e-commerce sites, Cloudways on a DigitalOcean or Linode server is what I recommend. Cloudways gives you server-level caching with Redis and Varnish, which is a completely different performance tier from shared hosting.

The test is simple. Run your site through WebPageTest and look at the TTFB number. Under 200ms is good. 200–600ms is acceptable but improvable. Above 600ms — fix your hosting before doing anything else, because nothing else will matter.

✅ Pro Tip: If you’re on Hostinger, enable LiteSpeed Cache from the Hostinger dashboard before installing any other caching plugin. Hostinger’s servers run LiteSpeed and the native integration is significantly faster than generic caching plugins on the same server.

Fix 2 — Images Are Destroying Your Load Time

Images are the single biggest contributor to slow WordPress sites. Not plugins, not themes — images. I’ve seen restaurant sites with 8MB hero images and tourism sites with 40 photos uploaded straight from a phone camera at full resolution.

In 2026 there is no reason to serve JPEG or PNG for photographs on a WordPress site. The correct format is WebP. WebP files are 25–35% smaller than JPEG at the same visual quality and are supported by every modern browser.

The even better option is AVIF — roughly 50% smaller than JPEG and browser support is now above 95%. If your image optimisation plugin supports AVIF, use it with a JPEG fallback.

For automatic conversion and compression, I use ShortPixel on most client sites. It gives the best file-size-to-quality ratio of any image plugin I’ve tested, supports both WebP and AVIF, and pay-per-image pricing makes it cost-effective for sites that aren’t uploading hundreds of images per month.

Beyond format, two other image rules matter:

Set explicit width and height attributes on every image. This prevents layout shift (CLS) and tells the browser how much space to reserve before the image loads.

Use lazy loading on everything below the fold. WordPress enables this by default since version 5.5, but check that your theme or page builder isn’t overriding it.

⚠️ Watch Out: Never lazy load your hero image — the large image at the top of the page that’s visible immediately on load. Lazy loading delays images that are off-screen. Your hero image is on-screen. Lazy loading it actually hurts your LCP score. In Elementor, set the hero image widget’s loading attribute to “eager” to prevent this.

Fix 3 — Caching: What to Install and What to Skip

Caching plugins store a static HTML version of your pages so WordPress doesn’t have to rebuild them from scratch every time someone visits. It’s one of the highest-impact changes you can make.

The right caching plugin depends entirely on your hosting:

On Hostinger — use LiteSpeed Cache. It’s free and integrates natively with the server. Enable page cache, browser cache, CSS/JS minification, and lazy load from its settings. Don’t install WP Rocket on top of it — two caching plugins conflict and create problems.

On Cloudways — use Breeze (Cloudways’ own plugin). It’s designed specifically for their server stack and works better than third-party alternatives on their infrastructure.

On any other shared hosting — WP Rocket is the most reliable all-in-one option. It handles caching, file minification, lazy loading, and database cleanup in one plugin with a clean interface that doesn’t require technical knowledge to configure.

After installing and configuring your caching plugin, run PageSpeed Insights again. A well-configured cache should improve your performance score noticeably, sometimes by 15–25 points on its own.

✅ Pro Tip: After any significant site change — new page, new plugin, updated content — clear your cache. Visitors can see outdated versions of pages if cache isn’t cleared. Every major caching plugin has a “Clear All Cache” button in the WordPress admin toolbar. Use it after every update.

Fix 4 — Elementor Is Probably the Slowest Thing on Your Site

I use Elementor on client sites. It’s a powerful page builder and most clients love the flexibility. But I’ll be direct — Elementor is one of the heaviest page builders available in terms of what it loads on every page.

By default, Elementor loads its CSS and JavaScript on every single page of your site, even pages that have nothing built with Elementor. It also generates inline CSS for every widget which adds page weight.

Here’s how I reduce Elementor’s impact without removing it:

Go to Elementor → Settings → Advanced → Enable “Improved CSS Loading.” This loads widget CSS only when that widget is actually used on the page rather than loading all widget styles globally.

Enable “Improved Asset Loading” in the same menu. This reduces the number of JavaScript files Elementor loads.

Disable the Elementor font awesome library if you’re using a theme that already loads it. Duplicate icon libraries loading twice is a common culprit for script bloat.

Use the Elementor Image widget’s native lazy loading option rather than relying on a plugin to add it.

None of these fixes make Elementor as fast as a lightweight theme with no page builder. But they close the gap significantly. After making these changes on a restaurant client site, the mobile PageSpeed score went from 41 to 67 — without changing hosting or images.

Fix 5 — Minify CSS and JavaScript (But Test After)

Minification removes unnecessary characters — spaces, line breaks, comments — from your CSS and JavaScript files. It reduces file size and speeds up delivery. Every caching plugin mentioned above handles this automatically.

The thing nobody tells you is that aggressive minification breaks things. JavaScript minification in particular can conflict with how some plugins and themes load their scripts, causing visual or functional errors on the front end.

My approach: enable CSS minification first, test the site thoroughly. Then enable JavaScript minification, test again. Never enable both at once without testing. Check every page type — homepage, single post, shop page, checkout — because different pages load different scripts.

If anything breaks after enabling JS minification, look for the “exclude” option in your caching plugin settings. You can exclude specific scripts from minification while minifying everything else.

⚠️ Watch Out: Never enable JavaScript deferral or delay on pages with inline scripts that need to run on page load — payment gateways, booking widgets like FareHarbor, and map embeds are common casualties. A broken checkout or booking flow is a far bigger problem than a slightly lower PageSpeed score.

Fix 6 — Use a CDN for Static Assets

A Content Delivery Network (CDN) serves your images, CSS, and JavaScript files from servers geographically close to each visitor. If your site is hosted in Europe and someone visits from the US, without a CDN they’re waiting for files to travel across the Atlantic. With a CDN, those files come from a server in the US.

For most WordPress sites, Cloudflare’s free tier is the right starting point. It’s easy to set up, improves load times for international visitors, and adds a basic layer of security as a bonus.

If you’re on Hostinger Business or above, Cloudflare CDN integration is available directly from the Hostinger dashboard. Enable it there rather than setting it up separately — it’s preconfigured for their infrastructure.

After enabling a CDN, check your PageSpeed score again. The improvement is most noticeable for visitors who are geographically distant from your server.

How to Know If Your Fixes Are Actually Working

Speed optimisation without measurement is guesswork. After every change, run these three tools:

Google PageSpeed Insights — the most important one since it directly reflects how Google scores your site. Aim for 90+ on desktop and 70+ on mobile as your initial targets.

GTmetrix — gives you waterfall view showing exactly which files are taking longest to load. Useful for identifying specific problem scripts or images that PageSpeed Insights doesn’t pinpoint clearly.

WebPageTest — shows your TTFB clearly and lets you test from different geographic locations. Use this to verify your CDN is working and your server response time is acceptable.

Run each test three times and average the results. Speed scores fluctuate based on server load at the time of testing. One bad result doesn’t mean your site is broken and one good result doesn’t mean your work is done.

Common WordPress Speed Mistakes I See Constantly

Installing multiple caching plugins. They conflict. Pick one and use only that one.

Using full-size images in thumbnails. WordPress generates thumbnail sizes automatically but only if images are properly registered. If your theme or page builder is displaying your 2400px hero image at 400px wide, the browser is still downloading 2400px of image.

Leaving hello-world post and unused demo content indexed. Extra pages Google crawls for zero benefit. Delete them.

Installing plugins for every small feature. Every plugin adds code that loads on every page. A contact form, a social share widget, a cookie notice, a popup, a chat widget — individually fine, collectively they add seconds to your load time. Audit your plugins and remove anything that isn’t actively earning its place.

Not testing on actual mobile. Desktop PageSpeed scores and mobile PageSpeed scores are completely different. Most clients only ever test on desktop. Check your site on a real phone on a real mobile network before calling a project done.

FAQ

What PageSpeed score should I aim for in 2026?
Target 90+ on desktop and 70+ on mobile as your baseline. Google’s ranking algorithm weighs mobile score heavily. A desktop score of 95 with a mobile score of 45 means your SEO is still being penalised.

Is WP Rocket worth paying for?
For non-LiteSpeed hosting, yes. It’s the most reliable all-in-one caching and optimisation plugin available. The configuration is straightforward, it works well with most themes and plugins, and the support is good. On LiteSpeed servers, use LiteSpeed Cache instead — it’s free and performs better on that infrastructure.

Will a caching plugin break my WooCommerce store?
It can if configured incorrectly. Cart pages, checkout pages, and account pages must be excluded from caching — every major plugin does this automatically when it detects WooCommerce, but always verify. A cached checkout page where all customers see the same cart content is a serious problem.

Does image optimisation affect visual quality?
With modern formats like WebP and AVIF at 80–85% quality settings, the difference is invisible to the human eye at normal viewing sizes. The files are dramatically smaller. I’ve never had a client notice a quality difference after converting to WebP.

How often should I check my site speed?
After every significant change — new plugin, updated theme, new page template. Set a reminder to run a full PageSpeed check monthly even if nothing has changed. Server environments change, plugin updates add new scripts, and speed regressions creep in silently over time.

Can I speed up WordPress without any paid plugins?
Yes. LiteSpeed Cache is free and powerful on compatible hosting. ShortPixel has a free tier. Cloudflare CDN has a free tier. The honest answer is that combining free tools gets you 80% of the way there. Paid tools like WP Rocket make the process faster and more reliable but aren’t strictly necessary if you’re willing to configure free alternatives carefully.

Final Thoughts

Speeding up a WordPress website is not complicated — but it is sequential. Fix the hosting first. Then the images. Then the caching. Then the page builder settings. Then the minification. Each step builds on the last.

Most slow WordPress sites I encounter aren’t slow because WordPress is bad. They’re slow because they were built quickly, without performance in mind, on the cheapest hosting available, with whatever theme looked nice in the preview. That’s a solvable problem. And the impact of solving it — on rankings, on bounce rate, on conversions — is immediate and measurable.

If you want an expert to audit and optimise your WordPress site’s speed, get in touch at https://syedaounraza.online/contact/

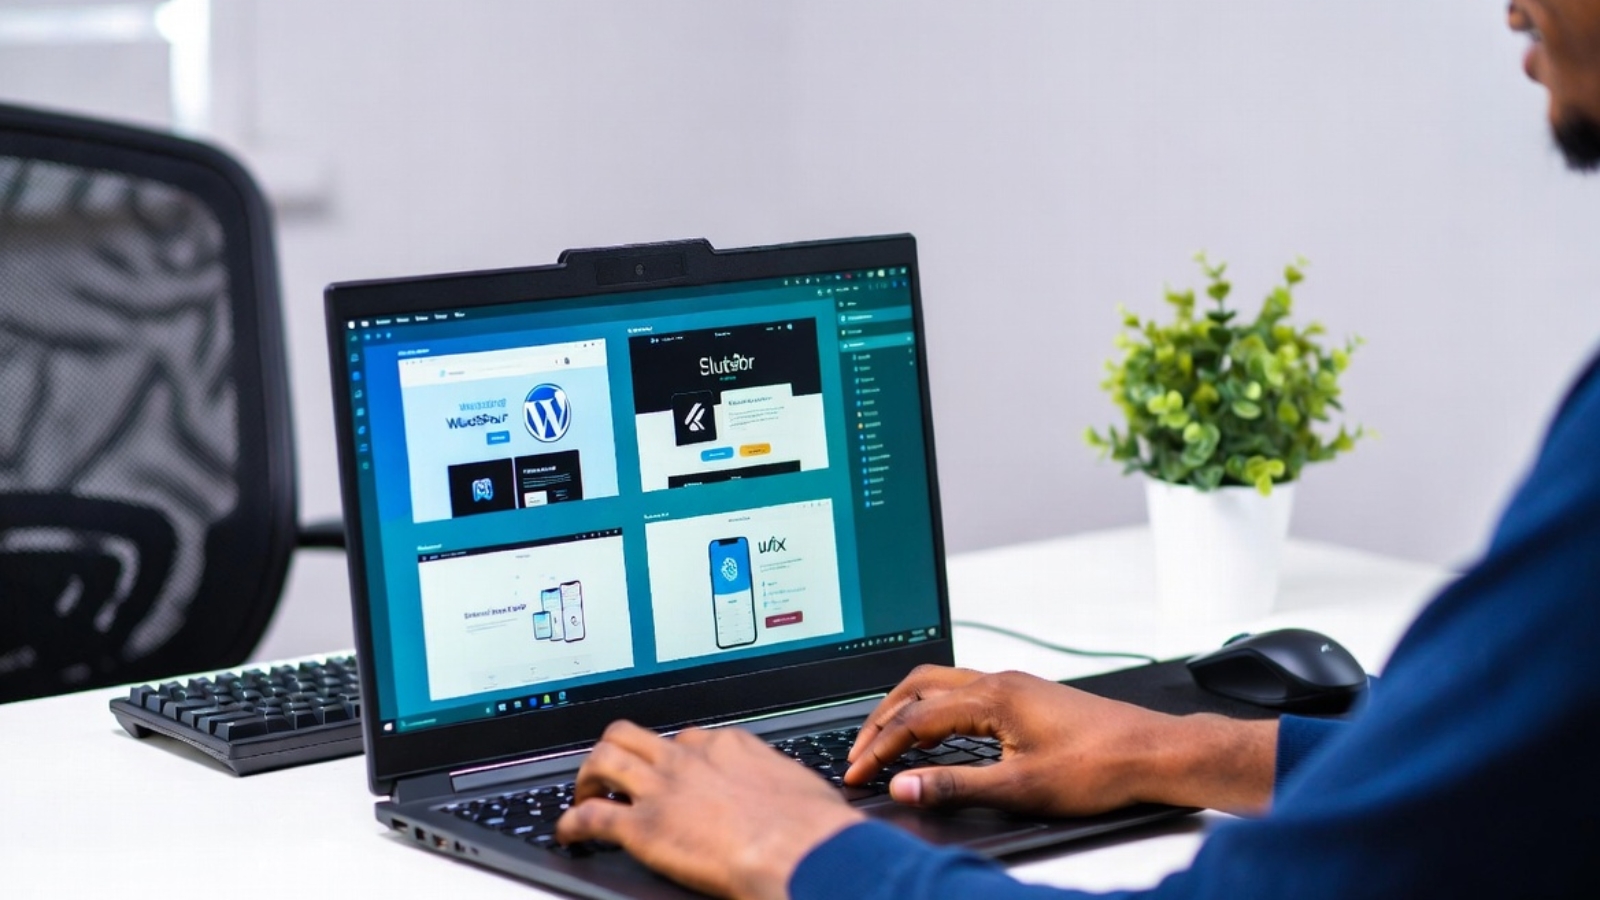
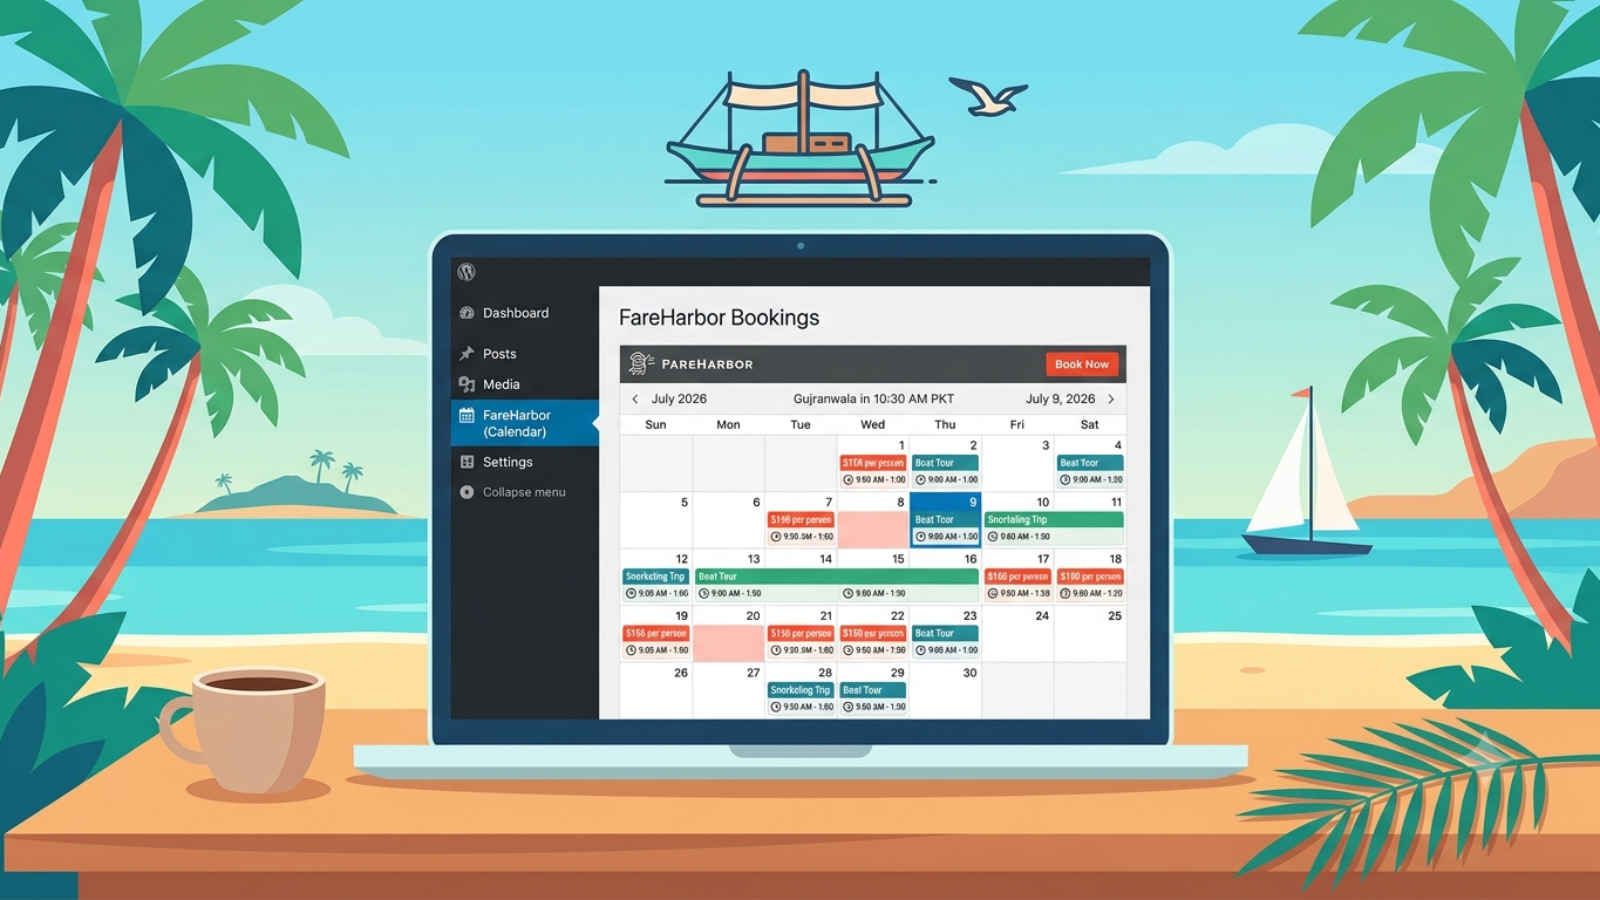
FareHarbor WordPress integration setup showing booking calendar on WordPress site

Add FareHarbor to WordPress: The Real Developer Guide (2026)

How to Add FareHarbor to WordPress (And Not Lose Your Commission Like I Did)

I almost cost my client real money on their first month of bookings. Not because the integration broke. Not because the plugin had a bug. Because I forgot to set the ASN.

If you don’t know what that means yet — you will by the end of this guide. And you won’t make the same mistake I did.

I’ve built FareHarbor WordPress sites for three tourism brands in Aruba: Pelican Adventures, De Palm Tours, and Kukoo Kunuku. Each one is a separate WordPress site, each targeting a different audience, each with its own booking flow. I’ve gone through the plugin setup, the shortcode configuration, the multi-brand partner pages, and yes — the moment where commissions weren’t tracking and I had to figure out why.

This guide is everything I learned doing it for real clients, not just reading the docs.


What Is FareHarbor and Why Tourism Sites Need It on WordPress

FareHarbor is the booking system that most serious tour and activity operators use. It handles availability, payments, customer communications, and operator commissions all in one place. If your client runs boat tours, island excursions, or any kind of ticketed experience — they’re probably already on FareHarbor or about to be.

WordPress is where most of these businesses want their public-facing site. So connecting the two is one of the most common requests I get from tourism clients.

The good news: FareHarbor has an official WordPress plugin. The bad news: the plugin documentation tells you the minimum, not the reality. There are decisions you need to make before you even install it — and if you skip them, you’ll spend hours debugging something that should have taken 20 minutes.

Let me walk you through the whole thing.


Step 1: Start With the Client’s Goal, Not the Plugin

Most developers jump straight to installing the FareHarbor plugin. I used to do this too. Now the first thing I do is ask the client one question: what are you actually trying to achieve with this integration?

That question changes everything.

Some clients want a simple “Book Now” button on their homepage. Others want a full availability calendar embedded on each tour page. Some are resellers who earn commission on other operators’ bookings — and that requires a completely different setup than a direct operator.

If you skip this conversation, you’ll build the wrong thing. I’ve seen developers embed a full calendar when the client just needed a lightframe button. I’ve seen reseller sites set up without affiliate tracking, meaning every booking they drove earned them nothing.

Know the goal first. Then choose your integration method.


Step 2: Install the FareHarbor WordPress Plugin

Once you know what you’re building, installation is straightforward.

Go to your WordPress dashboard, navigate to Plugins → Add New, and search for “FareHarbor.” Install and activate the official plugin by FareHarbor. As of 2026 it’s at version 3.6.13 with over 9,000 active installs, so it’s well maintained.

After activation, go to Settings → FareHarbor. You’ll see a settings page with a few options. The two that matter most:

Default Shortname — set this to your client’s FareHarbor shortname (more on this below). If you’re only building for one operator, set it here and you won’t need to type it in every shortcode.

Enable Auto Lightframing — check this box. Always. It means any link on the site that points to a FareHarbor booking URL will automatically open in the Lightframe overlay instead of taking the user away from your site. It’s a conversion improvement with zero downsides.

Enable FH Buttons Stylesheet — check this too if your client wants styled booking buttons. It loads FareHarbor’s button CSS so you can use their pre-built button styles.


What Is a Shortname and Why It Almost Broke My Project

Here’s the thing nobody explains clearly in the docs.

Every FareHarbor operator has a shortname. It’s the unique identifier for their account — the bit that appears in their FareHarbor dashboard URLs. For Pelican Adventures it was pelican-aruba. For De Palm Tours it was depalmtours. For Kukoo Kunuku it was kukookunuku-au.

You get this from the client or directly from their FareHarbor account. You cannot guess it. You cannot derive it from their business name. You need the exact string.

This is important because every shortcode you write uses it. Get it wrong and nothing loads. Get it right but forget the ASN — and you’ll lose commission tracking entirely.

I’ll explain the ASN issue in a moment. First, let me show you the shortcodes.


Step 3: The Four Shortcodes You Actually Need

The FareHarbor plugin gives you four shortcodes. Here’s when to use each one.

[fareharbor shortname=”companyname”] — This embeds a full availability calendar directly on the page. Use it on dedicated tour pages where you want visitors to see all available dates and book without leaving. It’s immersive but heavy — don’t put it on your homepage.

[itemgrid shortname=”companyname”] — This creates a grid of all activities or a specific flow. Use it on category pages where you want to show multiple tours at once. It looks clean, loads faster than the full calendar, and works well as a browsing interface before the customer picks a specific tour.

[lightframe shortname=”companyname”]Book Now[/lightframe] — This wraps any text or button to open the FareHarbor booking overlay on click. Use it for CTAs anywhere on the site — hero sections, tour description pages, sidebar widgets. This is the most flexible shortcode and the one you’ll use most.

[partners shortname=”companyname” include=”brand1,brand2″] — This is for reseller sites that want to show multiple operators’ inventory together. I didn’t use this for the Aruba project because each brand had its own separate WordPress site. But if you’re building a single site that aggregates multiple operators — a tourism hub, for example — this is what you need.


Step 4: The ASN — The Thing That Cost My Client Commission

This is the part I wish someone had told me before I launched.

If your client is a reseller — meaning they earn a commission when they drive bookings to another operator — FareHarbor tracks this through something called an ASN (Affiliate Short Name). Think of it as a tracking identifier that tells FareHarbor “this booking came through this reseller’s site.”

Without the ASN set correctly, FareHarbor has no way of attributing the booking to your client. The booking still happens. The customer still pays. But your client earns nothing from it.

For the Aruba project, the ASN for the account was toptiervacationrental. Every shortcode on every partner brand site needed to include this. And in my first build, I forgot to add it.

The first month went live. Bookings were happening. But when the client checked their FareHarbor dashboard, the commission column was empty.

It took me an hour of digging through the FareHarbor documentation to realize what was missing. The fix was a single parameter added to every shortcode. But the damage was real — a month of bookings with no commission tracked.

The correct shortcode format for a reseller looks like this:

[lightframe shortname=”pelican-aruba” asn=”toptiervacationrental”]Book Pelican Adventures[/lightframe]

[itemgrid shortname=”depalmtours” asn=”toptiervacationrental”]

That asn parameter is what creates the commission trail. Add it to every single shortcode on every page. Don’t leave it out on “just the homepage” or “just this one page.” Every shortcode needs it.

PRO TIP: Set the ASN as a default in the FareHarbor plugin settings page if your entire site is running under one reseller account. That way it applies automatically to every shortcode without typing it each time.

WATCH OUT: The ASN is case-sensitive. toptiervacationrental is not the same as TopTierVacationRental. Get the exact string from the FareHarbor account, copy it, paste it — don’t type it manually.


Step 5: Building Separate Pages Per Brand

For the three Aruba brands I mentioned — Pelican Adventures, De Palm Tours, and Kukoo Kunuku — we built separate WordPress sites rather than one multi-brand site. Each operator had their own domain, their own branding, and their own booking pages.

This approach has real advantages. Each site can be SEO-optimized for that specific brand’s search terms. There’s no confusion for the customer about whose tours they’re booking. And each site can have its own design that matches the brand’s identity.

The structure I use for these sites is simple and repeatable:

Homepage — hero section with a [lightframe] Book Now CTA, brief brand intro, featured tours using [itemgrid].

Individual tour pages — one page per tour, with description, photos, FAQs, and a full [fareharbor] calendar embed for that specific item ID.

Tours overview page — [itemgrid] showing all available tours, filterable by category if the operator has flows set up in FareHarbor.

This structure works. It converts. And it’s easy to hand off to the client to manage without them breaking anything.


Common Mistakes I See Other Developers Make

Beyond the ASN issue, here are the other things I’ve seen go wrong on FareHarbor WordPress builds.

Not enabling Auto Lightframing. When this is off, clicking a FareHarbor link takes the user completely away from the WordPress site to FareHarbor’s own booking page. You lose the branded experience and the customer feels like they’ve left the site. Always enable it.

Embedding the full calendar on the homepage. The [fareharbor] calendar shortcode is heavy. It loads a full iframe with date pickers and availability data. On a homepage it slows the page down and overwhelms visitors who are still deciding whether to book. Use [itemgrid] or a [lightframe] button on the homepage instead.

Not testing on mobile. FareHarbor’s Lightframe overlay works fine on desktop. On mobile, especially older Android browsers, there can be scroll issues inside the overlay. Always test the full booking flow on an actual phone before handing the site to the client.

Using the wrong item ID. When embedding a specific tour’s calendar using [fareharbor item=”12345″], you need the item ID from FareHarbor’s dashboard — not a guess. Pull it from the URL of the item in the operator’s FareHarbor account.


FAQ

How do I find my FareHarbor shortname?
Log into the FareHarbor dashboard and look at the URL — it usually contains the shortname. Or ask your FareHarbor account manager directly. Don’t guess it.

Can I use FareHarbor on WordPress without the plugin?
Yes — you can embed the Lightframe API script manually and use raw HTML links. But the plugin makes it cleaner, handles Auto Lightframing automatically, and is the approach FareHarbor officially supports. Use the plugin.

Does FareHarbor work with Elementor?
Yes. The shortcodes work inside Elementor’s Text Editor or Shortcode widgets. The [lightframe] shortcode wrapping an Elementor button needs a bit more work — you’ll need to add the shortcode around the button’s text content, not the button widget itself.

What if my client is not a reseller — do I still need the ASN?
No. The ASN is only relevant for reseller/affiliate setups where commission tracking is required. If your client is a direct operator taking their own bookings, skip the ASN entirely.

Can I show multiple operators on one WordPress site?
Yes — use the [partners] shortcode with the include parameter listing each operator’s shortname. This is the right approach for tourism hub sites or aggregators rather than building separate sites per brand.

How do I test if commission tracking is working?
Make a test booking through the site and check the FareHarbor dashboard for that booking. Look for the referral source — it should show your ASN. FareHarbor support can also verify this on their end if you’re unsure.


Final Thoughts

FareHarbor is a solid booking system and the WordPress plugin works well once you understand what it’s actually doing. The documentation covers the basics. What it doesn’t cover is the real-world decisions — the ASN, the per-brand site structure, the difference between embedding a calendar and using a lightframe button.

I learned most of what’s in this guide by building real sites for real clients in Aruba. Some of it came easy. Some of it — like the missing ASN — came with consequences.

If you’re a developer taking on a FareHarbor WordPress project, save this guide. And if you’re a tourism business trying to figure out whether you need a developer or can do this yourself — feel free to reach out. I’ve built these setups from scratch and know exactly what your site needs.

Get in touch at https://syedaounraza.online/contact/
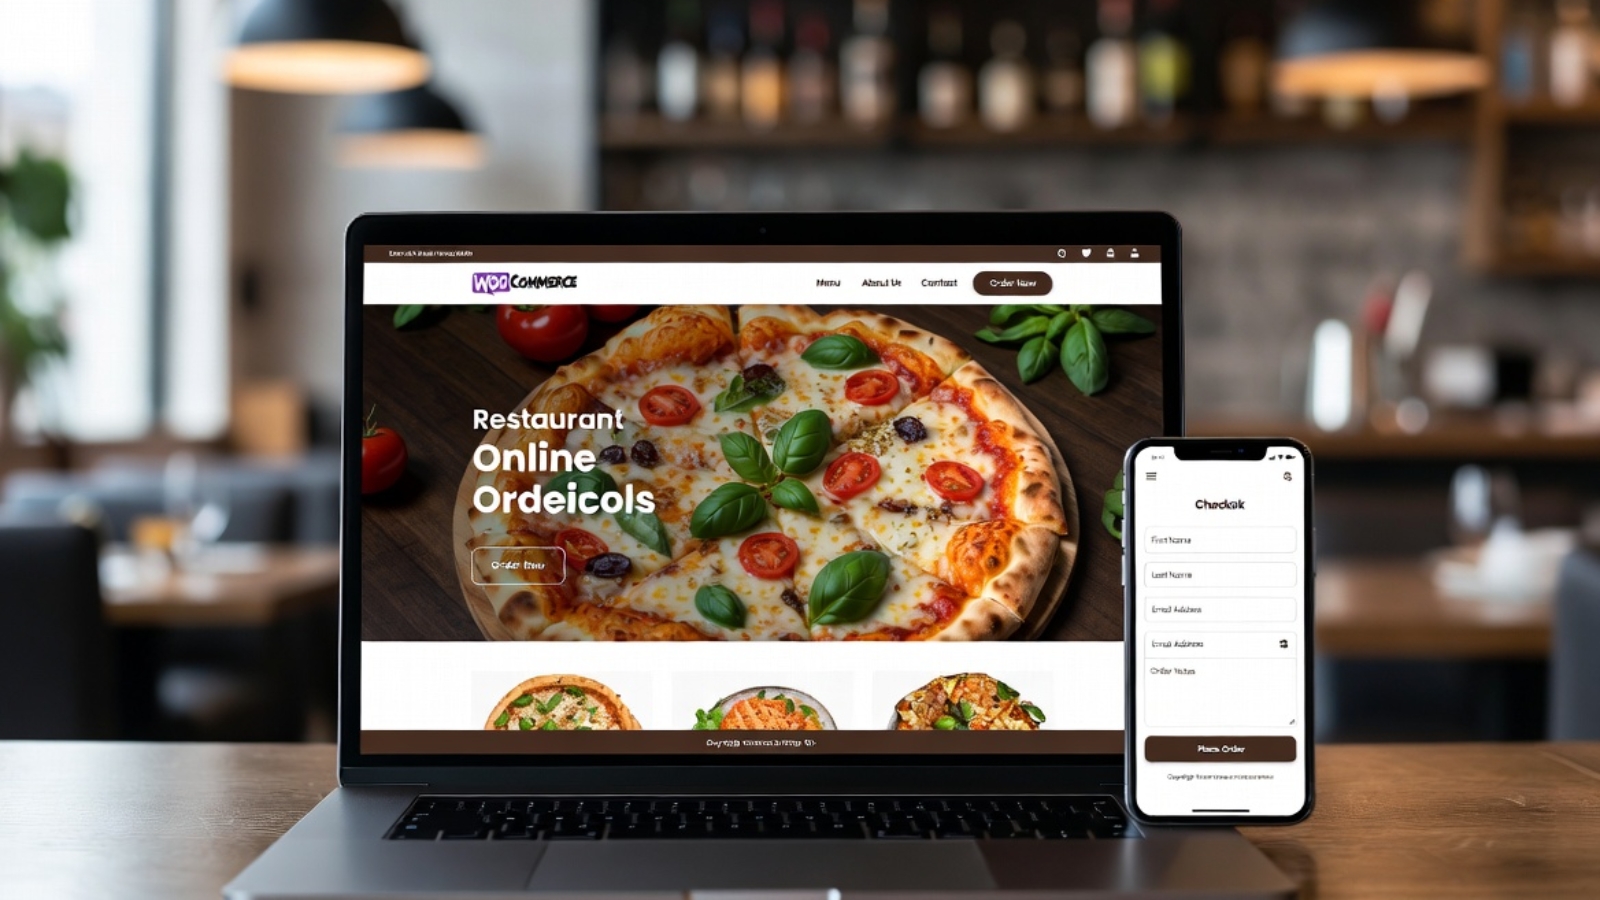
: WordPress website protected by security measures against hacking attempts

WordPress Security in 2026: The Complete Protection Guide

Quick answer: WordPress security in 2026 is mostly a plugin problem, not a core-software problem — 91% of vulnerabilities are found in plugins, with only 6 in WordPress core itself. Roughly 13,000 WordPress sites are hacked every day, and attackers now move within 5 hours of a vulnerability being disclosed. The good news: basic security hygiene (updates, strong passwords, 2FA, a WordPress-specific firewall, and off-site backups) stops an estimated 90% of attacks. Security here isn’t about doing everything — it’s about doing the handful of things that actually matter, consistently.

If you run a WordPress site and have never audited its security, this is the real 2026 picture — and the specific fixes that make the biggest difference.

How Big Is the Actual Problem?

The scale is genuinely large, but it’s worth understanding why before reacting to it. WordPress runs 43.5% of all websites on the internet — nearly half the web — which makes it the single most attractive target for cybercriminals, not because WordPress is uniquely insecure, but because attacking it at scale makes economic sense. FS Code

The daily numbers back that up: roughly 13,000 WordPress sites are hacked per day, totaling around 4.7 million annually. And once a vulnerability becomes public, the window to react is short — the weighted median time from vulnerability disclosure to mass exploitation is just 5 hours. GigaPressGigaPress

It’s Not WordPress Itself — It’s the Plugins

This is the single most important thing to understand, and it changes how you should actually spend your security effort. 11,334 vulnerabilities were discovered in 2025 alone, up 42% year-over-year, and 91% of those vulnerabilities are found in plugins — only 6 were in WordPress core itself. Google

Put plainly: WordPress core is very secure, and a WordPress site with minimal, well-maintained plugins and proper security practices is as safe as any platform. Your actual attack surface is almost entirely the plugins you’ve chosen to install, not WordPress itself. Google

The Uncomfortable Part: Nearly Half Have No Patch Available

This is why “just update everything” isn’t a complete security strategy on its own. 46% of vulnerabilities had no developer patch available when they were disclosed, meaning you can’t rely solely on updates — proactive security like a web application firewall and active monitoring is necessary too. Google

Traditional defenses also fall short here more than most site owners assume. 87.8% of exploits bypass standard hosting-level defenses, and separately, traditional web application firewalls block only about 12% of WordPress-specific attacks — WordPress-specific security tooling matters more than generic protection. FS CodeGoogle

Passwords Are Still a Bigger Problem Than You’d Expect

Some of the most preventable breaches still come down to basics. 81% of hacked WordPress sites involved weak or stolen passwords as a contributing factor, and a Melapress study found 41% of WordPress users aren’t using two-factor authentication or a strong enough password. GigaPressZapier

This matters more than it might seem, because the vast majority of credential-stuffing attacks target the standard /wp-login.php and /wp-admin paths — meaning a default login setup is essentially inviting every automated attack that knows where to look. GigaPress

What Happens When a Site Actually Gets Hacked

It’s rarely as visible as people assume. Most hacked WordPress sites are turned into distribution channels, not billboards — the common outcomes are injected scripts, redirects, and spam, since these models monetize quietly, meaning a homepage can look completely fine while the site is still redirecting visitors, serving SEO spam, or dropping malicious code behind the scenes. WPBeginnerWPBeginner

This is exactly why regular monitoring matters more than a one-time security check — a compromised site can operate invisibly for weeks before anyone notices.

The Real Cost of Getting This Wrong

The average recovery cost for a small business after a hack is around $14,500, compared to roughly $8/month for proactive protection. Beyond direct cleanup costs, there’s also real business disruption — Google can flag a compromised site, tanking both traffic and trust in the process. GigaPress

Recovery is also far worse without a plan in place. Sites without a documented incident response plan take 3-4 times longer to recover — not because the team is less capable, but because decisions are being made under stress without a framework. FS Code

The Actual Fixes That Matter (In Priority Order)

Given how concentrated the risk actually is, here’s where effort should go, roughly in order of impact:

1. Keep WordPress core, themes, and plugins updated — outdated plugins, themes, and WordPress files remain the most common way hackers get in, and updates often include patches for exact vulnerabilities hackers actively exploit. Zapier

2. Enable two-factor authentication and avoid “admin” as a username — limiting login attempts and enabling 2FA stops brute-force attacks, and avoiding “admin” as a username matters because it’s the first guess in every automated attack script. Zapier

3. Use a WordPress-specific firewall, not just a generic one — given how much traditional WAFs miss, tools purpose-built for WordPress’s specific vulnerability patterns catch meaningfully more.

4. Store backups off-site, not on the same server — if the server itself is compromised, backups stored on that same server can be deleted along with everything else — off-site storage (Dropbox, Google Drive, Amazon S3) is the safer strategy. Zapier

5. Disable file editing from the WordPress dashboard — WordPress allows editing theme and plugin files directly from the dashboard, and if a hacker gets in, this is the first place they go to inject malware. Bookly

6. Audit your plugin list regularly — plugins not updated for 6+ months should be removed or replaced, since fewer active plugins directly means a smaller attack surface. Themewinter

Why Basic Hygiene Genuinely Works

Despite the scary headline numbers, the practical reality is reassuring once you understand attacker behavior. Basic security hygiene stops more than 90% of attacks, because most attackers are opportunistic — when a site looks harder to target than average, they simply move on to an easier one. FS Code

You don’t need every possible security measure. You need the handful that address where the real risk actually concentrates — plugins, passwords, and backups — applied consistently rather than as a one-time setup task.

A New Regulatory Shift Worth Knowing About

If you rely on third-party plugins for your site (nearly everyone does), there’s a regulatory change arriving that should improve things over time. The EU’s Cyber Resilience Act requires that from September 2026, every commercial WordPress plugin available in the EU must have a vulnerability disclosure program — a genuinely significant shift that forces the WordPress plugin ecosystem to formalize its security processes. Themewinter

For the full technical detail behind these 2026 statistics, Patchstack’s official State of WordPress Security whitepaper is the primary source most of this data draws from.

Frequently Asked Questions

Is WordPress itself insecure?
No — WordPress core had only 6 vulnerabilities in 2025, out of over 11,000 total. The real risk comes almost entirely from third-party plugins, not the core software.

Do I really need a security plugin if my host offers protection?
Yes — hosting-level firewalls miss a large share of WordPress-specific attacks. A WordPress-specific firewall catches patterns generic hosting protection isn’t built to recognize.

How often should I audit my installed plugins?
At minimum, review them monthly; sites that change frequently should do it more often. Remove anything unmaintained for 6+ months.

What’s the single biggest security mistake WordPress site owners make?
Relying on updates alone. Nearly half of disclosed vulnerabilities have no patch available at the time of disclosure, so proactive monitoring and a firewall matter just as much as staying updated.

Can a hacked site look completely normal to visitors?
Yes — many compromised sites are used quietly for redirects, spam injection, or malicious code delivery, with no visible sign on the homepage itself. Regular scanning, not just visual checks, is necessary to catch this.

For how ongoing security fits into your overall WordPress budget, see our WordPress website cost guide, and for the performance side of site health, our Core Web Vitals 2026 guide.


Want your WordPress site’s security properly audited and hardened? Contact us with your site URL for a real assessment.

Scroll-driven 3D website animation built with Three.js and GSAP ScrollTrigger

How to Build a Scroll-Driven 3D Website (GSAP + Three.js Guide)

Quick answer: A scroll-driven 3D website is built by rendering a Three.js scene on a fixed canvas behind your HTML content, then using GSAP’s ScrollTrigger plugin to sync the scene’s camera position, object transforms, and material effects to the user’s scroll progress. As the user scrolls, ScrollTrigger reports a progress value (0 to 1) that drives the 3D animation in real time — turning ordinary scrolling into a cinematic, choreographed experience. A solid first build typically takes 16-40+ hours depending on complexity.

If you’ve landed on a site where scrolling feels like watching a movie — camera moves, objects morphing, lighting shifting — that effect almost always comes from one specific technical combination. Here’s exactly how it works.

The Core Technique: Progress-Driven Animation

The fundamental mechanic is simpler than it looks. For each section of the page, a GSAP ScrollTrigger instance is created, and it reports a “progress” value on an onUpdate callback, where 0 is the start of the section, 0.5 is the middle, and 1 is the end — that progress number is then used to drive the Three.js scene. Firebase

The Three.js canvas itself sits independently from the scrollable content: Three.js is initialized so its canvas is fixed and positioned behind all the HTML content, staying visible on screen at all times, while the scene updates based on each section’s scroll progress inside the render loop. Firebase

The Build Process, Step by Step

A widely-used practical breakdown of this workflow looks like this: set up the Three.js scene as usual, add the GSAP and ScrollTrigger npm packages, define a master GSAP timeline with tweens for camera position, mesh transforms, and material uniforms, wrap that timeline in a ScrollTrigger with scrub set to true so scroll directly scrubs the timeline, add Lenis for smooth scroll feel, then test thoroughly on mobile since scroll-driven sites can feel sluggish without real optimization work. Medium

For asset-based projects specifically, the flow typically runs: scaffold the project (commonly Vite + Three.js), get a basic scene rendering with camera, light, and geometry, load the actual 3D asset as a glTF file, hook up the animation timeline using GSAP or Three’s built-in animation system, add interactivity for clicks and scroll, optimize for mobile with device-tier checks and asset compression, then deploy. Medium

Smooth Scrolling: The Detail That Makes It Feel Premium

Native browser scroll feels noticeably rougher than what you see on award-winning 3D sites. The fix is a smooth-scroll library paired directly into the render loop: a smooth-scroll library like Lenis is initialized, its scroll event is wired to update ScrollTrigger, and then GSAP’s own ticker drives both the Lenis raf loop and the Three.js renderer on every tick — GSAP ends up driving everything through its ticker, Lenis updates the scroll feel, and the scene renders on each frame. 200oksolutions

Beyond Simple Scrubbing: Pinning and Scene Transitions

More advanced scroll-driven sites don’t just move a camera — they pin sections in place while a full scene transition plays out. One real implementation pattern: a GSAP timeline is set up with ScrollTrigger configured to pin a hero section in place while scrubbing, then chains multiple animations together — text blurring and fading out, camera pulling back and reframing the scene — so the pinned section feels like a cinematic sequence rather than a plain scroll. 200oksolutions

For a deeper hands-on build, a recent published tutorial from Codrops walks through combining several of these techniques at once: syncing WebGL and the DOM so Three.js planes perfectly match HTML image positions, smooth scrolling that plays nicely with a render loop, and scroll-triggered shader animation that reveals images as they enter the viewport. The full walkthrough is available in Codrops’ scroll-revealed WebGL gallery tutorial, which is one of the most detailed public resources on this exact technique. Wix

An Alternative Technique: Image Sequences

Not every scroll-driven 3D effect is a live-rendered scene. Many of the most famous examples (including Apple’s product pages) actually use a different, lighter-weight approach: the effect is powered by GSAP plus ScrollTrigger and a numbered sequence of images rendered to a canvas — as the user scrolls, the animation scrubs through frame numbers and draws the corresponding image, creating the illusion of a real-time 3D render without the GPU cost. Medium

This comes with real best practices worth following: place this lower on the page rather than in the hero, so there’s time to preload the image sequence and the first view isn’t a blank canvas; never scroll-jack — let native scroll drive the scrub instead of overriding it; and add a fallback for slower devices and small screens, similar to how major brands serve a static image on mobile instead of the full sequence. Medium

Cleanup: The Part Most Tutorials Skip

This matters enormously for any site with page transitions or a single-page app structure, and it’s the detail that separates a demo from a production-ready build. GSAP plugins like ScrollTrigger and SplitText create instances and DOM wrappers that don’t automatically disappear when a page changes, so triggers and tweens need to be killed and SplitText reverted before leaving a route, then re-initialized after entering the next one. Wix

The same discipline applies to the 3D layer itself: removing a mesh from the scene isn’t enough — if WebGL objects are recreated per page, geometries, materials, and textures for unused assets need to be explicitly disposed of, or GPU memory will creep up after multiple page transitions. Wix

What This Actually Costs in Time and Money

Realistic expectations matter here, since this style of build is genuinely more involved than a standard website. A first scroll-driven 3D build typically takes 16-40 hours, and for a personal portfolio, self-learning the whole stack is feasible with effort — but for a commercial site with real deadlines and conversion goals, self-learning to commercial-quality 3D work can take 6-12 months, which usually makes hiring an experienced developer the more practical route. Medium

This tracks with what we’ve found scoping real client projects — a properly planned scroll-driven 3D site is a multi-week engagement, not a quick add-on, once you factor in asset preparation, performance optimization across devices, and the animation choreography itself.

Performance: Don’t Skip This for the Sake of the Effect

A visually stunning 3D scroll site that performs badly defeats its own purpose — poor Core Web Vitals scores directly hurt both user experience and search visibility, something we cover in full in our Core Web Vitals 2026 guide. Test on real mid-range mobile devices early, not just on a development machine, since 3D rendering performance varies dramatically across hardware.

Frequently Asked Questions

Do I need to know Three.js and GSAP both, or is one enough?
Both, for a true scroll-driven 3D effect. Three.js renders the 3D scene; GSAP’s ScrollTrigger drives that scene’s state based on scroll position. They’re complementary tools solving different halves of the problem.

Is an image-sequence approach easier than a live 3D render?
Generally yes, and it’s lighter on GPU resources — it’s how many large-scale product sites achieve a “3D” feel without real-time rendering overhead, at the cost of losing true interactivity.

How long does it realistically take to build one of these sites?
A first build for a portfolio project runs roughly 16-40 hours. A polished, production-ready commercial site with multiple scenes and full mobile optimization typically takes several weeks.

Will a scroll-driven 3D site hurt my Core Web Vitals scores?
It can, if not optimized carefully — asset compression, lazy loading of 3D assets below the fold, and proper WebGL memory cleanup are essential to keep loading speed and responsiveness in good standing.

Can this be built as a single-page site, or does it work with multi-page navigation too?
Both are possible, but multi-page setups require extra care — ScrollTrigger instances and WebGL resources must be properly disposed of between page transitions to avoid memory leaks and lingering animations.

For how a project like this fits into overall budgeting, see our complete website development cost guide.


Want a scroll-driven 3D experience built for your brand? Contact us with your reference sites and goals for a scoped quote.

Website content being optimized for AI search engines through AEO and GEO

What Is AEO and GEO? How to Optimize for AI Search in 2026

Quick answer: AEO (Answer Engine Optimization) means structuring content so AI-powered search features — Google AI Overviews, ChatGPT, Perplexity — can extract a direct answer and cite it. GEO (Generative Engine Optimization) is the broader discipline of getting AI models to trust and recommend your brand at all, even outside a traditional search box. Neither replaces SEO — nearly 40% of Google’s AI Overviews rank in the top 10 organic search results, and nearly 70% rank in the top 100 — so strong traditional SEO is still the foundation both are built on. Medium

If you’ve been publishing content and wondering why AI tools never mention your site, this is the actual mechanics of why — and what to fix.

Why This Matters Now, Not Later

The shift in how people search is no longer a prediction — it’s already measurable. Ahrefs found that AI overviews reduced click-through rates for top-ranking Google content by 58%, up from 34.5% the year before, largely because Google now gives users the information they need directly, without requiring a click through to the source page. MediumMedium

It’s not just Google, either. ChatGPT alone processes 2.5 billion prompts daily, 65% of which qualify as search-type queries. Separately, SparkToro research shows more than 38% of Google searches now end with zero clicks — the user gets their answer directly in an AI Overview, Featured Snippet, or People Also Ask card, meaning if your content isn’t optimized for this, you effectively don’t exist for a third of all searches. MediumWix

AEO vs GEO vs SEO: The Actual Difference

These three terms get used interchangeably, but they’re not the same thing.

  • SEO gets your page onto the results page in the first place
  • AEO makes your content the direct answer extracted from that page
  • GEO gets your brand cited and recommended by AI models more broadly, even in conversational contexts outside a search bar

As one clear framing puts it: SEO gets you onto the results page, AEO makes your content the answer within that page, and GEO ensures AI models recommend you outside the Google ecosystem entirely. Wix

Crucially, these aren’t competing priorities. AEO and SEO are not competing strategies — they are complementary layers of a unified search visibility framework, and content that satisfies AEO requirements (clear answers, structured data, entity authority) simultaneously improves traditional SEO, since Google’s algorithms increasingly reward the same signals AI models use for citation selection. Wix

You Cannot Skip SEO and Jump to GEO

This is the single most important thing to understand before doing anything else. Studies show a 92% correlation between pages ranking in the top 10 organically and pages cited in AI Overviews — you cannot skip traditional SEO and jump to GEO, because the AI reads the top results, and if you’re not in the top 10, you’re statistically unlikely to be read by the AI in the first place. Omi AI

That said, ranking well isn’t sufficient on its own either — only 38% of AI Overview citations come from top-10 Google results, but strong organic rankings still provide the authority signals that AI engines rely on for source selection, meaning ranking well raises your odds substantially without guaranteeing citation. OpenAI Developer Community

What Actually Gets Content Cited: The Research

There’s real empirical research behind this, not just marketing claims. The Princeton GEO study found that adding expert quotes boosts AI visibility by roughly 41%, statistics by about 30%, and citations by around 30%. A separate study reached a similar conclusion from a different angle: a 2024 study by Georgia Tech, Princeton, and IIT Delhi found sites optimized for generative engines see 30-115% higher AI citation rates. Omi AIWix

The practical takeaway: adding real data, expert framing, and verifiable sources to your content measurably increases the odds an AI model treats it as citable.

The Structural Formula That Works

Across nearly every current guide on this topic, the same structural pattern shows up. Format headings as questions (“What is X?”, “How does Y work?”, “How much does Z cost?”) since search engines recognize these as Featured Snippet candidates, then give a concise, direct answer of 40-60 words immediately under the heading before going into further detail — this is the TL;DR rule, and Google actively surfaces it. Wix

This is echoed almost word-for-word elsewhere: place the direct answer to a question in the first 40-60 words immediately following a question-based heading. Omi AI

Beyond structure, format matters too: use formats like FAQs, bullet points, tables, and lists that align with how answer engines present information, and write in plain, precise language that’s easy for AI systems to interpret, avoiding ambiguity or unnecessary jargon. Medium

Schema Markup: The Machine-Readable Layer

Structured data doesn’t guarantee citation, but it removes ambiguity for AI systems trying to parse your content. Implementing Schema.org FAQPage markup on pages with questions and answers helps search engines and AI systems recognize exactly what’s being asked and answered. Wix

It’s worth being realistic about its limits, though: structured data helps clarify content and can improve machine understanding, but it does not guarantee that a page will be cited or surfaced — content quality, relevance, and trust still matter far more. Wix

E-E-A-T: Why Authorship Suddenly Matters More

This is the part most sites still get wrong. AI models use Google’s E-E-A-T guidelines (Experience, Expertise, Authoritativeness, Trustworthiness) as a proxy for truth, since an LLM can’t independently “know” what’s true — it looks for signals instead, and if content lacks a clear author, verifiable data, or credible sourcing, the retrieval pipeline tends to ignore it. Dude Lemon

Practically, this means: every page should have an author byline with a link to a real biography, a clear publication date, a modification date, and cited sources — AI systems check these signals before citing content. Wix

Platform-Specific Behavior Worth Knowing

Not every AI platform behaves the same way. Google AI Overviews pull mostly from top-10 results, Perplexity rewards freshness and authority, and Microsoft Copilot leans heavily on LinkedIn specifically for B2B queries. If your audience skews B2B, that Copilot/LinkedIn detail is worth acting on directly rather than treating all platforms identically. Omi AI

Content Freshness Is a Real Ranking Lever Here

AI-driven answer surfaces change faster than traditional rankings. Featured Snippets and AI answer selections shift monthly as old content drops out, so refreshing older articles every 3-6 months with a new date, new information, and new citations meaningfully helps maintain visibility. Wix

Common Mistakes That Undermine AEO/GEO Efforts

Publishing generic AI content with no proof, ignoring third-party authority, measuring success by screenshots instead of actual business outcomes, and splitting every long-tail query into a separate thin page are among the most common mistakes brands make. YouTube

Beyond that, technical fundamentals still gate everything else: a site that loads slowly, isn’t mobile-friendly, or has a poor user experience will never win at AEO, since technical SEO is simply the cost of entry — without it, a brand isn’t even in the race. This connects directly to something we’ve covered in detail — see our Core Web Vitals 2026 guide for the technical foundation AEO is built on top of. Wix

How to Measure Whether Any of This Is Working

Traditional analytics don’t capture AI citation well. Top-performing brands in 2026 track “Share of Voice in AI Responses” — the percentage of AI answers for a target query that actually cite the brand — treating this as the new equivalent of ranking position #1. Dude Lemon

More broadly, effective AEO measurement tracks mentions, citations, traffic, sentiment, and conversion quality — not just impressions, clicks, or rankings in isolation. YouTube

Frequently Asked Questions

Do I need to abandon traditional SEO to focus on AEO and GEO?
No. Traditional SEO is the foundation both disciplines are built on — strong organic rankings substantially increase your odds of being cited by AI systems, even though ranking well doesn’t guarantee citation on its own.

What’s the single fastest structural change I can make to existing content?
Add a direct, 40-60 word answer immediately after any question-format heading, before going into further detail. This single change aligns with how most AI systems extract citable content.

Does adding an author bio actually make a measurable difference?
Current evidence suggests yes — AI systems increasingly check for author credibility, publication dates, and sourcing as trust signals before treating content as citable.

How often should I update existing articles for AEO/GEO purposes?
Roughly every 3-6 months for pages that matter most, since AI-driven answer selections shift faster than traditional search rankings and older content can quietly lose visibility.

Is GEO just a rebrand of SEO, or a genuinely different discipline?
It’s related but genuinely different — SEO targets ranking position, GEO targets whether AI models trust and cite your brand at all, including in conversational contexts entirely outside a traditional search engine.

For how this fits into your broader budget and platform decisions, see our complete website development cost guide.


Want your existing content audited and restructured for both SEO and AI search visibility? Contact us with your site for a review.

Core Web Vitals Optimization Service | Fix LCP, INP & CLS

Core Web Vitals 2026: LCP, INP & CLS Explained (Full Guide)

Quick answer: Core Web Vitals are three Google metrics measuring real user experience: Largest Contentful Paint (LCP, loading speed, good under 2.5 seconds), Interaction to Next Paint (INP, responsiveness, good under 200 milliseconds), and Cumulative Layout Shift (CLS, visual stability, good under 0.1). They’re a confirmed Google ranking factor — not the dominant one, but increasingly a real filter rather than just a tiebreaker in 2026. Most sites still fail at least one metric, especially INP, which is now the hardest to pass.

If your site “feels slow” but you’re not sure why — or you’ve heard Core Web Vitals matter for SEO but don’t know what to actually fix — this is the full picture, using real 2026 data.

What Each Metric Actually Measures

The three Core Web Vitals are Largest Contentful Paint (LCP), which measures loading speed with a “good” threshold of under 2.5 seconds; Interaction to Next Paint (INP), which measures responsiveness with a “good” threshold of under 200 milliseconds; and Cumulative Layout Shift (CLS), which measures visual stability with a “good” threshold of under 0.1. All three must be passing at the 75th percentile of real visitor data for a page to achieve an overall “good” Core Web Vitals assessment. ScribdScribd

In plain terms:

  • LCP — how long until the biggest visible thing on your page (usually a hero image or headline) finishes loading
  • INP — how fast your site responds when someone actually clicks, taps, or types
  • CLS — whether things jump around on screen while the page loads (a button shifting right just as someone taps it)

Why INP Is the One Tripping Up Most Sites in 2026

This is the metric that changed the game. Interaction to Next Paint replaced First Input Delay in March 2024 and measures interactivity by tracking how quickly a page responds to every user interaction — clicks, taps, and keyboard inputs — not just the first one. WebMD

The difference matters more than it sounds. First Input Delay only measured the delay before a browser could begin processing the very first interaction on a page — a single data point that told you almost nothing about overall responsiveness — while INP captures every interaction throughout the full page lifecycle and reports the worst one at the 75th percentile, making it far harder to game. Yoast

The result: 43% of sites still fail the 200ms INP threshold, making it the most commonly failed Core Web Vital in 2026. If your site passed Core Web Vitals a couple of years ago and you haven’t checked since, there’s a real chance it’s failing now on this metric alone. Yoast

Is This Actually a Ranking Factor, or Just a Nice-to-Have?

The honest answer sits in the middle, and this has shifted in 2026. Historically, Core Web Vitals have been a real but modest ranking factor, with the bigger practical impact showing up in bounce rate, conversion, and AI-engine retrieval eligibility rather than rankings directly. One analysis of real engagements found the practical ranking effect is roughly 1 to 2 positions for pages that improve from “poor” to “good” across all three metrics — meaningful, but not transformative on its own. YoastYoast

But 2026 brought a shift worth knowing about. Following the March 2026 core update, performance has moved from functioning purely as a tiebreaker to acting more like a filter — if your metrics are in the red, even genuinely strong content can be pushed down in rankings. Supporting this, pages ranking in position 1 on Google show a measurably higher Core Web Vitals pass rate than pages sitting in position 9. Bicycle CouriersBicycle Couriers

Google’s own position, cited consistently across sources, is that Core Web Vitals can serve as a tiebreaker when two pages have similar content quality, and while content relevance remains the most important ranking factor, failing Core Web Vitals puts a site at a real disadvantage in competitive niches. Scribd

The Business Case: Why This Matters Beyond SEO

Even if you set rankings aside entirely, the user-behavior numbers make a strong case on their own. Pages loading in under 2 seconds show around a 9% bounce rate, while those exceeding 5 seconds see bounce rates explode to roughly 38%. More specifically, for every second of delay beyond the 2.5-second LCP threshold, bounce rates increase by roughly 32%, and a one-second delay in load time reduces conversions by about 7%. Bicycle CouriersBicycle Couriers

Put in real terms: for an e-commerce site generating $100,000 per month, that conversion drop translates to roughly $7,000 in lost revenue. Separately, sites that get all three metrics into “good” territory see a compounding benefit: passing all three Core Web Vitals thresholds correlates with 24% lower bounce rates alongside measurable ranking improvements. Bicycle CouriersYoast

How to Fix Each Metric

Fixing LCP (loading speed):
Image preloading, critical CSS inlining, font preloading with display swap, and server-side rendering are the four highest-impact fixes for slow LCP scores. In practice, this usually means: compress and modernize your images (WebP or AVIF format), avoid render-blocking scripts above the fold, and use a quality host — slow hosting makes passing LCP extremely difficult since server response time directly impacts loading speed. YoastWebMD

Fixing INP (responsiveness):
This is the harder one. INP demands a fundamental shift in how developers handle JavaScript — breaking long tasks, deferring non-critical work, yielding to the main thread during interactions, and minimizing DOM complexity. INP usually fails because of long-running JavaScript tasks, so unlike a caching fix for LCP, there’s no single plugin toggle that resolves it — it requires actual code-level attention. YoastYoast

Fixing CLS (visual stability):
Every image, video, iframe, and ad slot needs explicit width and height attributes, and font-display swap combined with reserved space for dynamic content eliminates most remaining layout shift sources. Yoast

Specific Fixes for WordPress Sites

If you’re running WordPress — which most small business sites are — the common failure points are well understood. WordPress sites benefit from performance plugins like WP Rocket or LiteSpeed Cache for caching and optimization, image optimization plugins like ShortPixel or Imagify, lazy loading plugins, and lightweight themes designed for performance, since WordPress sites commonly struggle with Core Web Vitals due to plugin bloat and heavy themes. WebMD

More bluntly: most WordPress Core Web Vitals problems come from three sources — cheap hosting, bloated themes, and too many plugins — and those three should be fixed before optimizing anything else. Yoast

We’ve covered this in more hands-on detail specific to a real project in our WordPress restaurant website speed-up case study.

Mobile Matters More Than Desktop Now

Mobile devices represent approximately 58% of all website visits in 2026, making mobile Core Web Vitals performance the primary factor in Google’s ranking algorithms, largely because Google has fully implemented mobile-first indexing, meaning mobile scores are what matter most for rankings. If you only have budget to optimize one version of your site first, make it mobile. MediumWebMD

How to Actually Check Your Scores

Use these tools, in this order of reliability:

  1. Google Search Console → Core Web Vitals report — shows real field data from your actual visitors, grouped by URL
  2. PageSpeed Insights — Google’s own tool, combining real-world field data with simulated lab testing for any URL
  3. Chrome DevTools Lighthouse — deeper technical, simulated lab testing

Field data from real visitors always carries more ranking weight than lab data from simulated tests, so treat Search Console as your source of truth over any one-off Lighthouse score. Yoast

How Long Fixes Take to Show Results

Don’t expect overnight movement. Google Search Console updates Core Web Vitals data based on 28 days of real user data, so after implementing fixes, expect to see metric improvements within 4-6 weeks, with ranking improvements often taking longer since Google’s algorithm weighs many factors beyond Core Web Vitals — most sites see measurable ranking changes within 2-3 months of sustained good scores. WebMD

Frequently Asked Questions

Do Core Web Vitals directly determine my Google ranking?
No — they’re one signal among many, acting mainly as a tiebreaker between pages of similar content quality, though 2026 data suggests failing badly can act more like a filter than before.

Which Core Web Vital is hardest to pass in 2026?
INP (Interaction to Next Paint), which requires deeper JavaScript-level fixes rather than a quick caching or image-compression solution.

Does site speed matter more on mobile or desktop?
Mobile, due to Google’s mobile-first indexing and mobile devices making up the majority of web traffic in 2026.

How quickly will fixing Core Web Vitals improve my rankings?
Metric improvements typically show in Search Console within 4-6 weeks; ranking changes often take 2-3 months of sustained good scores.

Can a WordPress site realistically pass all three metrics?
Yes, but usually only after addressing the three most common causes: cheap hosting, a bloated theme, and too many active plugins.

For a broader look at how performance fits into overall project budgeting and platform choice, see our complete website development cost guide.


Want your site’s Core Web Vitals audited and fixed properly? Contact us with your URL for a real diagnostic, not a generic checklist.

WooCommerce and Shopify e-commerce platforms compared side by side

WooCommerce or Shopify 2026: Which Should You Choose?

Quick answer: Choose Shopify if you want a fully hosted, low-maintenance store with built-in AI tools and fast setup, and don’t mind paying transaction fees or a fixed monthly plan. Choose WooCommerce if you want full ownership of your data, no mandatory transaction fees, and stronger long-term SEO and content control — in exchange for handling your own hosting and technical maintenance. Neither platform is objectively better; the right choice depends on your technical comfort, budget structure, and whether content marketing is core to your growth strategy.

If you’re planning an online store in 2026, this decision shapes years of your business — migrating later is expensive and disruptive. Here’s a grounded, current comparison based on real 2026 data.

The Fundamental Difference: Hosted vs Self-Hosted

Shopify is a hosted SaaS platform where you rent the infrastructure, the software updates automatically, and Shopify handles security, while WooCommerce is an open-source WordPress plugin where you own and operate every component yourself. This single architectural choice explains almost every other difference between the two platforms. PeekYou

Pricing: What Each Platform Actually Costs

Headline numbers are only part of the picture here.

Shopify’s pricing: Shopify pricing in 2026 runs from $39 per month for the Basic plan to $399 per month for Advanced, with Shopify Plus starting near $2,300 per month for enterprise volume, and annual billing reduces these prices by roughly 25%. But the subscription fee is rarely the biggest cost. For most merchants processing meaningful volume, payment fees and app costs exceed the plan fee itself, and transaction fees are the single most important cost difference between the two platforms. Specifically, Shopify charges transaction fees of 0.6% to 2% unless you use Shopify Payments exclusively. Drugs.com + 2

WooCommerce’s pricing: There’s no license fee, but real costs still exist. A functional WooCommerce store typically needs $5 to $50 per month for hosting, plus $0 to roughly $2,000 per year for premium extensions covering payments, shipping, subscriptions, and bookings, depending on which features you need. Overall, industry estimates put a basic WooCommerce store near $800 per year, with feature-rich mid-market stores ranging from $5,000 to $15,000 per year once advanced extensions and developer time are factored in. Drugs.comDrugs.com

Where this nets out at scale: One detailed cost comparison found that a WooCommerce store doing $500K/year pays roughly $2,400 to $4,800/year in hosting and plugins, while the equivalent Shopify Advanced plan costs $2,988/year before apps — though Shopify’s transaction fees add up further at higher volumes. On the flip side, using Shopify Payments removes the extra 0.5-2% transaction fee entirely, and stores processing $1M/year can save $5,000 to $20,000 annually by staying on native payments instead of a third-party gateway. PeekYouPeekYou

Market Share and Who Actually Uses Each Platform

Both platforms have serious scale behind them. WooCommerce powers 39% of all e-commerce sites globally, while Shopify runs over 5.6 million live stores generating $378 billion in GMV as of 2025. Separately, WooCommerce leads on raw market share while Shopify merchants tend to generate significantly higher average revenue per store — meaning WooCommerce is the more common choice, but Shopify tends to attract higher-volume commerce-first businesses. QuotesLOGEIX

SEO and Content: Where WooCommerce Has a Real Edge

If organic search and content marketing matter to your growth strategy, this is the section to pay attention to. WooCommerce offers more SEO flexibility through WordPress’s plugin ecosystem, with full control over URL structures, schema markup, and server configuration, while Shopify has improved significantly but still limits URL customization and requires apps for advanced SEO features. Quotes

The blogging gap specifically is worth knowing about: Shopify’s blog is functional but limited, with no native categories, no advanced scheduling, and no content workflow tools, so if organic traffic through content is your primary growth channel, WooCommerce has the stronger foundation. Quotes

This matters directly if your e-commerce site is meant to double as a content hub — something we cover from the restaurant/hospitality angle in our WooCommerce migration case study.

AI Features: Shopify’s Current Advantage

This is one area where Shopify has clearly pulled ahead in 2026. Shopify Magic covers product descriptions, email campaigns, blog posts, and customer segmentation natively, while WooCommerce relies on third-party plugins for comparable AI features, adding $30-150/month in additional tool costs. LOGEIX

More specifically, Shopify’s 2026 update added AI-powered product descriptions, email copy, and customer insights via Shopify Magic at no extra cost across all plans, and WooCommerce has no native equivalent — third-party tools are required for comparable functionality. The practical upshot: Shopify’s bundled AI features eliminate $100-200/month in third-party tools while offering deeper integration with your store data. QuotesLOGEIX

Setup Complexity and Ongoing Maintenance

Shopify launches stores in hours with zero server management, while WooCommerce requires WordPress hosting setup, plugin configuration, and ongoing maintenance — adding an estimated 10-40 hours of initial setup time. If you don’t have in-house technical capacity or a developer on retainer, this gap is worth taking seriously before committing to WooCommerce. PeekYou

Checkout Conversion and Point of Sale

Shopify has a measurable edge in checkout performance: Shop Pay converts 1.72x better than standard checkout, while WooCommerce’s checkout performance depends heavily on hosting quality, plugin configuration, and design choices — meaning WooCommerce can match this, but only with deliberate optimization work, not out of the box. Quotes

For in-person selling, there’s a recent shift worth knowing: WooCommerce discontinued its native point-of-sale system in February 2026, meaning merchants needing in-person selling must now use a third-party app such as Lightspeed POS, which costs $249 per year. Shopify still includes native POS hardware support as part of its core offering. Quotes

Data Ownership and Long-Term Flexibility

This is the tradeoff that matters most for businesses thinking years ahead, not just at launch. WooCommerce runs on your own server with direct database access, giving you full data ownership, while Shopify is a hosted SaaS platform where you cannot export all your data, and migrating away from Shopify is significantly harder than migrating away from WooCommerce. PeekYou

If you ever plan to switch platforms, hosts, or developers, this asymmetry is worth weighing heavily now rather than discovering it later.

Migration: What It Actually Involves

If you’re currently on one platform and considering a switch, budget real time for this. Migrating from WooCommerce to Shopify or vice versa involves data mapping, URL redirect management, SEO preservation, and payment gateway reconfiguration, and typically takes 4 to 12 weeks of proper migration work to avoid ranking drops and revenue gaps. LOGEIX

Rankings shouldn’t be treated as a formality during this process either — use 301 redirects for every URL, maintain accurate canonical tags and meta descriptions, and submit an updated sitemap to search engines immediately after migration, since rankings will dip temporarily and recovery depends on redirect accuracy and how quickly search engines recrawl the new domain. SUSO

AEO/GEO: Does the Platform Choice Even Matter?

Worth noting for anyone optimizing for AI answer engines specifically: both platforms support AI-search optimization (ChatGPT, Perplexity, Gemini) equally well when content uses clear question-format headings and direct answer paragraphs — platform choice matters less than content quality for AI visibility. In other words, this decision should be driven by your operational and cost needs, not by which platform “ranks better” in AI search — that’s determined by how you write, not which cart software processes payments. Quotes

Frequently Asked Questions

Is WooCommerce cheaper than Shopify?
At low-to-moderate volume, generally yes — WooCommerce avoids transaction fees entirely. At very high transaction volume using Shopify Payments, the gap narrows or can reverse, since Shopify’s bundled infrastructure becomes more cost-efficient per dollar processed.

Which platform is easier for a beginner to set up?
Shopify, by a clear margin — it handles hosting, security, and updates automatically, while WooCommerce requires WordPress hosting knowledge and plugin configuration.

Which is better for content-driven SEO?
WooCommerce, since it’s built on WordPress’s full content management and plugin ecosystem, including granular SEO tools like Yoast and Rank Math.

Does Shopify have better AI tools than WooCommerce?
Currently, yes — Shopify Magic is natively built into every plan, while WooCommerce requires third-party plugins to get comparable AI functionality.

Can I migrate from WooCommerce to Shopify (or the reverse) without hurting my SEO?
Yes, with careful planning — proper 301 redirects, sitemap resubmission, and accurate metadata carried over. Expect a temporary ranking dip during the transition regardless of how carefully it’s done.

For a broader look at how e-commerce platform costs fit into overall project budgeting, see our complete website development cost guide.


Not sure whether WooCommerce or Shopify fits your business? Contact us with your product catalog and growth plans for an honest recommendation.