
: WordPress website protected by security measures against hacking attempts

WordPress Security in 2026: The Complete Protection Guide

Quick answer: WordPress security in 2026 is mostly a plugin problem, not a core-software problem — 91% of vulnerabilities are found in plugins, with only 6 in WordPress core itself. Roughly 13,000 WordPress sites are hacked every day, and attackers now move within 5 hours of a vulnerability being disclosed. The good news: basic security hygiene (updates, strong passwords, 2FA, a WordPress-specific firewall, and off-site backups) stops an estimated 90% of attacks. Security here isn’t about doing everything — it’s about doing the handful of things that actually matter, consistently.

If you run a WordPress site and have never audited its security, this is the real 2026 picture — and the specific fixes that make the biggest difference.

How Big Is the Actual Problem?

The scale is genuinely large, but it’s worth understanding why before reacting to it. WordPress runs 43.5% of all websites on the internet — nearly half the web — which makes it the single most attractive target for cybercriminals, not because WordPress is uniquely insecure, but because attacking it at scale makes economic sense. FS Code

The daily numbers back that up: roughly 13,000 WordPress sites are hacked per day, totaling around 4.7 million annually. And once a vulnerability becomes public, the window to react is short — the weighted median time from vulnerability disclosure to mass exploitation is just 5 hours. GigaPressGigaPress

It’s Not WordPress Itself — It’s the Plugins

This is the single most important thing to understand, and it changes how you should actually spend your security effort. 11,334 vulnerabilities were discovered in 2025 alone, up 42% year-over-year, and 91% of those vulnerabilities are found in plugins — only 6 were in WordPress core itself. Google

Put plainly: WordPress core is very secure, and a WordPress site with minimal, well-maintained plugins and proper security practices is as safe as any platform. Your actual attack surface is almost entirely the plugins you’ve chosen to install, not WordPress itself. Google

The Uncomfortable Part: Nearly Half Have No Patch Available

This is why “just update everything” isn’t a complete security strategy on its own. 46% of vulnerabilities had no developer patch available when they were disclosed, meaning you can’t rely solely on updates — proactive security like a web application firewall and active monitoring is necessary too. Google

Traditional defenses also fall short here more than most site owners assume. 87.8% of exploits bypass standard hosting-level defenses, and separately, traditional web application firewalls block only about 12% of WordPress-specific attacks — WordPress-specific security tooling matters more than generic protection. FS CodeGoogle

Passwords Are Still a Bigger Problem Than You’d Expect

Some of the most preventable breaches still come down to basics. 81% of hacked WordPress sites involved weak or stolen passwords as a contributing factor, and a Melapress study found 41% of WordPress users aren’t using two-factor authentication or a strong enough password. GigaPressZapier

This matters more than it might seem, because the vast majority of credential-stuffing attacks target the standard /wp-login.php and /wp-admin paths — meaning a default login setup is essentially inviting every automated attack that knows where to look. GigaPress

What Happens When a Site Actually Gets Hacked

It’s rarely as visible as people assume. Most hacked WordPress sites are turned into distribution channels, not billboards — the common outcomes are injected scripts, redirects, and spam, since these models monetize quietly, meaning a homepage can look completely fine while the site is still redirecting visitors, serving SEO spam, or dropping malicious code behind the scenes. WPBeginnerWPBeginner

This is exactly why regular monitoring matters more than a one-time security check — a compromised site can operate invisibly for weeks before anyone notices.

The Real Cost of Getting This Wrong

The average recovery cost for a small business after a hack is around $14,500, compared to roughly $8/month for proactive protection. Beyond direct cleanup costs, there’s also real business disruption — Google can flag a compromised site, tanking both traffic and trust in the process. GigaPress

Recovery is also far worse without a plan in place. Sites without a documented incident response plan take 3-4 times longer to recover — not because the team is less capable, but because decisions are being made under stress without a framework. FS Code

The Actual Fixes That Matter (In Priority Order)

Given how concentrated the risk actually is, here’s where effort should go, roughly in order of impact:

1. Keep WordPress core, themes, and plugins updated — outdated plugins, themes, and WordPress files remain the most common way hackers get in, and updates often include patches for exact vulnerabilities hackers actively exploit. Zapier

2. Enable two-factor authentication and avoid “admin” as a username — limiting login attempts and enabling 2FA stops brute-force attacks, and avoiding “admin” as a username matters because it’s the first guess in every automated attack script. Zapier

3. Use a WordPress-specific firewall, not just a generic one — given how much traditional WAFs miss, tools purpose-built for WordPress’s specific vulnerability patterns catch meaningfully more.

4. Store backups off-site, not on the same server — if the server itself is compromised, backups stored on that same server can be deleted along with everything else — off-site storage (Dropbox, Google Drive, Amazon S3) is the safer strategy. Zapier

5. Disable file editing from the WordPress dashboard — WordPress allows editing theme and plugin files directly from the dashboard, and if a hacker gets in, this is the first place they go to inject malware. Bookly

6. Audit your plugin list regularly — plugins not updated for 6+ months should be removed or replaced, since fewer active plugins directly means a smaller attack surface. Themewinter

Why Basic Hygiene Genuinely Works

Despite the scary headline numbers, the practical reality is reassuring once you understand attacker behavior. Basic security hygiene stops more than 90% of attacks, because most attackers are opportunistic — when a site looks harder to target than average, they simply move on to an easier one. FS Code

You don’t need every possible security measure. You need the handful that address where the real risk actually concentrates — plugins, passwords, and backups — applied consistently rather than as a one-time setup task.

A New Regulatory Shift Worth Knowing About

If you rely on third-party plugins for your site (nearly everyone does), there’s a regulatory change arriving that should improve things over time. The EU’s Cyber Resilience Act requires that from September 2026, every commercial WordPress plugin available in the EU must have a vulnerability disclosure program — a genuinely significant shift that forces the WordPress plugin ecosystem to formalize its security processes. Themewinter

For the full technical detail behind these 2026 statistics, Patchstack’s official State of WordPress Security whitepaper is the primary source most of this data draws from.

Frequently Asked Questions

Is WordPress itself insecure?
No — WordPress core had only 6 vulnerabilities in 2025, out of over 11,000 total. The real risk comes almost entirely from third-party plugins, not the core software.

Do I really need a security plugin if my host offers protection?
Yes — hosting-level firewalls miss a large share of WordPress-specific attacks. A WordPress-specific firewall catches patterns generic hosting protection isn’t built to recognize.

How often should I audit my installed plugins?
At minimum, review them monthly; sites that change frequently should do it more often. Remove anything unmaintained for 6+ months.

What’s the single biggest security mistake WordPress site owners make?
Relying on updates alone. Nearly half of disclosed vulnerabilities have no patch available at the time of disclosure, so proactive monitoring and a firewall matter just as much as staying updated.

Can a hacked site look completely normal to visitors?
Yes — many compromised sites are used quietly for redirects, spam injection, or malicious code delivery, with no visible sign on the homepage itself. Regular scanning, not just visual checks, is necessary to catch this.

For how ongoing security fits into your overall WordPress budget, see our WordPress website cost guide, and for the performance side of site health, our Core Web Vitals 2026 guide.


Want your WordPress site’s security properly audited and hardened? Contact us with your site URL for a real assessment.
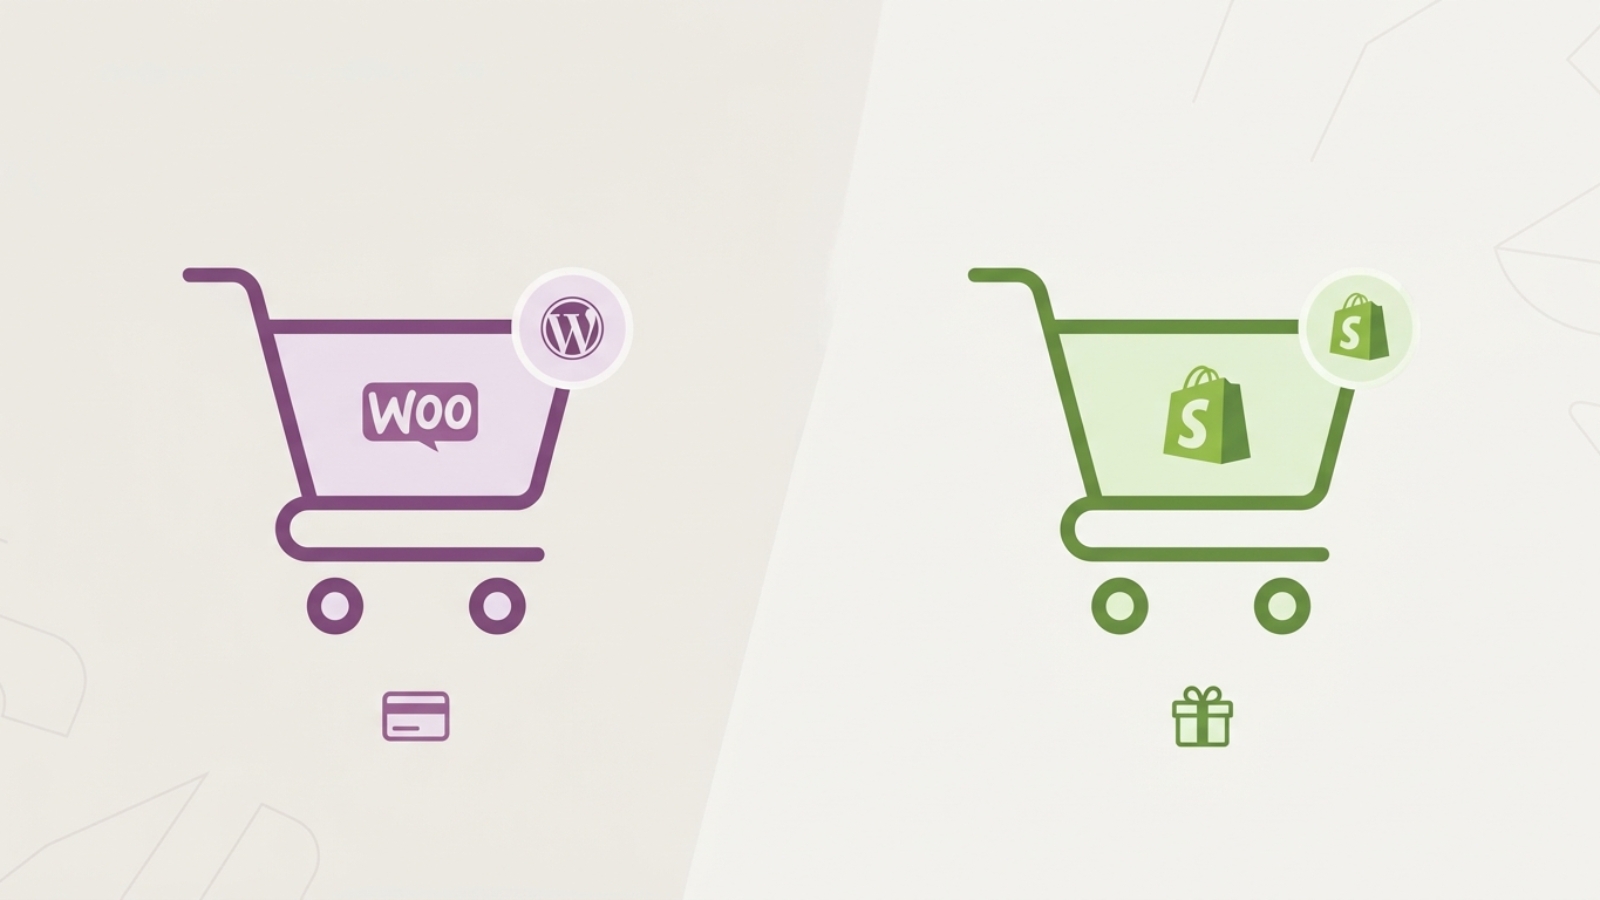

WooCommerce and Shopify e-commerce platforms compared side by side

WooCommerce or Shopify 2026: Which Should You Choose?

Quick answer: Choose Shopify if you want a fully hosted, low-maintenance store with built-in AI tools and fast setup, and don’t mind paying transaction fees or a fixed monthly plan. Choose WooCommerce if you want full ownership of your data, no mandatory transaction fees, and stronger long-term SEO and content control — in exchange for handling your own hosting and technical maintenance. Neither platform is objectively better; the right choice depends on your technical comfort, budget structure, and whether content marketing is core to your growth strategy.

If you’re planning an online store in 2026, this decision shapes years of your business — migrating later is expensive and disruptive. Here’s a grounded, current comparison based on real 2026 data.

The Fundamental Difference: Hosted vs Self-Hosted

Shopify is a hosted SaaS platform where you rent the infrastructure, the software updates automatically, and Shopify handles security, while WooCommerce is an open-source WordPress plugin where you own and operate every component yourself. This single architectural choice explains almost every other difference between the two platforms. PeekYou

Pricing: What Each Platform Actually Costs

Headline numbers are only part of the picture here.

Shopify’s pricing: Shopify pricing in 2026 runs from $39 per month for the Basic plan to $399 per month for Advanced, with Shopify Plus starting near $2,300 per month for enterprise volume, and annual billing reduces these prices by roughly 25%. But the subscription fee is rarely the biggest cost. For most merchants processing meaningful volume, payment fees and app costs exceed the plan fee itself, and transaction fees are the single most important cost difference between the two platforms. Specifically, Shopify charges transaction fees of 0.6% to 2% unless you use Shopify Payments exclusively. Drugs.com + 2

WooCommerce’s pricing: There’s no license fee, but real costs still exist. A functional WooCommerce store typically needs $5 to $50 per month for hosting, plus $0 to roughly $2,000 per year for premium extensions covering payments, shipping, subscriptions, and bookings, depending on which features you need. Overall, industry estimates put a basic WooCommerce store near $800 per year, with feature-rich mid-market stores ranging from $5,000 to $15,000 per year once advanced extensions and developer time are factored in. Drugs.comDrugs.com

Where this nets out at scale: One detailed cost comparison found that a WooCommerce store doing $500K/year pays roughly $2,400 to $4,800/year in hosting and plugins, while the equivalent Shopify Advanced plan costs $2,988/year before apps — though Shopify’s transaction fees add up further at higher volumes. On the flip side, using Shopify Payments removes the extra 0.5-2% transaction fee entirely, and stores processing $1M/year can save $5,000 to $20,000 annually by staying on native payments instead of a third-party gateway. PeekYouPeekYou

Market Share and Who Actually Uses Each Platform

Both platforms have serious scale behind them. WooCommerce powers 39% of all e-commerce sites globally, while Shopify runs over 5.6 million live stores generating $378 billion in GMV as of 2025. Separately, WooCommerce leads on raw market share while Shopify merchants tend to generate significantly higher average revenue per store — meaning WooCommerce is the more common choice, but Shopify tends to attract higher-volume commerce-first businesses. QuotesLOGEIX

SEO and Content: Where WooCommerce Has a Real Edge

If organic search and content marketing matter to your growth strategy, this is the section to pay attention to. WooCommerce offers more SEO flexibility through WordPress’s plugin ecosystem, with full control over URL structures, schema markup, and server configuration, while Shopify has improved significantly but still limits URL customization and requires apps for advanced SEO features. Quotes

The blogging gap specifically is worth knowing about: Shopify’s blog is functional but limited, with no native categories, no advanced scheduling, and no content workflow tools, so if organic traffic through content is your primary growth channel, WooCommerce has the stronger foundation. Quotes

This matters directly if your e-commerce site is meant to double as a content hub — something we cover from the restaurant/hospitality angle in our WooCommerce migration case study.

AI Features: Shopify’s Current Advantage

This is one area where Shopify has clearly pulled ahead in 2026. Shopify Magic covers product descriptions, email campaigns, blog posts, and customer segmentation natively, while WooCommerce relies on third-party plugins for comparable AI features, adding $30-150/month in additional tool costs. LOGEIX

More specifically, Shopify’s 2026 update added AI-powered product descriptions, email copy, and customer insights via Shopify Magic at no extra cost across all plans, and WooCommerce has no native equivalent — third-party tools are required for comparable functionality. The practical upshot: Shopify’s bundled AI features eliminate $100-200/month in third-party tools while offering deeper integration with your store data. QuotesLOGEIX

Setup Complexity and Ongoing Maintenance

Shopify launches stores in hours with zero server management, while WooCommerce requires WordPress hosting setup, plugin configuration, and ongoing maintenance — adding an estimated 10-40 hours of initial setup time. If you don’t have in-house technical capacity or a developer on retainer, this gap is worth taking seriously before committing to WooCommerce. PeekYou

Checkout Conversion and Point of Sale

Shopify has a measurable edge in checkout performance: Shop Pay converts 1.72x better than standard checkout, while WooCommerce’s checkout performance depends heavily on hosting quality, plugin configuration, and design choices — meaning WooCommerce can match this, but only with deliberate optimization work, not out of the box. Quotes

For in-person selling, there’s a recent shift worth knowing: WooCommerce discontinued its native point-of-sale system in February 2026, meaning merchants needing in-person selling must now use a third-party app such as Lightspeed POS, which costs $249 per year. Shopify still includes native POS hardware support as part of its core offering. Quotes

Data Ownership and Long-Term Flexibility

This is the tradeoff that matters most for businesses thinking years ahead, not just at launch. WooCommerce runs on your own server with direct database access, giving you full data ownership, while Shopify is a hosted SaaS platform where you cannot export all your data, and migrating away from Shopify is significantly harder than migrating away from WooCommerce. PeekYou

If you ever plan to switch platforms, hosts, or developers, this asymmetry is worth weighing heavily now rather than discovering it later.

Migration: What It Actually Involves

If you’re currently on one platform and considering a switch, budget real time for this. Migrating from WooCommerce to Shopify or vice versa involves data mapping, URL redirect management, SEO preservation, and payment gateway reconfiguration, and typically takes 4 to 12 weeks of proper migration work to avoid ranking drops and revenue gaps. LOGEIX

Rankings shouldn’t be treated as a formality during this process either — use 301 redirects for every URL, maintain accurate canonical tags and meta descriptions, and submit an updated sitemap to search engines immediately after migration, since rankings will dip temporarily and recovery depends on redirect accuracy and how quickly search engines recrawl the new domain. SUSO

AEO/GEO: Does the Platform Choice Even Matter?

Worth noting for anyone optimizing for AI answer engines specifically: both platforms support AI-search optimization (ChatGPT, Perplexity, Gemini) equally well when content uses clear question-format headings and direct answer paragraphs — platform choice matters less than content quality for AI visibility. In other words, this decision should be driven by your operational and cost needs, not by which platform “ranks better” in AI search — that’s determined by how you write, not which cart software processes payments. Quotes

Frequently Asked Questions

Is WooCommerce cheaper than Shopify?
At low-to-moderate volume, generally yes — WooCommerce avoids transaction fees entirely. At very high transaction volume using Shopify Payments, the gap narrows or can reverse, since Shopify’s bundled infrastructure becomes more cost-efficient per dollar processed.

Which platform is easier for a beginner to set up?
Shopify, by a clear margin — it handles hosting, security, and updates automatically, while WooCommerce requires WordPress hosting knowledge and plugin configuration.

Which is better for content-driven SEO?
WooCommerce, since it’s built on WordPress’s full content management and plugin ecosystem, including granular SEO tools like Yoast and Rank Math.

Does Shopify have better AI tools than WooCommerce?
Currently, yes — Shopify Magic is natively built into every plan, while WooCommerce requires third-party plugins to get comparable AI functionality.

Can I migrate from WooCommerce to Shopify (or the reverse) without hurting my SEO?
Yes, with careful planning — proper 301 redirects, sitemap resubmission, and accurate metadata carried over. Expect a temporary ranking dip during the transition regardless of how carefully it’s done.

For a broader look at how e-commerce platform costs fit into overall project budgeting, see our complete website development cost guide.


Not sure whether WooCommerce or Shopify fits your business? Contact us with your product catalog and growth plans for an honest recommendation.

WordPress booking plugin calendar interface for restaurant table reservations

Best WordPress Booking Plugins for Restaurants & Tours (2026)

Quick answer: There’s no single “best” WordPress booking plugin — the right choice depends on what you’re booking. Restaurants need table and party-size logic (Five Star Restaurant Reservations, WPCafe), tour and activity businesses need departure-based inventory (FareHarbor, Yatra Pro), and WooCommerce store owners selling bookable products should use WooCommerce Bookings directly inside their existing store. Picking based on category — not a generic “top 10” list — is what actually matters.

If you’ve searched “best WordPress booking plugin” and found a dozen conflicting lists, that’s because the word “booking” covers very different workflows. Here’s how to actually choose, based on your business type.

Why “Best Overall” Doesn’t Really Exist Here

An appointment plugin built for a salon handles staff schedules and service slots. A restaurant reservation system needs to think in tables, covers, and party size. A tour booking plugin needs departure dates, capacity limits, and anti-overbooking logic. A rental plugin needs inventory and pricing tiers. Stretching one tool to do all of these usually leads to a clunky setup — the smarter approach is matching the plugin to the category your business actually falls into.

If You Run a Restaurant or Café

Restaurant bookings are about tables, service windows, and party size — not staff calendars. For this category, dedicated restaurant reservation tools tend to outperform generic appointment plugins because they’re built around the actual guest-flow problem: party size rules, service hours, blocked dates, and reducing no-shows through automated reminders.

If you’re also running food ordering alongside reservations (not just bookings), an all-in-one restaurant plugin that handles both menus and table bookings in one dashboard tends to be less messy than stitching two separate tools together.

This connects directly to a project we’ve covered before — see our case study on migrating a restaurant from Gloria Food to WooCommerce, where ordering and booking needed to work together on one platform.

If You Run Tours, Activities, or Rentals

This is a completely different problem: you’re managing departure dates, capacity per date, and often multi-day availability — not single time slots. Tools built specifically for this space handle departures as core objects (with cutoffs and anti-overbooking locks), rather than treating dates as an afterthought bolted onto a generic booking form.

We’ve built this exact kind of system before — see our FareHarbor booking integration case study and the accompanying step-by-step FareHarbor + WordPress setup guide for a real example of how this works in practice.

If You Already Run a WooCommerce Store

If you’re selling physical products and want to add bookable services (equipment rental, workshop seats, photography sessions) without leaving your existing store, WooCommerce’s official Bookings extension is built specifically for this — every booking flows through the same order management, payment gateways, and reporting you’re already using, so you’re not managing two disconnected systems.

What to Actually Check Before Choosing Any Plugin

Regardless of category, these matter more than feature-list length:

  • Real-time availability — booked slots should close immediately, with no double-booking risk
  • Reminder automation — email/SMS reminders meaningfully reduce no-shows
  • Payment/deposit support — especially important for tours and higher-value reservations
  • Elementor or page-builder compatibility — if your site is built in Elementor, confirm the plugin’s booking widgets work natively inside it, rather than needing a separate shortcode workaround
  • Support and update history — check the plugin’s WordPress.org page for recent updates and real user reviews, not just the vendor’s own marketing page

A Word on “Free” Plugins

Many booking plugins offer a free tier, but it’s worth checking exactly what’s excluded before committing — commonly, free versions limit you to one staff member/location, no payment processing, and no SMS/WhatsApp reminders. If your business genuinely needs multi-location support or automated payment collection, budget for a paid tier from the start rather than hitting a wall mid-setup.

Frequently Asked Questions

Can one plugin handle both restaurant reservations and tour bookings?
Generally not well. These require fundamentally different data models — tables/party size versus departures/capacity — so using a dedicated tool for each category gives a cleaner result than forcing one plugin to do both.

Do I need WooCommerce to add booking functionality to WordPress?
No. Standalone booking plugins work independently of WooCommerce. WooCommerce Bookings is only the right choice if you’re already running a WooCommerce store and want bookings integrated into that existing setup.

What’s the biggest mistake businesses make when choosing a booking plugin?
Picking based on a generic “best of” list rather than their actual booking category — an appointment plugin, a restaurant reservation tool, and a tour booking system solve genuinely different problems.

Does Elementor work with booking plugins?
Many do offer Elementor-compatible widgets (search forms, booking calendars, listing shortcodes), but this varies by plugin — always confirm before building your page layout around it.


Not sure which booking system fits your restaurant, tour business, or rental operation? Contact us and we’ll help you scope the right setup.

AI features being added to a Wix Velo website through custom code integration

How to Add AI Features to Your Wix Velo Website (2026 Guide)

Quick answer: You can add AI features to a Wix Velo website by using Velo’s backend code environment to connect your site to an AI API (like OpenAI), storing your API key securely in Wix’s Secrets Manager, and building a frontend interface (chatbot, content generator, or smart search) using Wix’s $w elements. Basic AI chat features can be added in a few days; more advanced automation takes longer depending on complexity.

Wix has come a long way from being “just a drag-and-drop builder.” With Velo — Wix’s custom code layer — you can build genuinely smart, AI-powered features directly into a Wix site. Here’s exactly how it works, what’s possible, and what it actually costs to build.

Why Add AI to a Wix Velo Site

Most Wix sites are still static — they look good but don’t do much. Adding AI changes that:

  • Instant customer answers through an AI chatbot, without needing separate live-chat software
  • Automated content help — AI-assisted blog drafts, product descriptions, or FAQ generation
  • Smarter search and recommendations based on what visitors are actually looking for
  • Lead qualification — an AI assistant that asks the right questions before a lead reaches your inbox

For small businesses, this often replaces tools they’d otherwise pay for separately (chat widgets, content assistants, form logic).

How Velo Connects to AI: The Technical Basics

Velo gives you a backend coding environment inside Wix, and that’s where AI integration happens. According to Wix’s own developer documentation, calling external APIs from the backend avoids CORS issues and keeps sensitive keys secure, and any API keys should always be stored using the Secrets Manager rather than exposed on the frontend. Google

The general flow looks like this:

  1. Enable Dev Mode on your Wix site to access the Velo code panel
  2. Create a backend .jsw file — this is where your AI API calls live, completely separate from the visible frontend
  3. Store your AI provider’s API key in the Secrets Manager — never hard-code it into your site
  4. Write a backend function that sends visitor input to the AI API and returns a response
  5. Build a simple frontend UI using Wix Editor elements ($w) — a text box, a button, and a response area is enough for a basic chatbot
  6. Test in Preview mode before publishing, checking both the request and response carefully

Wix’s own documentation on integrating third-party services in Velo walks through this exact backend-to-API pattern in more depth, including how the Secrets Manager and fetch() function work together.

Common AI Features You Can Build

1. AI Chatbot
The most common request. A visitor types a question, it’s sent to an AI model on the backend, and the response streams back into a chat-style widget. This can be trained on your specific business content so it doesn’t give generic answers.

2. AI Content Assistant
A form where a site owner (or admin) inputs a topic, and the backend calls an AI API to draft blog content, product descriptions, or FAQ answers — useful for sites that publish regularly but don’t have a full-time writer.

3. Smart Search / Recommendations
Instead of basic keyword search, AI can help match visitor intent to the right product, service, or page — particularly useful for larger catalogs or service menus.

4. Automated Lead Qualification
An AI assistant asks a few smart follow-up questions before handing a lead to a human — filtering out low-intent inquiries before they hit your inbox.

What Makes This Different From Just Installing a Plugin

Unlike WordPress, Wix doesn’t have the same plugin ecosystem for AI tools — most meaningful AI integrations on Wix go through Velo’s custom code layer rather than a one-click install. This means:

  • More flexibility — you can train responses on your exact business content, not a generic template
  • More setup work upfront — there’s genuine backend coding involved, even if it’s relatively lightweight
  • Better long-term control — you’re not dependent on a third-party app’s pricing changes or feature limits

What This Typically Costs

  • Basic AI chatbot (FAQ-style, pre-set responses): Lower cost, faster turnaround — often just a few days of setup
  • Custom-trained AI assistant (trained on your specific business content, with lead capture): Mid-range project cost, typically a week or so of development
  • Advanced automation (content generation tools, smart recommendations, multi-step workflows): Higher cost and longer timeline, scoped based on exact requirements

As with most custom development, the honest answer is: it depends on your feature list. A scoped conversation with a developer beats any generic price estimate.

Mistakes to Avoid

  • Skipping the Secrets Manager — never place API keys directly in frontend code; this is a real security risk
  • Not testing thoroughly in Preview mode — AI responses can behave unexpectedly with edge-case inputs
  • Building without a fallback — always include a way for visitors to reach a human if the AI can’t help
  • Over-scoping the first version — start with one AI feature (like a chatbot), prove it works, then expand

Frequently Asked Questions

Can Wix Studio sites use AI without coding?
Some basic AI-adjacent features exist in Wix’s built-in tools, but genuinely custom AI functionality (chatbots trained on your content, smart automation) requires Velo’s backend code environment.

Is Velo required for AI integration on Wix?
Yes, for anything beyond Wix’s built-in generic tools. Velo is what allows a Wix site to securely call external AI APIs and process responses.

Does adding AI features slow down a Wix site?
Not if implemented properly — backend API calls don’t block frontend load times when built correctly, since the heavy lifting happens server-side.

How do I keep my AI API key secure on Wix?
Always store it in Wix’s Secrets Manager and access it only from backend code — never expose it in frontend elements or client-side code.


Want an AI chatbot or custom AI feature built into your Wix Velo site? Contact us with what you have in mind for a scoped quote.

Mobile app built with Flutter showing cost breakdown concept

Flutter App Development Cost in 2026: Real Pricing Guide

Quick answer: Flutter app development cost in 2026 typically depends on app complexity, features, and backend needs (like Firebase). A simple app with basic screens and no backend costs far less than a full-featured app with real-time data, authentication, and payments. Getting a scoped quote based on your exact feature list is the only way to get an accurate number — generic price lists rarely match real projects.

If you’re planning a mobile app and keep seeing wildly different price estimates online, here’s what actually drives Flutter app development cost — and how to budget realistically.

Why Flutter App Costs Vary So Much

Flutter lets developers build for iOS and Android from a single codebase, which usually makes it cheaper than building two separate native apps. But cost still swings widely based on:

  • Number of screens and user flows
  • Whether you need a backend (like Firebase) for data, login, or real-time updates
  • Third-party integrations (payments, maps, push notifications, chat)
  • Custom animations or complex UI
  • Admin panel or dashboard requirements

A simple single-screen utility app and a full marketplace app with logins, payments, and real-time chat are both “Flutter apps” — but they’re nowhere near the same cost.

What Typically Increases Cost

  • Firebase backend (authentication, real-time database, cloud functions) — adds development and setup time
  • Payment gateway integration (Stripe, PayPal, local providers) — needs careful testing
  • Push notifications and background services
  • Admin dashboards for managing app content or users
  • Offline functionality — apps that need to work without internet require extra engineering

What Keeps Cost Lower

  • Using Firebase’s pre-built services instead of a fully custom backend
  • Sticking to standard UI components instead of heavy custom animations
  • Launching with a focused feature set (MVP) instead of everything at once
  • Reusing existing design systems or templates where appropriate

A Smarter Way to Budget: Start with an MVP

Instead of trying to build every feature on day one, most successful apps launch with a Minimum Viable Product — the core features only — then add functionality based on real user feedback. This reduces upfront cost significantly and gets your app to market faster.

How to Get an Accurate Quote

The only reliable way to know your real cost is to list out:

  1. Every screen your app needs
  2. Whether you need user accounts/login
  3. Any real-time features (chat, live tracking, notifications)
  4. Payment or subscription requirements
  5. Whether you need an admin panel

With that list, a developer can give you a scoped, accurate quote — not a generic range.

Frequently Asked Questions

Is Flutter cheaper than native app development?
Generally yes, since one codebase covers both iOS and Android, reducing total development time compared to building two separate native apps.

Does Firebase cost extra on top of development?
Firebase has its own usage-based pricing (separate from development cost), but its free tier covers many small-to-medium apps early on.

How long does a Flutter app take to build?
A simple MVP can take a few weeks; a full-featured app with backend, payments, and admin panel typically takes longer depending on scope.

Can I add features after launch?
Yes — this is actually the recommended approach. Launch with core features, then expand based on real user data.


Want an accurate quote for your specific app idea? Contact us with your feature list for a scoped estimate.

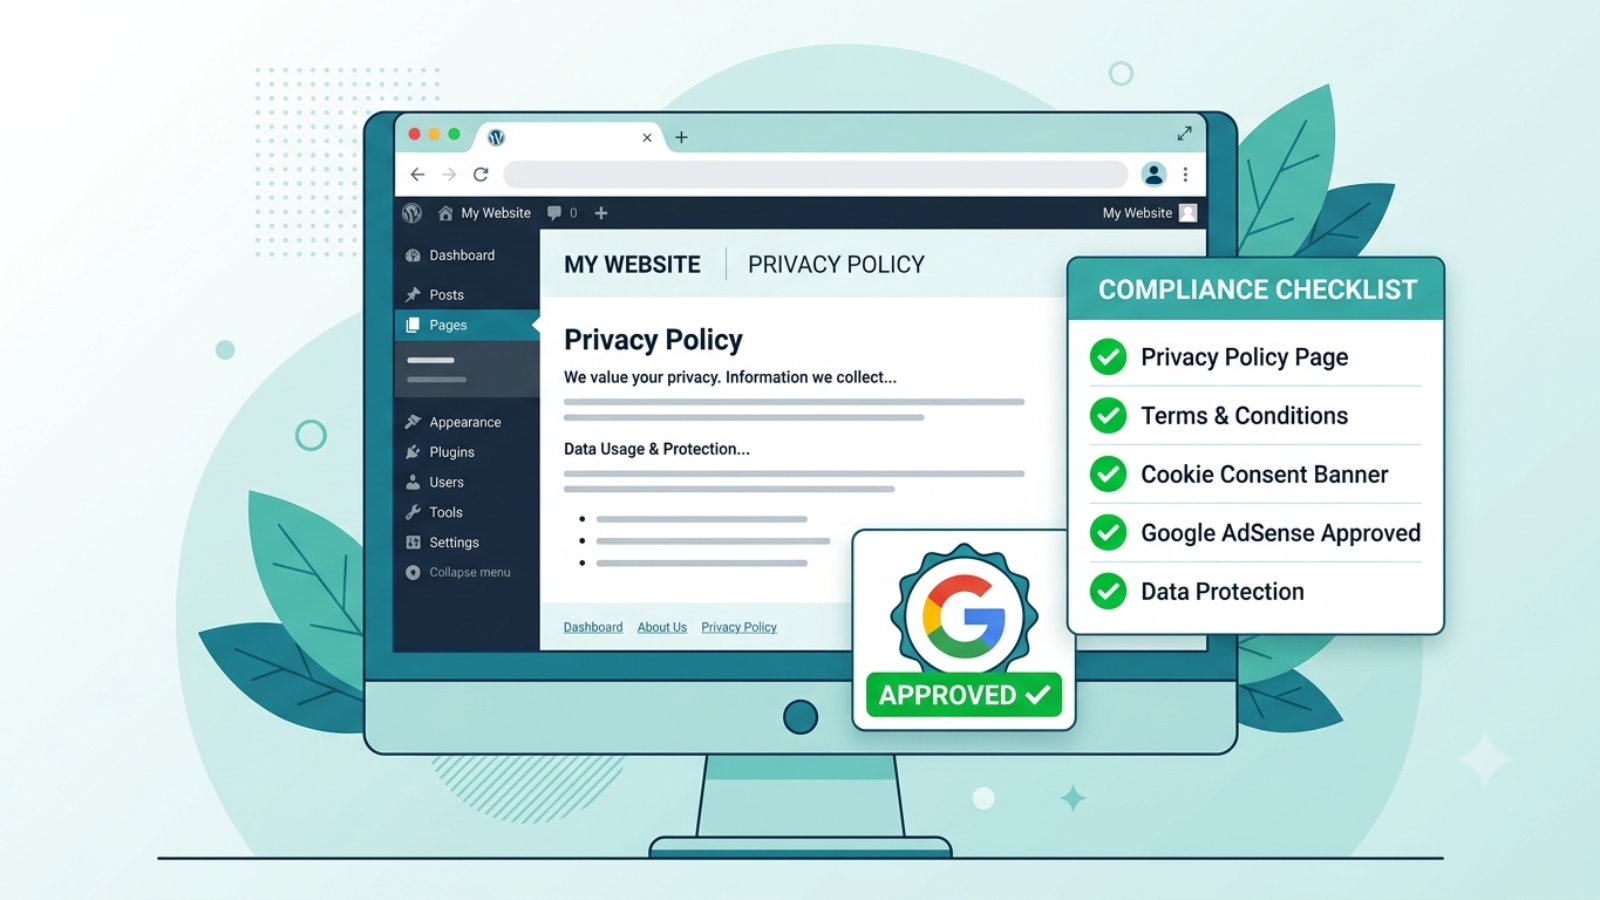
Privacy policy page for Google AdSense approval shown on a WordPress website

How to Create a Privacy Policy Page for Google AdSense Approval

A privacy policy page for Google AdSense is not optional — Google will reject your AdSense application without one. It is one of the first things their review team checks, and getting it wrong is one of the most common reasons new sites fail AdSense approval even when everything else looks fine.

This guide covers exactly what your privacy policy needs to say, how to create one for free, where to add it on your WordPress site, and what else Google checks alongside it during the AdSense review process.

If you’re preparing your WordPress site for AdSense and want to get approved on your first application rather than going back and forth with rejections — read this before you apply.

Why Google AdSense Requires a Privacy Policy

Google AdSense displays personalized ads based on visitor behavior and cookies. Privacy laws in the US (COPPA), EU (GDPR), and UK (UK GDPR) require any website displaying behavioral advertising to disclose this to visitors clearly.

Google enforces this requirement as a condition of AdSense participation. Your privacy policy must specifically disclose that third-party ad networks — including Google — use cookies and collect data to serve personalized ads.

A generic privacy policy template that doesn’t mention advertising cookies will not satisfy AdSense requirements even if it covers everything else correctly.

⚠️ Watch Out: Don’t copy someone else’s privacy policy from another website. Google’s review team checks for this. Copied policies also create legal liability — a policy written for someone else’s business may not accurately describe yours.

What Your Privacy Policy Must Include for AdSense

Google publishes its own requirements for publisher privacy policies. Your policy must cover all of these areas:

1. What Data You Collect

List every type of data your site collects from visitors:

  • Name and email (if you have contact forms or email signup)
  • IP addresses (collected automatically by your server)
  • Browser type and device information
  • Pages visited and time spent (via Google Analytics)
  • Cookies placed by your site and third-party services

2. How You Use That Data

Explain why you collect each type of data:

  • Contact form data — to respond to enquiries
  • Analytics data — to understand how visitors use the site
  • Advertising data — to display relevant ads through Google AdSense

3. Google AdSense and Advertising Cookies

This section is the most critical for AdSense approval. You must specifically state:

  • Your site uses Google AdSense to display advertisements
  • Google uses cookies to serve ads based on visitor behavior
  • Visitors can opt out of personalized ads via Google’s Ads Settings
  • Third-party vendors including Google use cookies to serve ads based on prior visits

Google provides exact required language for this disclosure in their AdSense program policies.

4. Google Analytics

If you use Google Analytics (which you should), disclose this separately:

  • Your site uses Google Analytics to collect anonymous usage data
  • This data helps you understand visitor behavior and improve the site
  • Visitors can opt out via the Google Analytics opt-out browser add-on

5. Cookies

Explain what cookies your site uses and why:

  • Essential cookies — required for the site to function (WooCommerce cart, login sessions)
  • Analytics cookies — Google Analytics tracking
  • Advertising cookies — Google AdSense personalized ads
  • Third-party cookies — any other services (Stripe, WPForms, etc.)

6. Third-Party Links

If your site links to other websites, state that you’re not responsible for the privacy practices of those external sites.

7. Children’s Privacy (COPPA)

State clearly that your site does not knowingly collect data from children under 13. This is required for AdSense regardless of your site’s topic.

8. How to Contact You

Include a contact method — email address or contact form link — so visitors can ask questions about your privacy practices.

9. Policy Last Updated Date

Add a “Last Updated: [date]” line at the top or bottom of the policy. Google wants to see that the policy is maintained and current.

✅ Pro Tip: After AdSense approval, update this date any time you add a new plugin, service, or data collection method to your site. A policy that says “Last Updated: 2023” on a site actively collecting data in 2026 is a red flag during any audit.

How to Create Your Privacy Policy for Free

You have three options — from fastest to most thorough:

Option 1 — Privacy Policy Generator (Fastest)

Use a free privacy policy generator that covers AdSense requirements specifically. The best free options:

  • Termly.io — generates a comprehensive policy covering GDPR, CCPA, and AdSense requirements. Free tier available.
  • PrivacyPolicies.com — clean generator with AdSense-specific options. Free for basic use.
  • GetTerms.io — simple and fast, covers the essentials.

When using any generator:

  • Select “Google AdSense” when asked about advertising services
  • Select “Google Analytics” when asked about analytics
  • Enter your website URL and contact email accurately
  • Download or copy the generated policy

Option 2 — WordPress Privacy Policy Tool (Built In)

WordPress has a built-in privacy policy generator at Dashboard → Settings → Privacy. It creates a draft policy page automatically with common sections pre-filled.

The limitation: the default WordPress policy doesn’t include AdSense-specific language. Use it as a starting point, then add the Google AdSense disclosure section manually from Option 1 above.

Option 3 — Write It Yourself

If you want full control and accuracy, write your policy manually based on the section headings above. This takes longer but produces a policy that accurately describes your specific site rather than a generic template.

For a WordPress developer site like syedaounraza.online, a self-written policy covering all eight sections above is both legally more accurate and more credible to Google’s reviewers than an obvious template.

✅ Pro Tip: Whatever method you use, read the full policy before publishing it. Make sure every service it mentions is actually on your site and every service on your site is actually mentioned. A policy that lists services you don’t use or omits services you do is worse than having no policy at all.

How to Add the Privacy Policy to WordPress

Once your policy is written, adding it to WordPress takes about two minutes.

Create the Page

  1. Go to WordPress Dashboard → Pages → Add New
  2. Title: Privacy Policy
  3. Paste your policy content into the editor
  4. Set the slug to /privacy-policy/
  5. Publish

Tell WordPress About It

WordPress has a specific setting for the privacy policy page:

  1. Go to Settings → Privacy
  2. Under “Change your Privacy Policy page,” select the page you just created
  3. Click Use This Page

This setting tells WordPress — and any privacy-related plugins — which page is your official privacy policy.

Add It to Your Footer Menu

Google’s review team looks for the privacy policy link in your footer. Add it there:

  1. Go to Appearance → Menus
  2. Select your Footer menu (create one if it doesn’t exist)
  3. Under Pages, find and add your Privacy Policy page
  4. Save Menu

Your footer should show: Privacy Policy · Contact · [any other legal pages]

⚠️ Watch Out: Don’t put your privacy policy only in the header navigation. Footer placement is the standard location Google expects and reviewers look for. You can add it to both, but the footer is non-negotiable.

Other Pages Google Checks During AdSense Review

Your privacy policy is the most important requirement but not the only one. During AdSense review, Google also checks:

About Page

Google wants to know who runs the site. Your About page should include your real name, what the site is about, and what kind of content visitors can expect. An anonymous site with no About page is a red flag.

Contact Page

A working contact method must be accessible. A contact form is fine — you don’t need to publish your email address publicly. Go to your contact page and submit a test message to confirm the form actually works before applying.

Content Quality

Google checks that your site has genuine, original content — not thin pages, copied text, or auto-generated content. Before applying, make sure you have at least 15–20 real, original blog posts published. Posts should be at least 800 words each and cover topics relevant to your site’s niche.

Site Age

Google generally prefers sites that have been live for at least 3–6 months before applying. A brand new site with 5 posts is very unlikely to be approved regardless of policy quality.

No Policy Violations

Your existing content must not violate AdSense policies — no adult content, no copyrighted material used without permission, no misleading claims, no content promoting illegal activity.

The AdSense Application Checklist

Before you submit your AdSense application, confirm every item on this list:

  • Privacy policy page published at /privacy-policy/
  • Privacy policy linked in footer menu
  • Privacy policy includes Google AdSense cookie disclosure
  • Privacy policy includes Google Analytics disclosure
  • About page published with real name and site description
  • Contact page with working contact form
  • Minimum 15 original blog posts published
  • All posts minimum 800 words each
  • Google Analytics installed and tracking
  • Site live for at least 3 months
  • No AdSense policy violations in existing content
  • Site loads on mobile without errors
  • No broken links on key pages

✅ Pro Tip: Install Google Site Kit on your WordPress site before applying. It connects Google Analytics, Search Console, and AdSense in one dashboard — and having Search Console data already flowing when you apply shows Google your site is actively indexed and receiving real traffic.

What to Do If Your AdSense Application Is Rejected

AdSense rejection emails are frustratingly vague — they rarely tell you exactly what’s wrong. Common rejection reasons and what they actually mean:

“Insufficient content”
You don’t have enough original posts, or your posts are too short. Add more content — aim for 20+ posts of 1000+ words before reapplying.

“Site does not comply with AdSense policies”
Something on your site violates a policy. Check for: copied content, broken pages, thin pages with less than 300 words, any adult or violent content, or misleading claims.

“Site is under construction”
Your site has pages that are blank, show placeholder content, or have coming soon notices. Remove all placeholder content before applying.

“Privacy policy issues”
Your privacy policy is missing, incomplete, or doesn’t include the required AdSense disclosure. Use the section headings above and confirm the AdSense cookie language is explicitly present.

After fixing the issue, wait at least 2 weeks before reapplying to give Google time to re-crawl your site.

Common Questions

Q: Does my privacy policy need to be written by a lawyer?
A: Not for AdSense approval — a comprehensive policy generated by a reputable tool covers Google’s requirements. For full legal compliance with GDPR or CCPA, professional legal review is advisable but separate from AdSense requirements.

Q: Can I use the same privacy policy on multiple sites?
A: No. Each site needs its own policy accurately describing that specific site’s data practices. A policy listing services you don’t use on that site creates both legal and AdSense compliance issues.

Q: How long does AdSense review take?
A: Typically 1–2 weeks for the initial review. If additional review is needed, it can take up to 4 weeks. You’ll receive an email either approving your account or listing issues to address.

Q: Do I need a cookie consent banner?
A: If your site has visitors from the EU, yes — GDPR requires explicit cookie consent before placing non-essential cookies. Install a free plugin like CookieYes which handles the consent banner and integrates with Google’s Consent Mode for AdSense.

Final Thoughts

Creating a privacy policy page for Google AdSense approval is a one-hour task that most people either skip entirely or do poorly with a three-line template. Neither approach gets you approved.

Use a proper generator like Termly, make sure the AdSense cookie disclosure is explicitly present, publish it at /privacy-policy/, link it in your footer, and check every other item on the application checklist before you submit.

The privacy policy is the easiest part of AdSense approval to get right — the harder part is having enough original, quality content published. Focus on both simultaneously rather than rushing an application before your site is genuinely ready.

If you need help setting up your WordPress site for AdSense — including privacy policy, Google Analytics, Search Console, and Site Kit configuration — Contact me and I’ll get everything in place correctly before you apply.

Multi-partner tourism booking website case study showing three tour brands on one site

How I Built a FareHarbor Booking Site for a Caribbean Tourism Company

A few months ago, a tourism operator in Aruba came to me with a problem that’s more common than people think: they were managing three separate tour brands, each with bookable inventory, and customers had no single place to discover and book all of it. Each brand had its own following, but there was no unified web presence tying them together.

This post walks through exactly how I approached the project — the technical decisions, the challenges that came up, and what I’d tell anyone facing a similar setup.

The Starting Point

The client operated under one umbrella business, working with three partner tour companies — each running their own activities, each with their own FareHarbor account for managing availability and payments. The goal was simple to state and harder to execute: build one WordPress website where a visitor could browse all three brands’ tours, check real-time availability, and book directly — without ever needing to leave the site or figure out which company to contact.

Before this project, customers were finding tours through scattered channels — direct partner websites, social media, word of mouth — with no consistent booking experience and no way for the operator to present everything as one cohesive offering.

✅ Pro Tip: If you’re in a similar position — managing multiple service providers or brands under one umbrella — don’t try to force everything into a single generic page. Customers need to understand which experience belongs to which brand, even while booking everything in one place.

Why FareHarbor

FareHarbor was already the booking system each partner used individually, which made it the obvious technical foundation rather than introducing a new platform and asking three separate businesses to migrate their existing booking workflows. FareHarbor’s Partner Network feature was the key piece that made a unified site possible — it allows one “operator” account to be granted booking permissions across multiple partner accounts, while each partner retains full control of their own inventory and payments on their end.

This meant the WordPress site didn’t need to store or manage any booking data itself. It just needed to display the right widgets, pointed at the right partner inventory, in the right places.

Planning the Site Structure

Before writing any code, the site needed a structure that made sense to a first-time visitor who had no idea three separate companies were involved. I settled on:

  • A homepage introducing the umbrella brand with a clear primary call-to-action
  • A single “Book a Tour” page as the main booking destination
  • Within that page, three distinct sections — one per partner brand — each with its own short introduction, photos, and a FareHarbor Flow widget scoped to that partner’s specific tours
  • Individual tour landing pages for the most popular activities, each with its own booking widget, for better SEO and easier sharing on social media

This structure meant a customer could land on the main booking page and immediately understand: here’s a boat tour company, here’s a party bus company, here’s an adventure sports company — pick what interests you.

The Technical Build

The site was built on WordPress using Elementor for the front-end design, which gave the flexibility to create custom layouts for each partner section without needing to write a custom theme from scratch.

FareHarbor integration approach:

Each partner section used a FareHarbor Flow widget, filtered to that specific partner’s item IDs using the operator shortname and a comma-separated list of item IDs in the embed URL. This was the cleanest way to keep inventory separated visually while still pulling everything through one connected account.

<a href="https://fareharbor.com/embeds/book/operatorshortname/items/12345,67890/?full-items=yes">
  Book [Partner Name] Tours
</a>

Design decisions that mattered:

  • Each partner section used a distinct accent color matching that brand’s existing identity, while keeping the overall page layout consistent — so it felt unified, not chaotic
  • Mobile-first build, since the overwhelming majority of tourists browse and book from their phones, often on hotel wifi or a tourist SIM with limited data
  • WhatsApp contact buttons placed throughout, because in this market a lot of customers want to ask a quick question before committing to a booking, and WhatsApp converts far better than a contact form for this audience

⚠️ Watch Out: When working with multiple FareHarbor partner accounts, every partner has to individually approve your operator account in their FareHarbor Partner settings before their inventory will show up in your widgets. This isn’t something you control from your side — it requires the partner logging into their own FareHarbor dashboard. Build this into your project timeline, because it’s a common bottleneck.

Challenges Along the Way

Coordinating partner approval timing

Since each of the three partners needed to separately approve the operator account inside their own FareHarbor dashboard, the project timeline depended partly on three different businesses responding promptly — not something a developer can speed up directly. The lesson here was building this dependency into the project plan from day one rather than assuming it would happen instantly.

Keeping brand identity intact within a unified site

The client was understandably protective of each partner’s individual brand identity — none of the three wanted to feel like they’d been absorbed into a generic “tours” page. Solving this meant treating each section almost like its own mini-landing-page within the larger site, with distinct photography, color accents, and copy tone, while still sharing the same booking mechanics underneath.

Page speed with multiple embedded widgets

Loading three separate Flow widgets on one page risked slowing things down if not handled carefully. The fix was loading the FareHarbor script tag once in the site header rather than once per widget instance, and lazy-loading each partner section’s widget so it only initialized as the visitor scrolled to that section.

The Result

The umbrella operator now has a single website where visitors can discover and book tours across all three partner brands, with live availability pulled directly from FareHarbor — no manual updates required on the WordPress side when a partner’s schedule changes. Each partner retains full control of their own pricing, availability, and payment processing through their existing FareHarbor account, while benefiting from a more polished, unified web presence than any of them had individually before.

For the operator, it meant turning three disconnected booking experiences into one coherent customer journey — without anyone needing to change how they actually run their day-to-day tour operations.

What I’d Tell Anyone in a Similar Situation

If you’re running multiple brands, partner businesses, or service providers under one umbrella and considering a similar setup, here’s what actually matters most:

  • Confirm partner buy-in and FareHarbor approval timelines before committing to a launch date
  • Design each section to preserve individual brand identity, not flatten everything into one generic look
  • Build mobile-first from day one if your audience is tourists booking on their phones
  • Load shared scripts once, not per widget, to protect page speed
  • Put WhatsApp or a similarly low-friction contact option front and center if your audience prefers chat over forms

If you’re managing something similar — multiple service providers, partner brands, or locations that all need to come together under one booking experience — Contact me and I can walk you through how this could work for your situation.

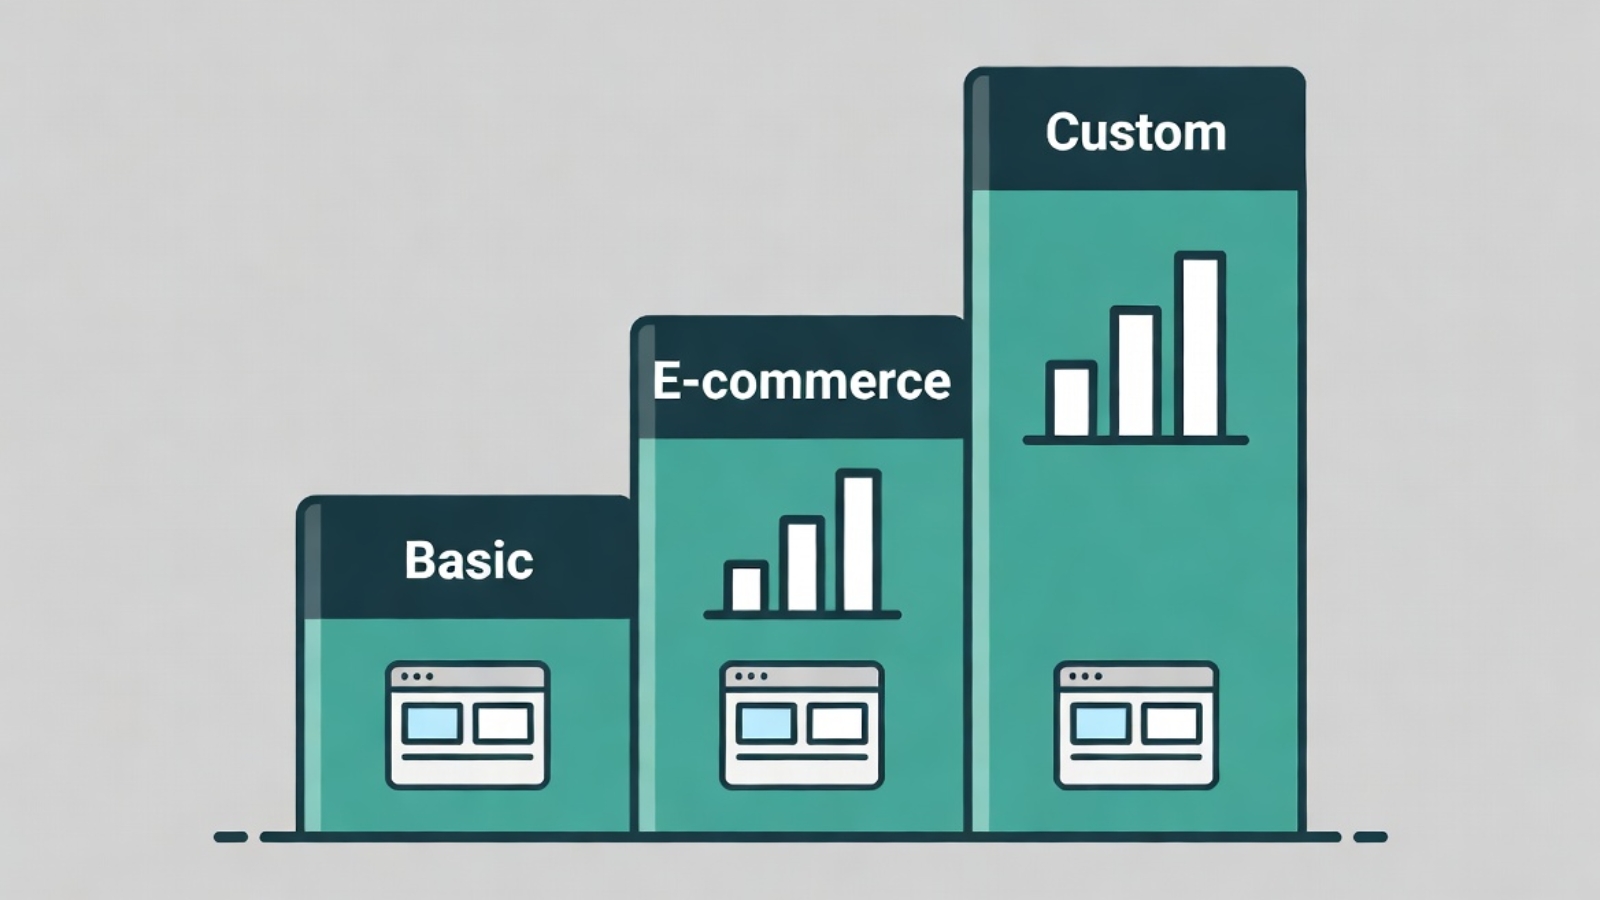
WordPress website cost breakdown illustration showing pricing tiers

How Much Does a WordPress Website Cost in 2026? A Real Pricing Breakdown

“How much will my website cost?” is almost always the first question a business owner asks — and almost always the hardest one to get a straight answer to. Agencies hide pricing behind “request a quote” forms. Freelance marketplaces show wildly different numbers for what looks like the same job. And most pricing guides online are written by agencies trying to upsell you into their most expensive package.

This post breaks down real WordPress website pricing in 2026 — what affects the cost, what you should actually expect to pay for different project types, and where the hidden costs usually hide. I’ve built business sites, e-commerce stores, booking platforms, and bilingual corporate sites for clients across multiple countries, so these numbers reflect real project scopes, not theoretical estimates.

The Short Answer

A simple WordPress business website typically costs $400–$1,500. A WooCommerce e-commerce store typically costs $800–$3,500. A custom-functionality site — booking systems, membership portals, multi-language sites — typically runs $1,500–$6,000+, depending on complexity.

These ranges assume freelance pricing, not large agency pricing, which can be 3–5x higher for the same scope of work.

What Actually Determines the Price

The price of a WordPress website isn’t really about “pages” — it’s about complexity, custom functionality, and how much original design and development work is required versus configuration of existing tools.

Factors that increase cost:

  • Custom functionality (booking systems, calculators, member areas)
  • E-commerce with many products or complex variants
  • Multi-language or bilingual sites, especially RTL languages like Arabic
  • Custom design (not a pre-built theme) with original layouts
  • Third-party integrations (payment gateways, CRMs, booking platforms like FareHarbor)
  • Migration from another platform (Wix, Squarespace, Gloria Food, Shopify)

Factors that keep cost down:

  • Using a quality pre-built theme with Elementor customization instead of fully custom code
  • Standard WooCommerce setup without complex variant logic
  • Fewer than 10 pages
  • Content (text, images) provided by the client rather than written/sourced by the developer

✅ Pro Tip: The single biggest cost driver is usually content readiness. A client who shows up with finished copy, photos, and a clear sitemap will pay significantly less than one expecting the developer to also write all the content and source all the images — because that’s a separate skill set and a separate time cost.

Real Pricing by Project Type

1. Simple Business / Brochure Website

Typical range: $400–$1,500

A 5–8 page site (Home, About, Services, Contact, maybe a Blog) built on WordPress with Elementor, using a quality theme rather than fully custom design. This covers most restaurants, local service businesses, consultants, and small agencies.

What’s typically included:

  • Theme setup and customization to match brand colors/fonts
  • Contact form integration
  • Basic SEO setup (Yoast, meta titles/descriptions)
  • Mobile-responsive design
  • Google Maps embed (for local businesses)

What often costs extra:

  • Custom illustrations or original graphic design
  • Copywriting (if the client doesn’t provide their own text)
  • Stock photography licensing or professional photography

2. WooCommerce E-Commerce Store

Typical range: $800–$3,500

This covers everything from a 10-product store to a few hundred products with variants (size, color, material).

What affects price within this range:

  • Number of products and complexity of variants
  • Payment gateway count (Stripe alone vs. Stripe + PayPal + local options like MobilePay)
  • Shipping zone complexity (single country vs. international)
  • Whether products need bulk CSV import or manual entry
  • Custom checkout flow vs. standard WooCommerce checkout

⚠️ Watch Out: Many cheap e-commerce quotes don’t include payment gateway setup, SSL configuration, or shipping zone configuration as separate cost items — then add them later as “extras.” Always ask for a full scope breakdown before agreeing to a price.

3. Booking / Reservation Websites

Typical range: $1,000–$4,000

This includes integrations like FareHarbor for tourism, custom booking forms, or appointment scheduling systems.

Pricing depends heavily on:

  • Whether you’re using an existing booking platform (FareHarbor, Calendly) vs. fully custom booking logic
  • Number of services/tours/partners being integrated
  • Payment processing requirements
  • Calendar sync needs

4. Bilingual / Multi-Language Websites

Typical range: $1,200–$4,000

A site in two languages (e.g. English + Arabic with RTL support) generally costs 40–70% more than the same site in one language, because:

  • Every page needs to be built and styled for both reading directions
  • Navigation, forms, and buttons need RTL-compatible styling
  • Translation management (WPML or Polylang) needs proper configuration
  • Content needs to be translated (either by the client or a separate translator)

5. Custom Plugin Development / Unique Functionality

Typical range: $500–$3,000+ per feature

If your project needs something WordPress doesn’t do out of the box — a custom calculator, a unique admin dashboard, an API integration with a third-party system — this is priced separately from the website build itself, usually based on hours.

Freelancer vs. Agency Pricing

FreelancerAgency
Simple business site$400–$1,500$1,500–$5,000
WooCommerce store$800–$3,500$3,000–$10,000+
Custom booking site$1,000–$4,000$5,000–$15,000+
CommunicationDirect with the developerThrough account managers
TurnaroundUsually fasterOften slower (more process)
Ongoing supportNegotiated separatelyOften bundled into retainer

Agencies aren’t necessarily better — they’re paying for office overhead, project managers, and sales staff, which gets built into your price. A skilled freelancer doing the actual hands-on work can often deliver the same quality for considerably less, with more direct communication.

Hidden Costs to Ask About Upfront

  • Hosting — usually $3–$15/month, sometimes excluded from the project quote
  • Domain name — around $10–$20/year if you don’t already own one
  • SSL certificate — often free through hosting, but confirm
  • Premium plugins — some functionality (advanced forms, booking calendars) may require paid plugin licenses, typically $50–$200/year
  • Stock photography — if you don’t have your own photos, licensed stock images can add $0–$200 depending on the source
  • Post-launch support — does the price include a bug-fix window after launch, or is every change billed separately?

✅ Pro Tip: Always ask “what is NOT included in this price?” before agreeing to a quote. A clear answer to that question tells you more about a developer’s professionalism than the price itself.

How to Get an Accurate Quote

To get a real, accurate price instead of a vague range, be ready to share:

  • A list of pages you need
  • Any specific functionality (booking, multi-language, e-commerce, integrations)
  • Whether you have existing content (text, photos) or need it created
  • Your target launch date
  • Examples of websites you like (even from competitors)

The more specific you are upfront, the more accurate — and usually lower — your quote will be, because the developer isn’t padding the price to cover unknowns.

Common Questions

Q: Is a $50 website on Fiverr a bad idea?
A: For a genuinely simple single-page site with no custom functionality, it can work. For anything involving e-commerce, custom integrations, or ongoing business use, extremely low prices usually mean template reuse with minimal customization, and little to no post-launch support.

Q: Should I pay monthly or pay upfront?
A: Most freelance web projects are priced as a fixed project fee, often with 50% upfront and 50% on completion. Monthly “website as a service” models exist but often cost more over 12 months than a one-time build with separate hosting.

Q: Does WordPress itself cost money?
A: WordPress software is free and open source. You’re paying for hosting, possibly premium themes/plugins, and the developer’s time to build and configure everything.

Q: How long does a typical project take?
A: A simple business site: 1–2 weeks. A WooCommerce store: 2–4 weeks. A custom booking or multi-language site: 3–6 weeks, depending on complexity and how quickly content is provided.

Final Thoughts

WordPress website pricing varies enormously because “a website” can mean a 5-page brochure site or a fully custom booking platform with three payment gateways and two languages — these are fundamentally different projects with fundamentally different price tags.

The best way to avoid both overpaying and underpaying is to get specific about scope before asking for a price, and to always ask what’s excluded, not just what’s included.

If you’re planning a WordPress project — whether it’s a simple business site, a WooCommerce store, or something with custom booking or bilingual functionality — Contact me and I’ll give you a clear, honest scope and price based on exactly what you need.