HAT Answer Key 2026 July — Download & Calculate Score Before Result

HAT Answer Key 2026 July — Download PDF & Calculate Your Score Before Official Result

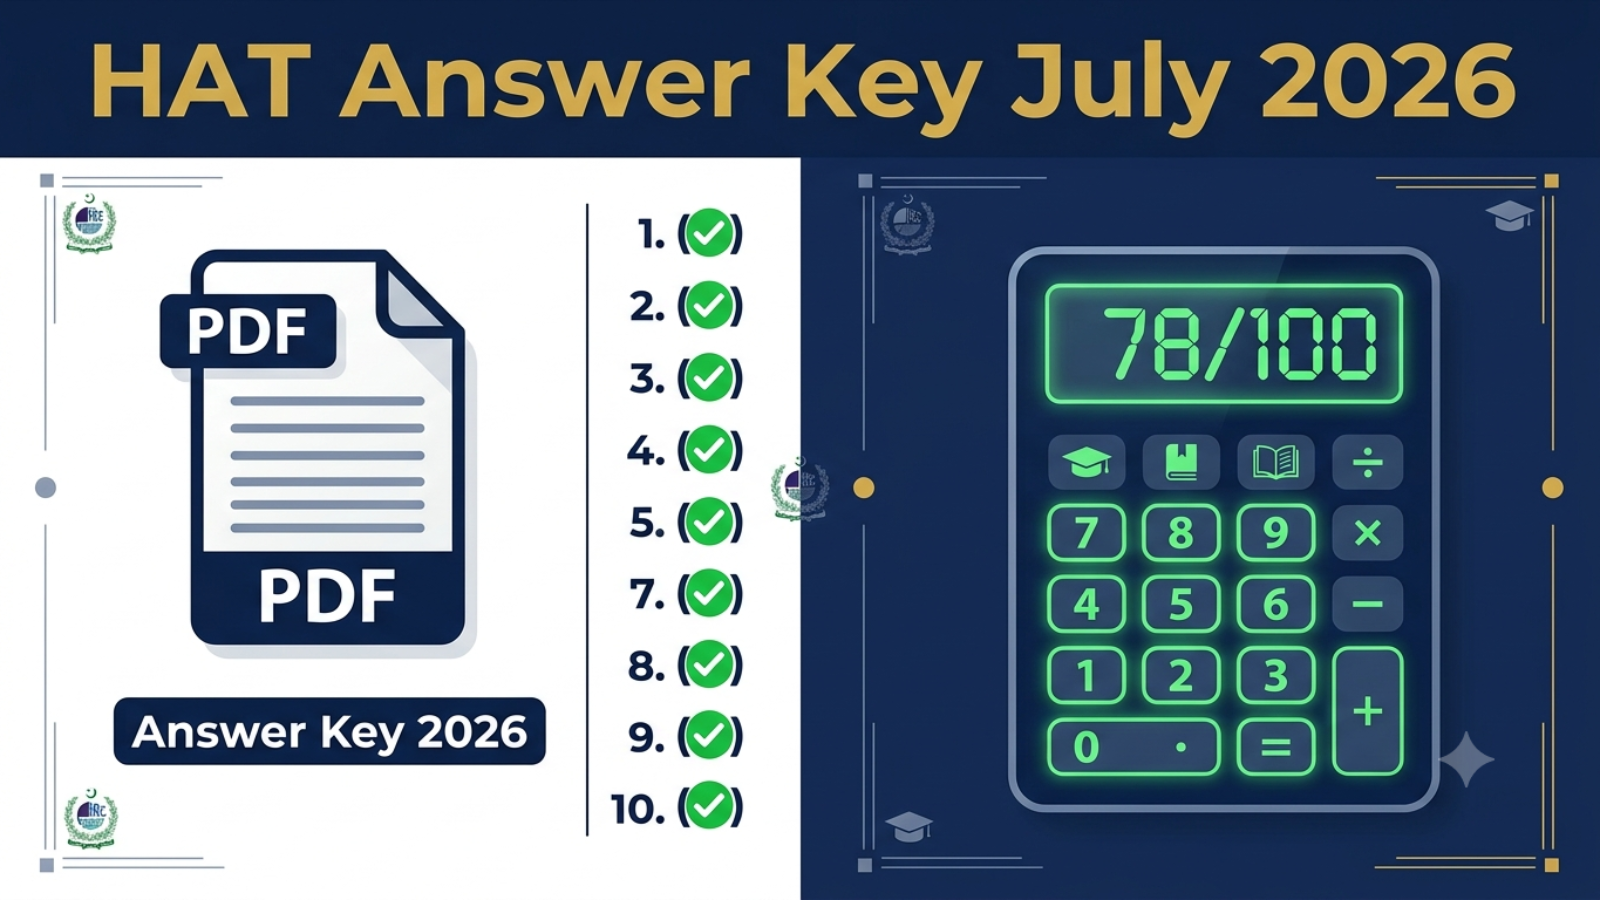
HAT answer key 2026 July — if you appeared in the HEC Higher Education Aptitude Test on July 5, 2026, this is the first thing you need right now. Before the official result is announced on August 1, 2026, the HEC Education Testing Council releases the answer key so every candidate can verify their answers and estimate their final score.

This article gives you the exact steps to download the HAT answer key, calculate your score accurately, understand what your score means, and plan your next move — all before the official result drops.


What Is the HAT Answer Key 2026?

The HAT answer key is an official PDF document published by the Higher Education Commission through the Education Testing Council (ETC). It contains the correct answer for every question in the HAT test, organized by question number and option letter (A, B, C, D, or E).

HEC releases the answer key within 3 to 5 days of the test date. For the July 5, 2026 HAT test, the answer key is expected between July 8 and July 10, 2026.

There are five HAT categories and each has its own separate answer key. Make sure you download the one that matches your category:

HAT CategoryCovers
HAT-1Engineering, IT, Computer Science
HAT-2Social Sciences, Arts, Humanities
HAT-3Medical and Health Sciences
HAT-4Agriculture, Veterinary, Biological Sciences
HAT-5Management Sciences, Business, Commerce

If you appeared for MS/MPhil in Computer Science or IT, you need the HAT-1 answer key.


How to Download HAT Answer Key 2026 July

Step 1. Open your browser and go to the official ETC portal: etc.hec.gov.pk

Step 2. Click on “Result and Keys” from the navigation bar.

Step 3. Look for the entry: “Answer Keys for HAT-MS (July 2026)”

Step 4. Select your category (HAT-1 for Engineering/IT/CS).

Step 5. The answer key will open as a PDF. Click Download to save it.

Step 6. Open the PDF and match it against your remembered answers or the rough work you kept after the test.

Tip: Many experienced candidates carry a small notebook into the test hall and note their chosen answers for each question. If you did this, you can calculate your exact score the same evening the answer key is released.


How to Calculate Your HAT Score Using the Answer Key

HAT uses a simple scoring system. Here is exactly how it works:

  • Each correct answer = 1 mark
  • Wrong answer = 0 marks (no negative marking)
  • Unanswered question = 0 marks
  • Total marks = 100

So your formula is simply:

Your Score = Number of Correct Answers

For example: If you got 42 Verbal questions right out of 50, 24 Quantitative right out of 30, and 16 Analytical right out of 20 — your total score is 82 out of 100.

Use this section-wise breakdown to pinpoint your strengths and weaknesses:

SectionTotal MarksYour Correct AnswersYour Score
Verbal Reasoning50______
Quantitative Reasoning30______
Analytical Reasoning20______
Total100

What Does Your Estimated Score Mean?

Once you have calculated your score from the answer key, here is how to interpret it:

Below 50 — Did not clear the minimum threshold. You will need to reappear in the next HAT cycle. The good news: there is no limit on how many times you can attempt HAT. The September 2026 test is your next opportunity.

50 to 64 — Passed but will struggle for competitive programs. Most universities accept this range but top programs and scholarships will be difficult. Focus on improving your weakest section before retaking.

65 to 74 — Solid score. You are eligible for most MS/MPhil programs in Pakistan. However, for HEC foreign scholarships you will need to push this higher.

75 to 84 — Strong and scholarship-competitive. You are in a good position for HEC-funded scholarships to Italy, China, France, and other partner countries. Apply immediately once results are official.

85 and above — Excellent. You are among the top scorers nationally. Apply for fully funded scholarships to Germany, Italy, France, and other European countries through HEC. Your score puts you in a very strong position.


HAT Answer Key 2026 — Common Mistakes to Avoid When Calculating

Many candidates make errors when self-scoring. Watch out for these:

Mistake 1 — Counting unanswered questions as wrong. There is no negative marking in HAT. Unanswered = 0, not minus 1.

Mistake 2 — Using the wrong category answer key. If you appeared in HAT-1 and accidentally use the HAT-2 key, your calculated score will be completely wrong.

Mistake 3 — Misreading question numbers. If you skipped a question during the test and shifted your answers by one row on the answer sheet, your entire recall will be off. This is why noting answers during the test matters.

Mistake 4 — Panicking over a low estimated score. The answer key estimate is not always exactly equal to your final result. Occasional printing or scanning issues during tests can result in slight variations. Always wait for the official result before making decisions.


I Scored Low in the Answer Key — What Should I Do Right Now?

First, do not wait for the official result to start preparing again. If your estimated score is below 70, begin your next attempt preparation immediately.

Here is a smart 4-week plan before the September 2026 HAT:

Week 1 — Diagnose your weak section. Calculate your score section by section. If Verbal is your lowest, that is where you spend 60% of your time this week.

Week 2 — Practice with real past paper questions. Do not practice random MCQs from unofficial sources. Use questions directly from the Durrani HAT Prep Guide and HEC sample papers. These are the closest to the real exam.

Week 3 — Full mock tests. Take at least 3 complete 100-question mock tests under timed conditions. 120 minutes. No breaks. This builds the exam stamina you need.

Week 4 — Revision and weak area focus. Stop learning new content. Revise everything you have done. Focus exclusively on your weakest question types.

For free practice with 474 real HAT MCQs covering all three sections with full answer explanations, use our dedicated tool:

/👉 Practice HAT MCQs Free — 474 Real Questions


HAT Answer Key 2026 — Section Wise Analysis

Here is what the answer key reveals about each section’s difficulty:

Verbal Reasoning (50 marks): This section tests synonyms, antonyms, analogies, sentence completion, grammar, and reading comprehension. It is the section where most candidates lose the most marks because it requires a strong vocabulary built over months, not days. If you found this hard, dedicate 30 minutes daily to vocabulary building.

Quantitative Reasoning (30 marks): This covers algebra, arithmetic, percentages, ratios, geometry, and word problems. Most Engineering and CS students find this manageable. Common errors happen in word problems and ratio questions under time pressure.

Analytical Reasoning (20 marks): This is pure logic — ordering, grouping, scheduling, and network problems. The Durrani HAT Prep Guide has 25 full analytical tests that match the real HAT pattern almost exactly. If you struggled here, work through all 25 tests systematically.


Next HAT Test 2026 — Key Dates

If you plan to reappear after the July 2026 cycle, here are the upcoming HAT opportunities:

CycleRegistration OpensTest DateResult Expected
HAT September 2026August 2026September 2026October 2026
HAT December 2026November 2026December 2026January 2027

Register early at etc.hec.gov.pk — the portal gets overloaded near deadlines and late registrations are not entertained under any circumstances.


Frequently Asked Questions — HAT Answer Key 2026

Q: When will the HAT answer key 2026 July be released?
Expected between July 8 and July 10, 2026 on etc.hec.gov.pk.

Q: Where can I download the HAT answer key 2026?
Go to etc.hec.gov.pk → Result and Keys → HAT-MS July 2026 → Select your category.

Q: Is there negative marking in HAT 2026?
No. There is no negative marking. Wrong answers and unanswered questions both score zero.

Q: My estimated score is below 50. Can I reappear?
Yes. You can appear in the September 2026 or December 2026 HAT cycle. There is no limit on attempts.

Q: The answer key shows I scored 78. Will the official result be the same?
Usually yes, but minor differences can occur due to technical variations. The official result on August 1 is the final, authoritative score.

Q: I scored 82 in the answer key. Am I eligible for HEC foreign scholarships?
A score of 82 makes you competitive. Most HEC international scholarships require 75+. Apply immediately when the official result is announced and scholarships open.


Useful Links

HAT Result 2026 July — Check Online via CNIC & Roll Number at hec.gov.pk

HAT Result 2026 July — Check Your Score Online

HAT result 2026 July is one of the most searched phrases in Pakistan right now — and for good reason. Thousands of students appeared in the HEC Higher Education Aptitude Test on July 5, 2026, and are now waiting to find out if they made the cut for MS/MPhil admissions and HEC scholarships.

This article tells you exactly when the result will be announced, how to check it online, what your score means, and what to do next — whether you passed or not.


When Will HAT Result 2026 July Be Announced?

The HAT test held on July 5, 2026 has already been conducted successfully across Pakistan. Based on HEC’s official test calendar and the pattern from previous cycles, here is the expected timeline:

MilestoneExpected Date
HAT Test DateJuly 5, 2026
Answer Key ReleaseJuly 8–10, 2026
Official Result AnnouncementAugust 1, 2026
Merit List PublicationAugust 2026

HEC typically announces results within 3 to 4 weeks of the test date. The official result will be published on the ETC portal at etc.hec.gov.pk and on the main HEC website at hec.gov.pk.


How to Check HAT Result 2026 Online

Follow these steps to check your HAT result 2026 as soon as it is announced:

Step 1. Visit the official HEC ETC portal: etc.hec.gov.pk

Step 2. Click on “Result and Keys” from the top navigation menu.

Step 3. Select “HAT-MS Result July 2026” from the list.

Step 4. Enter your CNIC number or Roll Number in the provided field.

Step 5. Click “View Result.” Your scorecard will appear on the screen.

Step 6. Download or print your scorecard for future use in university admissions and scholarship applications.

Important: Your HAT score is valid for two years from the date of the test. This means your July 2026 result can be used for MS/MPhil admissions and HEC scholarships until July 2028.


How to Check HAT Answer Key 2026

Before the official result, HEC releases the answer key so you can estimate your score yourself. Here is how:

Step 1. Go to etc.hec.gov.pk

Step 2. Navigate to “Result and Keys.”

Step 3. Select your HAT category — HAT-1 for Engineering, IT and Computer Science.

Step 4. Download the answer key PDF.

Step 5. Match your answers. Each correct answer = 1 mark. There is no negative marking in HAT.


What Is a Good Score in HAT 2026?

Understanding your score is just as important as checking it. Here is what different score ranges mean:

Score RangeWhat It Means
Below 50Below passing threshold — must reappear
50–59Passing but weak — limited university options
60–74Good — eligible for most MS/MPhil programs
75–84Strong — competitive for HEC scholarships
85+Excellent — highly competitive for fully funded foreign scholarships

The minimum passing score is 50 out of 100. However, for HEC foreign scholarships to Italy, Germany, China, and other countries, you need 75 or above to be seriously competitive. Top candidates who score 85+ stand the best chance of securing fully funded scholarships abroad.


HAT Result 2026 — What to Do If You Passed

Congratulations if you cleared the HAT. Here is your immediate action plan:

1. Download your scorecard from the ETC portal and save multiple copies.

2. Apply for MS/MPhil programs at public and private universities in Pakistan that accept HAT scores. Most top universities including QAU, NUST, COMSATS, and UET accept HAT in place of their own entry tests.

3. Apply for HEC scholarships — your HAT score is a mandatory requirement for most HEC-funded foreign scholarship programs. Check active scholarships at hec.gov.pk.

4. Check the HEC Italy and Germany scholarship programs — these are fully funded and require HAT 75+ as part of the eligibility criteria.


HAT Result 2026 — What to Do If You Did Not Pass

Do not panic. HAT is conducted multiple times a year and you can reappear in the next cycle.

Next HAT test dates in 2026:

  • September 2026 (registration opens August 2026)
  • December 2026 (registration opens November 2026)

The next available HAT test after July is in September 2026. Start your preparation now using real past paper questions.

Most importantly — identify your weak section. If your Analytical Reasoning let you down, practice all 25 full analytical tests. If Verbal was the problem, practice synonyms, antonyms, analogies, and grammar daily.

Want to start right now? Practice free HAT MCQs using real past paper questions on our dedicated preparation tool:

👉 HAT Test Preparation 2026 — Free Practice MCQs


HAT Merit List 2026 — How It Works

After the result is announced, HEC publishes a national merit list. Here is how it works:

The merit list ranks all candidates who appeared in the same HAT category by their score from highest to lowest. Universities and scholarship programs then select candidates from this merit list based on their own cutoff scores. A higher position on the merit list means a significantly better chance of getting into your preferred program or winning a scholarship.

Your percentile rank is as important as your raw score. A score of 75 might put you in the top 20% of all candidates, which is a strong position for scholarship applications.


Frequently Asked Questions — HAT Result 2026

Q: When will HAT result 2026 July be announced?
The result is expected on August 1, 2026 on etc.hec.gov.pk.

Q: How do I check my HAT result 2026?
Visit etc.hec.gov.pk, go to Result and Keys, select HAT July 2026, and enter your CNIC or Roll Number.

Q: What is the passing score for HAT 2026?
50 out of 100 is the minimum passing score. For scholarships, aim for 75+.

Q: Can I recheck my HAT result?
No. HEC does not offer a rechecking facility. However you can verify using the official answer key.

Q: How long is my HAT score valid?
HAT scores are valid for two years from the test date.

Q: I failed. When is the next HAT test?
The next HAT test is scheduled for September 2026. Registration opens in August 2026 at etc.hec.gov.pk.

Q: Can I use my HAT score for foreign scholarships?
Yes. HEC scholarships to Germany, Italy, China, France, and other countries all require a valid HAT score.


Stay Updated

For the latest HAT result 2026 updates, answer key release, and merit list, bookmark this page and check the official HEC portal at hec.gov.pk and etc.hec.gov.pk.

If you are planning to reappear, do not waste time. Start your preparation today with 474 real HAT MCQs covering all three sections — Verbal, Quantitative, and Analytical Reasoning:

👉 Start Free HAT Practice — 474 Real MCQs

Website development cost comparison dashboard showing pricing tiers by platform

Website Development Cost in 2026: The Complete Pricing Guide

Quick answer: Website development in 2026 typically costs between $1,000 and $15,000 for most small businesses, with basic sites at the low end and custom-featured builds at the high end. WordPress ranges roughly $500–$30,000+ depending on complexity, Wix Studio sites usually fall in a similar low-to-mid range with more predictable bundled pricing, and mobile apps (like Flutter builds) start higher due to backend and platform requirements. The real number depends far more on scope — integrations, e-commerce, custom design, and ongoing maintenance — than on which platform you choose.

If you’ve searched this question and found ranges anywhere from $500 to $500,000, you’re not imagining things — that’s genuinely how wide the market is. This guide breaks down why, using real 2026 market data, so you can budget with actual numbers instead of guesses.

Why “How Much Does a Website Cost” Has No Single Answer

A recent industry-wide survey of over 300 web development firms across 31 countries found that fixed-price web development projects in 2026 range from $1,000 to $150,000 or more, with 63% of agencies quoting between $1,000 and $15,000. That’s the honest starting point: most small business projects land in a fairly predictable band, but the ceiling is genuinely open-ended once you add complexity. YouTube

The same survey found that basic websites and MVPs cost $1,000 to $3,000 for 60% of agencies, with 71% delivering them in under four weeks, while enterprise builds show the widest spread — 36% quote $20,000 to $50,000, and 7% go as high as $200,000 to $500,000. Two businesses can both say “I need a website” and mean completely different projects. YouTube

WordPress Pricing: The Full Range

WordPress remains the most commonly used platform among web development firms — the same 2026 survey found 83% of respondent agencies build on WordPress, far ahead of any competitor. That popularity is exactly why its pricing spans so widely. YouTube

Basic WordPress sites: According to industry pricing data, simple WordPress websites typically cost $500 to $5,000, while fully custom builds with advanced features range from $5,000 to $30,000. Wix

Mid-range custom builds: Looking at the market more broadly, WordPress’s $3,000 to $10,000 modal range reflects its versatility, while complex builds handled by experienced WordPress development companies regularly reach $40,000 or more when custom plugin development, multisite architecture, or advanced editorial workflows are involved. YouTube

What actually drives the price up: One detailed 2026 pricing breakdown notes that the important factor isn’t a flat number but what kind of WordPress site you’re buying and what has to keep working after launch — deeper planning, custom design systems, cleaner development, more QA, migration planning, and long-term support all separate a $5,000 site from a $25,000 one. Omi AI

Maintenance — the cost most people forget: This is where budgets get blindsided. WordPress maintenance through a managed service typically runs $79 to $200 per month for a small business site, with the industry average across major providers landing around $246 per month. That’s an ongoing cost on top of the initial build — and it’s rarely mentioned in the first quote. Wix

For a full breakdown specific to smaller projects, see our WordPress website cost guide for 2026.

Custom WordPress Development: Plugins, Themes, and Integrations

If your project needs something WordPress doesn’t do out of the box — a custom plugin, a fully bespoke theme, or an integration with an external system — pricing shifts into a different bracket entirely. A detailed 2026 custom development pricing guide puts it plainly: custom WordPress development typically ranges from $2,000 to $15,000 or more, depending on whether you need a plugin, theme, or integration, and the level of complexity involved — and vague ranges like “$500 to $50,000” aren’t a budget, they’re a guess. Wix

At the higher end of custom plugin work specifically, plugins with complex logic, custom admin dashboards, or integration with third-party services — like booking systems or custom reporting tools — typically run $4,000 to $6,000 or more. Wix

This is directly relevant if you’re building something like a booking system or an AI-powered feature — these fall squarely into “custom integration” territory, not template pricing.

Wix Studio Pricing: How It Compares

Wix Studio sits in a genuinely different pricing model — instead of piecing together hosting, themes, plugins, and developer hours separately, most of that gets bundled into a plan. This tends to make Wix pricing more predictable upfront, though it comes with less long-term flexibility once you’re locked into the platform’s ecosystem (a tradeoff we cover in detail in our Wix Studio vs WordPress comparison).

For most small-to-medium projects, Wix Studio costs land in a broadly similar range to a mid-tier WordPress build — the real differentiator isn’t raw cost, it’s what you’re trading for that predictability: less control over hosting and long-term portability, in exchange for less maintenance overhead.

Enterprise and Corporate Website Pricing

If you’re planning something bigger — a full corporate site, a lead-generation platform for a mid-market company, or an e-commerce build at scale — the numbers jump substantially. Recent 2026 pricing data shows midmarket and corporate marketing sites typically span $15,000 to $75,000 for a complete project, with a median around $36,500. Wix

E-commerce specifically scales even higher: full custom e-commerce builds on platforms like Shopify Plus, or headless architectures, typically land between $45,000 and $250,000 depending on catalog complexity, ERP integration, and front-end requirements. Wix

Interestingly, even with AI tools now standard across the industry, prices haven’t dropped at this tier. The same data notes AI coding assistants have compressed production timelines by 22 to 34%, yet average project invoices have held steady or increased slightly, because buyers now expect more for the same budget — Core Web Vitals compliance, accessibility standards, and conversion optimization are no longer optional extras. Wix

Mobile App Development: Flutter and Firebase Costs

If your project is a mobile app rather than a website, the cost structure shifts again — apps typically involve backend infrastructure (like Firebase) from day one, which websites often don’t need. We cover this in detail in our Flutter app development cost guide, but the short version: a simple MVP app costs meaningfully less than a full-featured app with real-time data, authentication, and payments, and the smartest budgeting approach is scoping your exact feature list before requesting quotes — generic per-app pricing ranges are even less reliable for mobile than they are for websites.

What Actually Pushes Any Project’s Price Up

Across WordPress, Wix, and custom app development, the same cost drivers show up repeatedly:

  • Custom design work — Original UX research and bespoke visual design adds real hours, not just template customization
  • Content operations — Professional copywriting and image direction is frequently underestimated in a first budget
  • Third-party integrations — Payment gateways, CRMs, booking systems, or AI features all add scoped development time
  • Technical instrumentation — Analytics, tag management, and search monitoring are increasingly standard but rarely included in the cheapest quotes
  • Ongoing maintenance — Security updates, backups, and monitoring are a recurring cost, not a one-time fee

One 2026 industry breakdown puts it simply: the right price for a project is determined more by scope clarity and integration complexity than by which vendor or platform you choose, and spending even a few hours defining scope in detail before requesting proposals typically reduces quoted price variance by 30 to 50%. Wix

How to Get an Accurate Quote (Not a Guess)

Given how widely these numbers swing, the only reliable way to budget is to define your scope before asking for a price. That means listing out:

  1. Every page or screen your project needs
  2. Whether you need e-commerce, bookings, or user accounts
  3. Any third-party integrations (payments, CRMs, booking systems, AI features)
  4. Whether content and copywriting are included or handled separately
  5. Your expectations for ongoing maintenance and support after launch

A developer working from that list can give you a scoped, defensible number. A developer working from “how much for a website?” is guessing just as much as you are.

Frequently Asked Questions

Is WordPress cheaper than Wix Studio?
Not necessarily — for comparable small business projects, both land in a similar overall range. The real difference is in what you’re paying for: WordPress offers more long-term flexibility and plugin variety, while Wix bundles hosting and maintenance into more predictable pricing.

Why do WordPress quotes vary so much between freelancers and agencies?
Freelancers typically charge 30–100% less than agencies for comparable scope, since agency pricing includes project management, QA processes, and broader accountability structures that freelancers often don’t carry as overhead.

Does a cheaper website cost more in the long run?
Often, yes — if it lacks proper technical foundations (clean code, security practices, scalable structure), it can require a costly rebuild sooner than a slightly more expensive, properly built site would have.

Is AI making websites cheaper to build in 2026?
For basic sites, yes — AI-assisted tools have compressed timelines and lowered entry-level pricing. For complex, custom, or enterprise builds, overall invoices have held steady or risen slightly, since expectations for quality and functionality have risen alongside the efficiency gains.

What’s the single biggest hidden cost people forget to budget for?
Ongoing maintenance. A website’s launch cost is only part of the picture — hosting, security updates, and content upkeep are recurring costs that should be part of the original budget conversation, not a surprise afterward.


Not sure what your specific project should actually cost? Contact us with your requirements for a scoped, honest estimate — not a generic range.

WordPress booking plugin calendar interface for restaurant table reservations

Best WordPress Booking Plugins for Restaurants & Tours (2026)

Quick answer: There’s no single “best” WordPress booking plugin — the right choice depends on what you’re booking. Restaurants need table and party-size logic (Five Star Restaurant Reservations, WPCafe), tour and activity businesses need departure-based inventory (FareHarbor, Yatra Pro), and WooCommerce store owners selling bookable products should use WooCommerce Bookings directly inside their existing store. Picking based on category — not a generic “top 10” list — is what actually matters.

If you’ve searched “best WordPress booking plugin” and found a dozen conflicting lists, that’s because the word “booking” covers very different workflows. Here’s how to actually choose, based on your business type.

Why “Best Overall” Doesn’t Really Exist Here

An appointment plugin built for a salon handles staff schedules and service slots. A restaurant reservation system needs to think in tables, covers, and party size. A tour booking plugin needs departure dates, capacity limits, and anti-overbooking logic. A rental plugin needs inventory and pricing tiers. Stretching one tool to do all of these usually leads to a clunky setup — the smarter approach is matching the plugin to the category your business actually falls into.

If You Run a Restaurant or Café

Restaurant bookings are about tables, service windows, and party size — not staff calendars. For this category, dedicated restaurant reservation tools tend to outperform generic appointment plugins because they’re built around the actual guest-flow problem: party size rules, service hours, blocked dates, and reducing no-shows through automated reminders.

If you’re also running food ordering alongside reservations (not just bookings), an all-in-one restaurant plugin that handles both menus and table bookings in one dashboard tends to be less messy than stitching two separate tools together.

This connects directly to a project we’ve covered before — see our case study on migrating a restaurant from Gloria Food to WooCommerce, where ordering and booking needed to work together on one platform.

If You Run Tours, Activities, or Rentals

This is a completely different problem: you’re managing departure dates, capacity per date, and often multi-day availability — not single time slots. Tools built specifically for this space handle departures as core objects (with cutoffs and anti-overbooking locks), rather than treating dates as an afterthought bolted onto a generic booking form.

We’ve built this exact kind of system before — see our FareHarbor booking integration case study and the accompanying step-by-step FareHarbor + WordPress setup guide for a real example of how this works in practice.

If You Already Run a WooCommerce Store

If you’re selling physical products and want to add bookable services (equipment rental, workshop seats, photography sessions) without leaving your existing store, WooCommerce’s official Bookings extension is built specifically for this — every booking flows through the same order management, payment gateways, and reporting you’re already using, so you’re not managing two disconnected systems.

What to Actually Check Before Choosing Any Plugin

Regardless of category, these matter more than feature-list length:

  • Real-time availability — booked slots should close immediately, with no double-booking risk
  • Reminder automation — email/SMS reminders meaningfully reduce no-shows
  • Payment/deposit support — especially important for tours and higher-value reservations
  • Elementor or page-builder compatibility — if your site is built in Elementor, confirm the plugin’s booking widgets work natively inside it, rather than needing a separate shortcode workaround
  • Support and update history — check the plugin’s WordPress.org page for recent updates and real user reviews, not just the vendor’s own marketing page

A Word on “Free” Plugins

Many booking plugins offer a free tier, but it’s worth checking exactly what’s excluded before committing — commonly, free versions limit you to one staff member/location, no payment processing, and no SMS/WhatsApp reminders. If your business genuinely needs multi-location support or automated payment collection, budget for a paid tier from the start rather than hitting a wall mid-setup.

Frequently Asked Questions

Can one plugin handle both restaurant reservations and tour bookings?
Generally not well. These require fundamentally different data models — tables/party size versus departures/capacity — so using a dedicated tool for each category gives a cleaner result than forcing one plugin to do both.

Do I need WooCommerce to add booking functionality to WordPress?
No. Standalone booking plugins work independently of WooCommerce. WooCommerce Bookings is only the right choice if you’re already running a WooCommerce store and want bookings integrated into that existing setup.

What’s the biggest mistake businesses make when choosing a booking plugin?
Picking based on a generic “best of” list rather than their actual booking category — an appointment plugin, a restaurant reservation tool, and a tour booking system solve genuinely different problems.

Does Elementor work with booking plugins?
Many do offer Elementor-compatible widgets (search forms, booking calendars, listing shortcodes), but this varies by plugin — always confirm before building your page layout around it.


Not sure which booking system fits your restaurant, tour business, or rental operation? Contact us and we’ll help you scope the right setup.

AI chatbot feature integrated into a Flutter mobile app using Firebase

How to Add AI Features to a Flutter App with Firebase (2026)

Quick answer: You can add AI features to a Flutter app using Firebase AI Logic, which connects your app directly to Google’s Gemini models through a secure client SDK. This lets you build chatbots, smart recommendations, and content generation without managing your own backend server for basic use cases. Setup typically takes a few days depending on how deeply the AI feature is integrated into your app’s logic.

If you’re building a Flutter app in 2026, AI isn’t an add-on anymore — it’s often expected. Here’s exactly how to integrate it properly, using Google’s own recommended approach.

Why Firebase AI Logic Is the Right Starting Point

Firebase already handles authentication, databases, and hosting for most Flutter apps — so extending it to AI keeps everything in one ecosystem. According to Firebase’s official documentation, the AI Logic client SDKs are built specifically for mobile and web apps, offering security options against unauthorized clients along with integrations with other Firebase services, and are available in Dart for Flutter among other platforms. LOGEIX

This matters because it allows switching between Gemini API providers just by enabling a different API and changing a few lines of initialization code, and several client SDKs even support on-device inference that falls back to the cloud model when needed. LOGEIX

How the Integration Actually Works

Step 1: Set up Firebase AI Logic in the console
In the Firebase console, under AI Services, you select AI Logic and click “Get started” to launch a guided setup that configures the required APIs and resources for your project. You’ll choose between the Gemini Developer API (simpler, good for getting started) or Vertex AI Gemini API (more enterprise-focused, requires billing setup). SUSO

Step 2: Add the SDK to your Flutter app
The core package for this is firebase_ai, available on pub.dev, which supports all three major model types and is the central tool for connecting a Flutter client to Gemini. X

Step 3: Initialize Firebase in your app
This happens in your main.dart file, connecting your app to the Firebase project you configured, typically using the FlutterFire CLI to generate the right configuration files automatically.

Step 4: Create your model instance and start calling Gemini
Once initialized, you create a generative model instance and start sending prompts — this is the part that actually generates AI responses inside your app, whether that’s a chatbot reply, a content suggestion, or a data-driven recommendation.

Step 5: Test thoroughly before shipping
Because AI responses aren’t always predictable, test with a wide range of real user-style inputs, not just clean example prompts.

Full setup details are available directly in Firebase’s official AI Logic documentation, which covers platform-specific requirements for Flutter, Android, iOS, and web.

Security: Don’t Skip This Part

This is the step most tutorials gloss over, and it matters. If your Flutter app calls Gemini directly from the client, you should not commit your Firebase configuration file to a public repository, since anyone could reuse it to send requests to your AI endpoint, consuming quota and potentially causing billing costs. For production apps, the recommended approach is routing AI requests through a backend service — like Cloud Functions for Firebase or Cloud Run — so the backend, not the client, controls access. PeekYouPeekYou

In practice, this means: prototype quickly with direct client calls, but before launching publicly, move sensitive AI logic behind a backend function.

What You Can Actually Build

1. In-App AI Chat
A conversational assistant inside your app — for support, onboarding, or general Q&A. Google’s own AI Toolkit for Flutter provides ready-made chat widgets supporting multiturn conversations, streaming responses, and even voice input, built specifically around Firebase AI Logic. PeekYou

2. Smart Content Generation
Apps that generate personalized text — recipe suggestions, product descriptions, or learning content — based on simple prompts, without needing a custom-trained model.

3. Real-Time Recommendations
Using AI to suggest relevant options based on user behavior or stated preferences — practical for booking, e-commerce, or hospitality-style apps.

4. Live Voice/Video AI Interaction
The Gemini Live API enables low-latency, real-time voice and video interactions with a Gemini model, processing continuous streams of audio, video, or text to deliver immediate, human-like spoken responses. This is more advanced and best suited for apps where natural conversation is core to the experience. Quotes

What This Typically Costs

  • Basic AI chat feature (client-side, simple prompts): Lower cost, often a few days of integration work
  • Custom AI feature with backend security (Cloud Functions, production-ready): Mid-range cost, more setup time due to the added backend layer
  • Advanced features (Live API, voice/video, multi-step AI workflows): Higher cost, scoped individually based on complexity

As always, the only accurate way to budget is scoping your exact feature list with a developer rather than relying on generic estimates.

Mistakes to Avoid

  • Committing API keys or Firebase config files to public repositories — this is a real, common security mistake
  • Skipping Firebase App Check — this helps protect your API from abuse and unauthorized use
  • Building only for the “happy path” — test with messy, unexpected user inputs before launch
  • Going straight to advanced features — start with a simple chat or recommendation feature, validate it works well, then expand

Frequently Asked Questions

Do I need a backend server to add AI to a Flutter app?
Not necessarily for prototyping — Firebase AI Logic supports direct client-side calls. For production apps, routing through a backend (like Cloud Functions) is the safer, recommended approach.

Which AI model does Firebase AI Logic use?
It connects to Google’s Gemini models, with options to use either the Gemini Developer API or the Vertex AI Gemini API depending on your project’s needs.

Is this only for chatbots?
No — it supports chat, content generation, recommendations, and even real-time voice/video interaction through the Gemini Live API.

How secure is this approach?
When set up correctly (using Firebase App Check and, for production, backend-routed requests), it’s designed specifically to prevent API key exposure and abuse.


Want AI features built into your Flutter app the right way — secure, scoped, and production-ready? Contact us with your app idea for a quote.

AI features being added to a Wix Velo website through custom code integration

How to Add AI Features to Your Wix Velo Website (2026 Guide)

Quick answer: You can add AI features to a Wix Velo website by using Velo’s backend code environment to connect your site to an AI API (like OpenAI), storing your API key securely in Wix’s Secrets Manager, and building a frontend interface (chatbot, content generator, or smart search) using Wix’s $w elements. Basic AI chat features can be added in a few days; more advanced automation takes longer depending on complexity.

Wix has come a long way from being “just a drag-and-drop builder.” With Velo — Wix’s custom code layer — you can build genuinely smart, AI-powered features directly into a Wix site. Here’s exactly how it works, what’s possible, and what it actually costs to build.

Why Add AI to a Wix Velo Site

Most Wix sites are still static — they look good but don’t do much. Adding AI changes that:

  • Instant customer answers through an AI chatbot, without needing separate live-chat software
  • Automated content help — AI-assisted blog drafts, product descriptions, or FAQ generation
  • Smarter search and recommendations based on what visitors are actually looking for
  • Lead qualification — an AI assistant that asks the right questions before a lead reaches your inbox

For small businesses, this often replaces tools they’d otherwise pay for separately (chat widgets, content assistants, form logic).

How Velo Connects to AI: The Technical Basics

Velo gives you a backend coding environment inside Wix, and that’s where AI integration happens. According to Wix’s own developer documentation, calling external APIs from the backend avoids CORS issues and keeps sensitive keys secure, and any API keys should always be stored using the Secrets Manager rather than exposed on the frontend. Google

The general flow looks like this:

  1. Enable Dev Mode on your Wix site to access the Velo code panel
  2. Create a backend .jsw file — this is where your AI API calls live, completely separate from the visible frontend
  3. Store your AI provider’s API key in the Secrets Manager — never hard-code it into your site
  4. Write a backend function that sends visitor input to the AI API and returns a response
  5. Build a simple frontend UI using Wix Editor elements ($w) — a text box, a button, and a response area is enough for a basic chatbot
  6. Test in Preview mode before publishing, checking both the request and response carefully

Wix’s own documentation on integrating third-party services in Velo walks through this exact backend-to-API pattern in more depth, including how the Secrets Manager and fetch() function work together.

Common AI Features You Can Build

1. AI Chatbot
The most common request. A visitor types a question, it’s sent to an AI model on the backend, and the response streams back into a chat-style widget. This can be trained on your specific business content so it doesn’t give generic answers.

2. AI Content Assistant
A form where a site owner (or admin) inputs a topic, and the backend calls an AI API to draft blog content, product descriptions, or FAQ answers — useful for sites that publish regularly but don’t have a full-time writer.

3. Smart Search / Recommendations
Instead of basic keyword search, AI can help match visitor intent to the right product, service, or page — particularly useful for larger catalogs or service menus.

4. Automated Lead Qualification
An AI assistant asks a few smart follow-up questions before handing a lead to a human — filtering out low-intent inquiries before they hit your inbox.

What Makes This Different From Just Installing a Plugin

Unlike WordPress, Wix doesn’t have the same plugin ecosystem for AI tools — most meaningful AI integrations on Wix go through Velo’s custom code layer rather than a one-click install. This means:

  • More flexibility — you can train responses on your exact business content, not a generic template
  • More setup work upfront — there’s genuine backend coding involved, even if it’s relatively lightweight
  • Better long-term control — you’re not dependent on a third-party app’s pricing changes or feature limits

What This Typically Costs

  • Basic AI chatbot (FAQ-style, pre-set responses): Lower cost, faster turnaround — often just a few days of setup
  • Custom-trained AI assistant (trained on your specific business content, with lead capture): Mid-range project cost, typically a week or so of development
  • Advanced automation (content generation tools, smart recommendations, multi-step workflows): Higher cost and longer timeline, scoped based on exact requirements

As with most custom development, the honest answer is: it depends on your feature list. A scoped conversation with a developer beats any generic price estimate.

Mistakes to Avoid

  • Skipping the Secrets Manager — never place API keys directly in frontend code; this is a real security risk
  • Not testing thoroughly in Preview mode — AI responses can behave unexpectedly with edge-case inputs
  • Building without a fallback — always include a way for visitors to reach a human if the AI can’t help
  • Over-scoping the first version — start with one AI feature (like a chatbot), prove it works, then expand

Frequently Asked Questions

Can Wix Studio sites use AI without coding?
Some basic AI-adjacent features exist in Wix’s built-in tools, but genuinely custom AI functionality (chatbots trained on your content, smart automation) requires Velo’s backend code environment.

Is Velo required for AI integration on Wix?
Yes, for anything beyond Wix’s built-in generic tools. Velo is what allows a Wix site to securely call external AI APIs and process responses.

Does adding AI features slow down a Wix site?
Not if implemented properly — backend API calls don’t block frontend load times when built correctly, since the heavy lifting happens server-side.

How do I keep my AI API key secure on Wix?
Always store it in Wix’s Secrets Manager and access it only from backend code — never expose it in frontend elements or client-side code.


Want an AI chatbot or custom AI feature built into your Wix Velo site? Contact us with what you have in mind for a scoped quote.

Side-by-side comparison of Wix Studio and WordPress website platforms

Wix Studio vs WordPress: Which Should You Choose in 2026?

Quick answer: Choose WordPress if you need maximum flexibility, plugin variety, and long-term scalability for a growing business. Choose Wix Studio if you want a faster build, easier design control, and don’t need deep custom functionality. Neither is universally “better” — the right choice depends on your technical needs, budget, and how much control you want over the backend.

If you’re starting a new website project in 2026, this is one of the first decisions you’ll make. Here’s an honest, practical comparison — not just a features list.

The Core Difference

  • WordPress is open-source and self-hosted. You control everything, but you’re also responsible for updates, security, and hosting.
  • Wix Studio is a hosted, all-in-one platform. Wix manages hosting and security, and you build using their visual editor, with Velo (Wix’s custom code layer) available for advanced functionality.

When WordPress Makes More Sense

  • You need specific plugins (advanced booking systems, complex WooCommerce stores, membership sites)
  • You expect to scale significantly and want full control over performance and hosting
  • You want the flexibility to switch developers or hosts freely — WordPress isn’t locked to one platform
  • Your project needs deep custom functionality beyond what page builders support

When Wix Studio Makes More Sense

  • You want a faster turnaround with strong built-in design tools
  • You don’t want to manage hosting, security updates, or plugin conflicts
  • Your site needs moderate custom functionality — Velo handles a lot without needing a fully custom build
  • You’re a small business or startup that values simplicity over maximum flexibility

Cost Comparison

  • WordPress: Hosting and plugin costs vary, but you have full control over spend — from cheap shared hosting to premium managed hosting
  • Wix Studio: Pricing is bundled into plans, generally predictable, but less negotiable since you’re tied to Wix’s ecosystem

Neither is inherently cheaper — it depends on scope, plugins/apps needed, and long-term maintenance.

Performance and SEO

Both platforms can rank well in 2026 if built correctly. WordPress historically has more SEO plugin options (like Yoast), giving more granular control. Wix Studio has significantly improved its native SEO tools in recent years and is no longer the weak point it once was.

Long-Term Flexibility

This is often the deciding factor: WordPress gives you full ownership and portability — you can move hosts, developers, or platforms anytime. Wix Studio, while flexible in design, keeps you within its ecosystem.

Frequently Asked Questions

Is Wix Studio good enough for a business website?
Yes, especially for small-to-medium businesses that want a fast, professional site without managing technical maintenance.

Can Wix Studio handle custom functionality like WordPress plugins?
To a large extent, yes, through Velo (Wix’s custom code platform), though highly specialized plugins available in the WordPress ecosystem may not have a direct Wix equivalent.

Which platform is better for e-commerce?
Both handle e-commerce well. WordPress (via WooCommerce) offers more customization for complex stores; Wix offers a simpler, more guided e-commerce setup.

Can I switch from Wix to WordPress later?
Yes, but it typically requires rebuilding the site rather than a direct migration, since the platforms work differently under the hood.


Not sure which platform fits your project? Contact us and we’ll help you decide based on your specific needs.

Mobile app built with Flutter showing cost breakdown concept

Flutter App Development Cost in 2026: Real Pricing Guide

Quick answer: Flutter app development cost in 2026 typically depends on app complexity, features, and backend needs (like Firebase). A simple app with basic screens and no backend costs far less than a full-featured app with real-time data, authentication, and payments. Getting a scoped quote based on your exact feature list is the only way to get an accurate number — generic price lists rarely match real projects.

If you’re planning a mobile app and keep seeing wildly different price estimates online, here’s what actually drives Flutter app development cost — and how to budget realistically.

Why Flutter App Costs Vary So Much

Flutter lets developers build for iOS and Android from a single codebase, which usually makes it cheaper than building two separate native apps. But cost still swings widely based on:

  • Number of screens and user flows
  • Whether you need a backend (like Firebase) for data, login, or real-time updates
  • Third-party integrations (payments, maps, push notifications, chat)
  • Custom animations or complex UI
  • Admin panel or dashboard requirements

A simple single-screen utility app and a full marketplace app with logins, payments, and real-time chat are both “Flutter apps” — but they’re nowhere near the same cost.

What Typically Increases Cost

  • Firebase backend (authentication, real-time database, cloud functions) — adds development and setup time
  • Payment gateway integration (Stripe, PayPal, local providers) — needs careful testing
  • Push notifications and background services
  • Admin dashboards for managing app content or users
  • Offline functionality — apps that need to work without internet require extra engineering

What Keeps Cost Lower

  • Using Firebase’s pre-built services instead of a fully custom backend
  • Sticking to standard UI components instead of heavy custom animations
  • Launching with a focused feature set (MVP) instead of everything at once
  • Reusing existing design systems or templates where appropriate

A Smarter Way to Budget: Start with an MVP

Instead of trying to build every feature on day one, most successful apps launch with a Minimum Viable Product — the core features only — then add functionality based on real user feedback. This reduces upfront cost significantly and gets your app to market faster.

How to Get an Accurate Quote

The only reliable way to know your real cost is to list out:

  1. Every screen your app needs
  2. Whether you need user accounts/login
  3. Any real-time features (chat, live tracking, notifications)
  4. Payment or subscription requirements
  5. Whether you need an admin panel

With that list, a developer can give you a scoped, accurate quote — not a generic range.

Frequently Asked Questions

Is Flutter cheaper than native app development?
Generally yes, since one codebase covers both iOS and Android, reducing total development time compared to building two separate native apps.

Does Firebase cost extra on top of development?
Firebase has its own usage-based pricing (separate from development cost), but its free tier covers many small-to-medium apps early on.

How long does a Flutter app take to build?
A simple MVP can take a few weeks; a full-featured app with backend, payments, and admin panel typically takes longer depending on scope.

Can I add features after launch?
Yes — this is actually the recommended approach. Launch with core features, then expand based on real user data.


Want an accurate quote for your specific app idea? Contact us with your feature list for a scoped estimate.

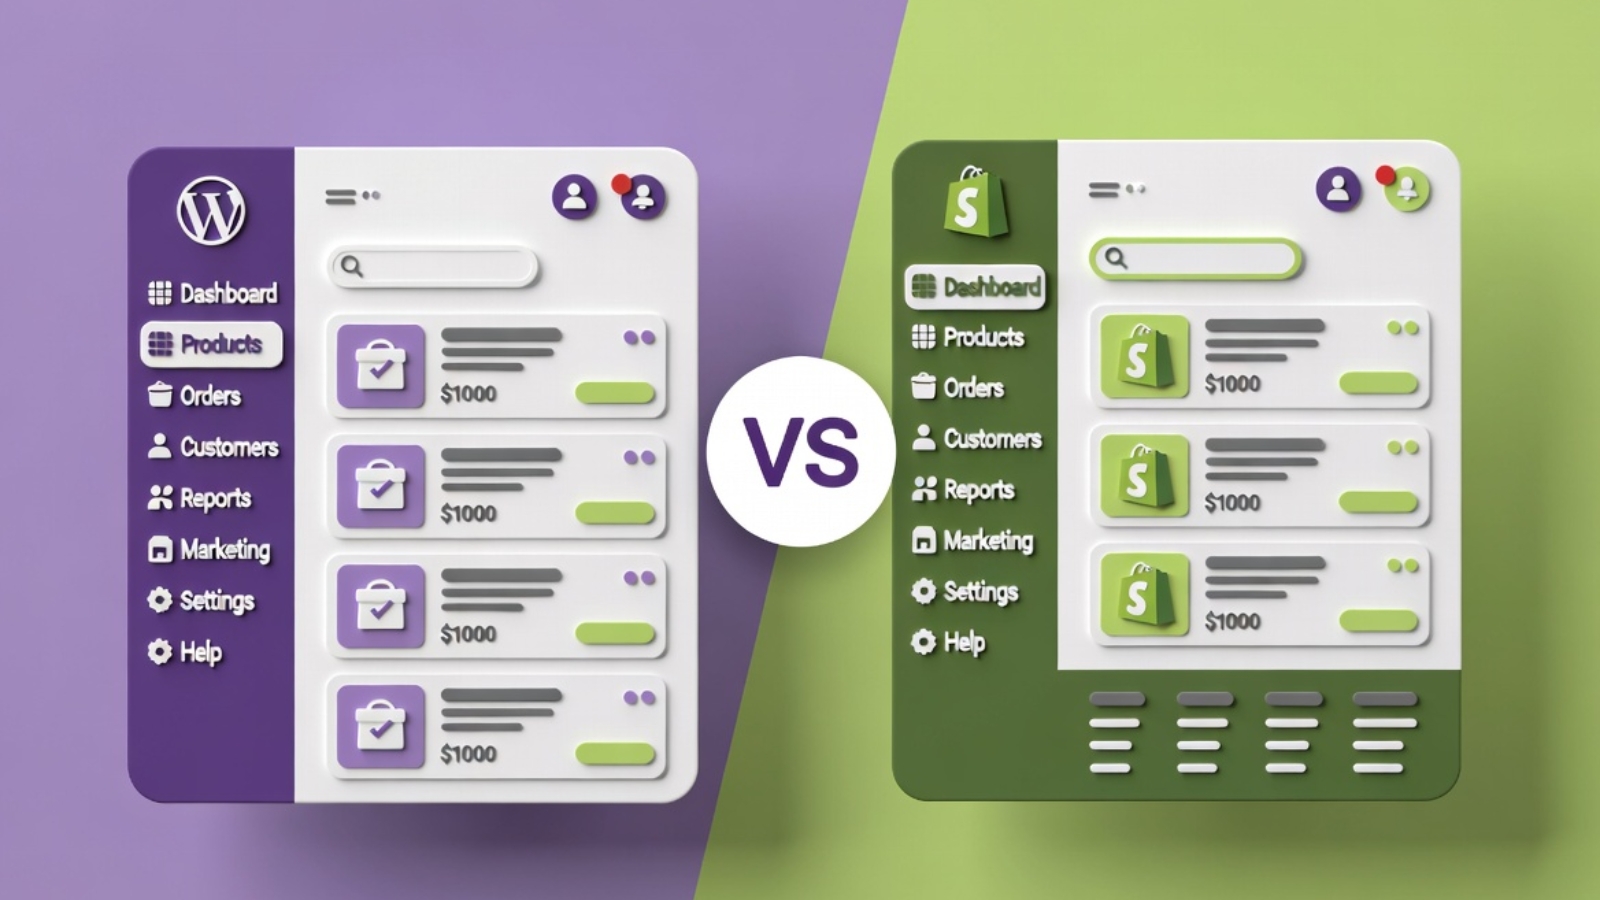
WooCommerce vs Shopify 2026 comparison showing both e-commerce platform logos and store interfaces

WooCommerce vs Shopify 2026: Which Should You Choose?

WooCommerce vs Shopify is the first decision most people face when starting an online store, and it’s a genuinely hard one because both platforms are excellent — just built on completely different philosophies.

Shopify is a fully hosted, all-in-one platform. WooCommerce is a free plugin that turns WordPress into a store. That single difference explains almost everything else about how these two platforms compare.

I’ve built stores on both. This comparison breaks down real differences in cost, ease of use, customization, and long-term ownership — not just a feature checklist copied from each platform’s marketing page.

The Core Difference You Need to Understand First

Shopify hosts everything for you. You pay a monthly fee, and Shopify handles the server, security, updates, and uptime. You’re renting a fully built store.

WooCommerce is self-hosted. It’s a free plugin you install on WordPress, but you need your own hosting, and you’re responsible for updates, security, and backups — either yourself or through a developer.

This one distinction drives every other difference between the two platforms.

✅ Pro Tip: If the idea of managing hosting, updates, and backups sounds stressful, Shopify removes that entirely. If you want full ownership and control over every part of your store, WooCommerce gives you that — at the cost of more responsibility.

Pricing Comparison

Shopify Pricing

Shopify charges a monthly subscription regardless of your sales volume:

  • Basic: $39/month
  • Shopify: $105/month
  • Advanced: $399/month

On top of the subscription, Shopify charges transaction fees if you don’t use Shopify Payments — typically 2%, on top of your payment processor’s fees. Using Shopify Payments removes this extra fee but locks you into their payment system.

Apps for extra functionality (reviews, upsells, advanced shipping) often carry their own monthly fees, which can add $50–$200/month depending on your store’s needs.

WooCommerce Pricing

WooCommerce itself is free. Your actual costs are:

  • Hosting: $5–$30/month depending on provider and traffic
  • Domain: $10–$20/year
  • SSL: Usually free through hosting
  • Premium plugins/themes: $0–$300/year depending on what you need
  • Payment processing: Standard Stripe/PayPal fees (around 2.9% + $0.30 per transaction) — no additional platform fee

For a small to medium store, WooCommerce typically costs significantly less per month than Shopify once you account for Shopify’s transaction fees and app costs.

⚠️ Watch Out: WooCommerce’s low sticker price doesn’t include your time or a developer’s time. If you’re not comfortable managing WordPress yourself, factor in either your own learning curve or the cost of hiring a developer for setup and maintenance.

Ease of Use

Shopify wins clearly here. It’s designed for non-technical store owners from day one. The setup wizard walks you through everything, the admin dashboard is intuitive, and you can have a functional store live within a few hours without touching any code.

WooCommerce has a steeper learning curve. You’re working within WordPress, which means understanding plugins, themes, and general WordPress management on top of the store itself. It’s not difficult once you’re familiar with it, but the initial setup requires more patience — or a developer.

If you want the fastest path to a live store with zero technical involvement: Shopify.

If you’re comfortable investing time to learn WordPress, or hiring someone who already knows it: WooCommerce gives you more control for less ongoing cost.

Customization and Flexibility

This is where WooCommerce genuinely outperforms Shopify.

Because WooCommerce is a WordPress plugin, you have access to WordPress’s entire ecosystem — over 60,000 plugins, unlimited theme customization, and full code-level control if you or your developer want it. Custom checkout flows, unique product configurators, complex membership logic — all of this is achievable with the right development work.

Shopify’s customization is more restricted. You’re working within Shopify’s Liquid templating system and app ecosystem. Shopify apps can extend functionality significantly, but you’re still operating within Shopify’s platform boundaries. Deep custom functionality often requires Shopify Plus (their enterprise tier, starting around $2,000/month) or complex app-based workarounds.

✅ Pro Tip: If your business model requires anything unusual — a subscription box with complex logic, a marketplace connecting multiple vendors, a highly custom product configurator — get a clear answer from a developer on both platforms before committing. WooCommerce almost always makes unusual requirements easier to build.

SEO Capabilities

Both platforms can rank well on Google, but WooCommerce has a structural advantage because it’s built on WordPress — historically the strongest CMS for SEO due to its flexibility.

With WooCommerce, you have complete control over URL structure, meta data, schema markup, and content strategy through plugins like Yoast SEO or Rank Math. You can build a full blog alongside your store, which Shopify also supports but with less flexibility in how blog and product content interact for SEO purposes.

Shopify has improved SEO significantly in recent years, but some structural limitations remain — like less control over URL structure for certain page types.

For a store planning heavy content marketing and blog-driven SEO alongside product sales, WooCommerce generally provides more flexibility.

Payment Processing

Shopify Payments is built in and works seamlessly if you’re in a supported country — no third-party gateway needed, and it avoids the extra transaction fee mentioned earlier. If Shopify Payments isn’t available in your country, you’ll need a third-party gateway and will pay the additional transaction fee.

WooCommerce works with virtually any payment gateway — Stripe, PayPal, Square, and hundreds of regional and local options through free plugins. This is particularly useful for businesses needing region-specific payment methods, like MobilePay for Danish customers or other local payment preferences.

Which One Should You Actually Choose

Choose Shopify if:

  • You want to launch fast with minimal technical involvement
  • You don’t want to manage hosting, security, or updates yourself
  • Your product catalog and business logic are relatively standard
  • You value having one company responsible for the entire platform
  • You’re comfortable with a predictable monthly cost

Choose WooCommerce if:

  • You want full ownership of your store and data
  • Your business needs custom functionality beyond standard e-commerce
  • You’re planning significant content marketing and blog-driven SEO
  • You want lower long-term costs and are willing to invest in setup
  • You already have a WordPress site and want to add a store to it
  • You need specific regional payment gateways

What About Migrating Later

Moving from WooCommerce to Shopify, or Shopify to WooCommerce, is possible but involves real work — migrating products, customer data, order history, and rebuilding your design. Neither platform makes this a simple one-click process.

Because of this, it’s worth thinking through your 2–3 year plan before choosing rather than picking based only on what’s easiest to start with today. A business planning to scale into complex custom functionality is often better served starting on WooCommerce, even if the initial setup takes longer.

Common Questions

Q: Is WooCommerce really free?
A: The WooCommerce plugin itself is free. Your actual costs are hosting, a domain, and any premium themes or plugins you choose to add. Most small stores can run WooCommerce for $10–$30/month total.

Q: Can I switch from Shopify to WooCommerce later?
A: Yes, though it requires migrating your product catalog, customer data, and rebuilding your site design. Several plugins exist to help with product data migration, but a smooth transition usually benefits from developer assistance.

Q: Which platform is better for a small restaurant or local business?
A: WooCommerce is often a better fit for local businesses because of lower ongoing costs and the ability to add regional payment methods like MobilePay. It also integrates naturally if you already need a WordPress site for your broader business presence, not just online ordering.

Q: Does Shopify or WooCommerce handle more traffic better?
A: Shopify’s hosting is built to handle traffic spikes automatically since it’s a managed platform. WooCommerce can handle high traffic too, but this depends entirely on your hosting quality — a cheap shared host will struggle under heavy traffic where Shopify wouldn’t.

Q: Which is cheaper in the long run?
A: For most small to medium stores, WooCommerce is cheaper over 12+ months once you account for Shopify’s monthly fee, transaction fees, and app costs. The gap narrows if your WooCommerce site needs significant developer time for setup and maintenance.

Final Thoughts

WooCommerce vs Shopify isn’t really a question of which platform is objectively better — it’s a question of which tradeoff fits your business. Shopify trades flexibility for simplicity and predictability. WooCommerce trades a steeper setup process for lower long-term cost and far greater customization.

If you’re still unsure after reading this, the deciding question is usually this: do you want a platform that does everything for you, or do you want full control over everything, even if it takes more work to get there?

If you’re planning a WooCommerce store and want it built properly from day one — including payment gateway setup, product configuration, and SEO foundations — Contact me and I’ll help you get it right.

DNS propagation issue during restaurant website migration showing old and new site conflict

DNS Propagation Issues When Migrating a Restaurant Website — How to Fix Them

DNS propagation issues during a restaurant website migration can bring your entire online ordering system to a halt at the worst possible moment — during a busy lunch service, on a Friday evening, or right after you’ve told customers about your new site.

I’ve migrated multiple restaurant websites including Danish restaurants registered at Punkt.um, and DNS propagation problems came up every single time. This guide covers exactly what causes DNS propagation issues, how to fix them fast, and how to structure your migration so your restaurant never goes dark during the switch.

If you’re mid-migration and your site is currently down or flipping between old and new — scroll straight to the Fix section. If you’re planning a migration, read everything so you don’t hit these problems at all.

What DNS Propagation Actually Means

Before fixing the problem, it helps to understand what’s actually happening.

Every domain name (like yourrestaurant.com) points to an IP address — the physical location of the server where your website lives. DNS (Domain Name System) is the global system that translates your domain name into that IP address so browsers can find your site.

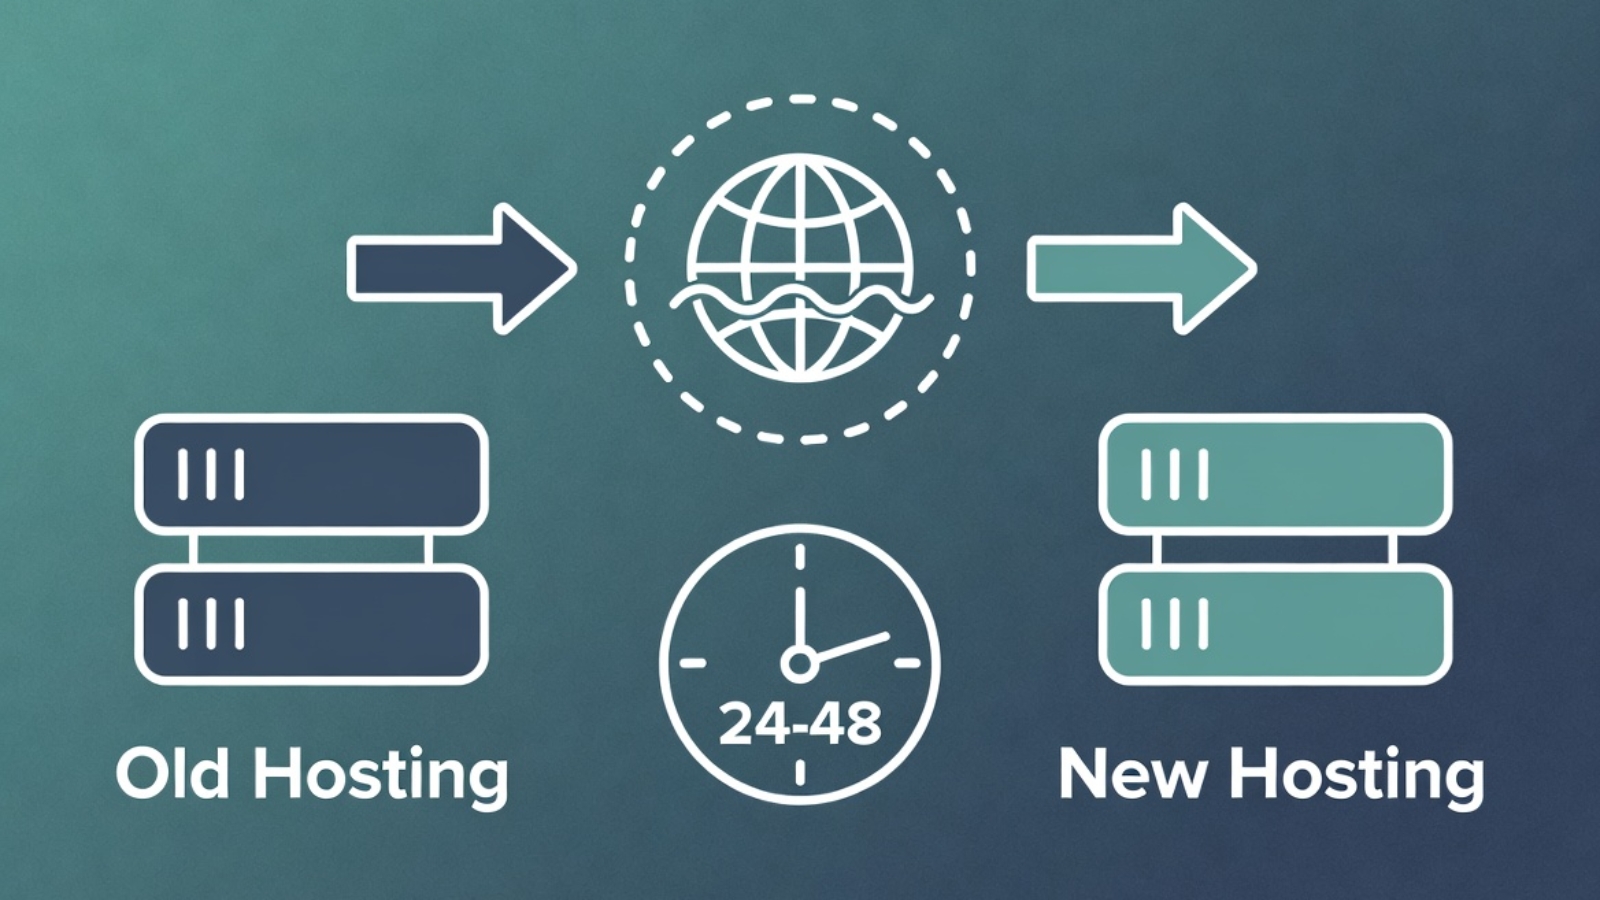
When you migrate a restaurant website to new hosting, you change the IP address your domain points to. DNS propagation is the time it takes for this change to spread across all DNS servers worldwide.

The problem: DNS servers around the world cache (store) your old IP address. Until their cache expires and they fetch the new record, some visitors see your old site and some see the new one — depending on which DNS server their internet provider uses.

This propagation period typically takes 24–48 hours. Some providers update within minutes. Others hold the old record for the full 48 hours. You have no direct control over this.

⚠️ Watch Out: During propagation, you might test your new site from your laptop and see it working perfectly — while a customer in another city still sees the old site or gets a blank page. This is normal propagation behavior, not a sign something is broken.

Why Restaurant Websites Are Especially Vulnerable

Most websites can afford a few hours of reduced visibility during a DNS change. Restaurant websites can’t — especially ones taking online orders.

A customer who hits a blank page or error during your migration doesn’t wait for propagation to finish. They order from somewhere else. If your DNS change happens on a Friday evening before a busy weekend, that’s real lost revenue.

Restaurant websites also typically involve more moving parts than a simple brochure site:

  • An active ordering system (WooCommerce, Gloria Food, or a booking platform)
  • Payment gateway connections that are IP or domain-specific
  • Email order notifications that may be tied to the old hosting
  • Google My Business listing pointing to the domain
  • Third-party delivery platform integrations

All of these need to keep working during and after the migration.

✅ Pro Tip: Never schedule a DNS change on a Friday, Saturday, or any day before a known busy period for your restaurant. Tuesday or Wednesday morning is ideal — lower traffic, your hosting support team is available, and you have the rest of the week to fix anything unexpected.

The Right Way to Migrate — Zero Downtime Approach

The single most important thing you can do to avoid DNS propagation problems is to never actually take your restaurant offline during the migration.

Here’s the approach I use for every restaurant migration:

Step 1 — Build the New Site on a Temporary URL

Build and fully test the new WordPress site on a staging URL or a temporary subdomain provided by your new host. For example:

staging.yourrestaurant.com
OR
yourrestaurant.newhost.com/staging

The old site stays completely live and taking orders throughout this entire phase. Customers never see anything different.

Step 2 — Test Everything on the Staging URL

Before touching any DNS settings, confirm all of the following work on the staging URL:

  • Full menu loads correctly with all items and prices
  • Add to cart and checkout work end to end
  • Payment processes successfully (use a real test transaction)
  • Order confirmation email arrives
  • All images load correctly
  • Site loads on mobile in Safari and Chrome

Do not change DNS until every item on this list passes.

Step 3 — Lower Your TTL Before Changing DNS

TTL (Time To Live) is the number of seconds DNS servers cache your record before checking for updates. Most domains default to 3600 seconds (1 hour) or 86400 seconds (24 hours).

Lower your TTL to 300 seconds (5 minutes) at least 24 hours before you plan to change your DNS records. This means when you do make the change, it propagates in minutes rather than hours.

To lower TTL:

  1. Log in to your domain registrar (Punkt.um, GoDaddy, Namecheap, etc.)
  2. Go to DNS management
  3. Find your A record for @ (root domain) and www
  4. Change the TTL value to 300
  5. Save and wait 24 hours before proceeding

✅ Pro Tip: Most restaurant owners don’t know about TTL and skip this step. It’s the single most effective thing you can do to speed up propagation. A 5-minute TTL means your DNS change reaches most of the world within 15–30 minutes instead of 24–48 hours.

Step 4 — Change Your DNS Records

Once your new site is fully tested and your TTL has been lowered for 24 hours, make the DNS change.

Option A — Change Nameservers (Recommended)

Nameservers control all DNS for your domain. Pointing them to your new host means the new host manages all DNS records.

Find your new host’s nameservers in your hosting control panel — they look like:

ns1.hostinger.com
ns2.hostinger.com

At your registrar, replace the current nameservers with these. Save.

Option B — Update A Records Only

If you want to keep your domain’s DNS managed at your registrar, update only the A records:

  1. Find your new hosting server’s IP address in your hosting control panel
  2. At your registrar, edit the A record for @ (root domain) — change IP to new hosting IP
  3. Edit the A record for www — same new IP
  4. Save

A record changes propagate faster than nameserver changes in most cases.

Step 5 — Keep the Old Site Live During Propagation

This is critical. Do not cancel your old hosting until propagation is fully complete.

During the propagation window, some visitors will reach the old site and some will reach the new one. If your old hosting is still live, old-site visitors still see a working restaurant — they can still order. The only downside is you’re running two hosting accounts temporarily.

Wait at least 48 hours after the DNS change before cancelling old hosting. Check propagation status at whatsmydns.net — enter your domain and confirm it shows the new IP from locations around the world before cancelling anything.

Punkt.um Specific — Danish Domain Registrar

If your restaurant domain is registered at Punkt.um — common for Danish restaurants — here’s what you need to know that their documentation doesn’t make obvious.

Finding DNS settings in Punkt.um:

Punkt.um’s interface is in Danish. The sections you need:

  • Nameservers: look for “Navneservere” in your domain management panel
  • DNS records (A records): look for “DNS-zoner”

Punkt.um propagation is slow. In my experience migrating Danish restaurant domains through Punkt.um, propagation consistently took 36–48 hours — longer than most registrars. Build this into your timeline and warn the client upfront.

Punkt.um TTL settings: TTL adjustment is available in the DNS-zoner section. Lower it to 300 before your migration window exactly as described above — it makes a significant difference even with Punkt.um’s slower propagation.

⚠️ Watch Out: Punkt.um requires you to confirm DNS changes via email. After saving your nameserver or A record change, check the email address registered with your Punkt.um account immediately — the change won’t apply until you click the confirmation link. This confirmation requirement catches people out, especially if the registered email is an old address they don’t check regularly.

How to Check If DNS Has Propagated

Don’t rely on your own browser to check propagation — your local DNS cache may be showing you the old site even after the change.

Use these tools instead:

whatsmydns.net — shows your domain’s DNS resolution from servers in 20+ countries simultaneously. Enter your domain, select A record, and click Search. Green checkmarks mean that location sees the new IP. This is the most reliable way to see real-world propagation status.

dnschecker.org — similar tool with a slightly different server list. Use both for a complete picture.

Clear your local DNS cache:

On Windows:

ipconfig /flushdns

On Mac:

sudo dscacheutil -flushcache; sudo killall -HUP mDNSResponder

On Chrome browser: go to chrome://net-internals/#dns → click Clear host cache.

After clearing cache, open your domain in an incognito window to see which version of the site your connection currently resolves to.

Common DNS Propagation Problems and Fixes

Problem: Site shows blank page or connection error during propagation

This usually means your new hosting is live but SSL hasn’t been issued yet for the domain. Most hosting providers issue a free SSL certificate automatically when your domain points to their servers — but this can take 10–30 minutes after DNS resolves.

Fix: Wait 30 minutes after DNS propagates and check again. If still no SSL, log in to your hosting control panel and manually trigger SSL issuance (Hostinger: hPanel → SSL → Install, SiteGround: Site Tools → Security → SSL Manager).

Problem: Old site showing after 48 hours

Fix: Your local DNS cache is still showing the old site. Clear your cache using the commands above and test in incognito. If whatsmydns.net shows the new IP globally but you still see the old site locally, it’s definitely a local cache issue — not a real propagation problem.

Problem: Email stops working after migration

Fix: When you change nameservers, you move DNS management to your new host — which may not have your MX records (email routing) set up. Before changing nameservers, log your existing MX records at your old registrar and recreate them at the new host.

Check MX records with:

nslookup -type=MX yourrestaurant.com

Problem: WooCommerce ordering breaks after migration

Fix: Check two things. First, your SSL certificate is active on the new host — WooCommerce checkout requires HTTPS. Second, your WordPress site URL is set correctly. Go to Settings → General and confirm both WordPress Address and Site Address show the correct domain with https://.

Problem: Google My Business still showing old site

Fix: This isn’t a DNS issue — it’s a Google cache issue. After migration, log in to your Google Business Profile and update the website URL to confirm it’s correct. Google will recrawl your site within a few days.

Migration Checklist — Full Timeline

One week before migration:

  • Build and fully test new site on staging URL
  • Confirm all payment gateways work on new host
  • Screenshot all existing DNS records at old registrar
  • Lower TTL to 300 on all A records

Day of migration:

  • Confirm TTL has been low for at least 24 hours
  • Run final test on staging URL
  • Change nameservers or A records at registrar
  • Confirm Punkt.um email confirmation if applicable
  • Monitor whatsmydns.net every 30 minutes

48 hours after DNS change:

  • Confirm full propagation on whatsmydns.net
  • Test complete ordering flow on live domain
  • Confirm order confirmation emails arriving correctly
  • Confirm SSL active with green padlock in browser
  • Clear your local DNS cache and test in incognito

After full confirmation:

  • Cancel old hosting
  • Restore TTL to 3600 on DNS records
  • Submit new sitemap to Google Search Console
  • Update any hardcoded old hosting URLs in WordPress database using Search Replace DB

Common Questions

Q: How long does DNS propagation actually take?
A: Typically 24–48 hours globally. With a low TTL set in advance it can be as fast as 15–30 minutes for most locations. Punkt.um specifically tends toward the 36–48 hour end of the range.

Q: Can I speed up DNS propagation?
A: Yes — lower your TTL to 300 seconds at least 24 hours before the change. This is the most effective method. You cannot force other DNS servers to update faster than their cache expiry.

Q: Will my restaurant lose orders during migration?
A: Not if you keep the old hosting live during propagation. Visitors hitting the old site during propagation still see a working restaurant and can still order. Only cancel old hosting after full propagation is confirmed.

Q: Do I need to change DNS if I’m keeping the same domain?
A: Yes — if you’re moving to new hosting, you need to update DNS regardless of whether you keep the same domain. The domain name stays the same but it needs to point to the new server’s IP address.

Q: What if my domain registrar doesn’t let me change TTL?
A: Some budget registrars don’t expose TTL settings. In this case, change your DNS records on a Tuesday morning when traffic is lowest and accept the standard 24–48 hour propagation window.

Final Thoughts

DNS propagation issues during a restaurant website migration are almost entirely avoidable with the right preparation. Lower your TTL a day before the switch, keep the old site live during propagation, use whatsmydns.net to monitor in real time, and never schedule a DNS change before a busy trading period.

The Punkt.um-specific issues — Danish confirmation emails, slower propagation, Danish-language interface — add complexity that catches people out if they haven’t worked with that registrar before. Now you know what to expect.

If you’re migrating a restaurant website — from Gloria Food to WooCommerce, from one host to another, or from a third-party platform to a self-hosted WordPress site — and want a developer who has done this before without taking the restaurant offline, Contact me and let’s get it done properly.