
Developer showing a client custom code in the Velo panel, explaining when a Wix Velo developer is needed

Hire a Wix Velo Developer: 7 Things to Check Before You Pay

Before you hire a Wix Velo developer, check for real Velo code samples (not just design work), verified Wix Partner status, a written scope separating custom code from built-in apps, and clarity on who owns the code afterward. Skipping these checks is how businesses end up with a half-finished custom feature and no one who can fix it.

Hiring for Velo work is different from hiring a general Wix designer, and most people don’t realize that until they’re already stuck. A great designer can build a beautiful Wix site without ever touching a line of code. That same person, listed as a “Wix expert,” might have zero real Velo experience.

Here’s exactly what I’d check before paying anyone for this kind of work, based on what actually separates a solid hire from a costly mistake.

Why Is Hiring for Velo Different From Hiring a Regular Wix Designer?

Velo work sits closer to software development than website design. It involves real JavaScript, database logic, and API connections — skills a template-focused Wix designer simply may not have, even if their portfolio looks polished.

That distinction matters because pricing and skill levels vary enormously. According to current freelance marketplace data, Wix developer rates range from around $15 an hour for entry-level template work up to $150-plus an hour for specialists handling complex Velo development. That’s a huge range, and the difference usually comes down to whether someone actually codes, or just configures existing apps.

The 7 Things I’d Check Before Paying Anyone

1. Ask for Real Velo Code, Not Just Design Screenshots

A polished portfolio of pretty Wix sites tells you nothing about someone’s coding ability. Ask specifically to see a project where they wrote custom Velo code — a booking system, a dynamic pricing setup, an API integration — and ask them to briefly explain what the code actually does.

2. Verify Their Wix Partner Status Directly

Wix maintains its own official marketplace and partner directory, where professionals list verified credentials and client reviews tied to their actual Wix account. Checking someone’s listing there, rather than trusting a claim on their personal website, gives you a harder-to-fake signal of legitimate experience.

3. Ask “Have You Built With Velo Specifically?” — Not Just “Do You Know Wix?”

This sounds obvious, but I’ve seen clients get burned by this exact gap. Someone can genuinely know Wix well without ever having written custom Velo code. Ask the direct question, and ask for a specific example, not a general “yes, I’m familiar with it.”

4. Get a Written Scope That Separates Custom Code From Built-In Apps

Your scope document should clearly state what’s being built with existing Wix apps versus what requires custom Velo development. This distinction affects both price and maintenance responsibility later, so vague scoping here causes disputes down the line.

5. Ask How They Handle API Rate Limits and Third-Party Connections

This is a technical detail most clients never think to ask about, and it’s exactly where inexperienced Velo developers get tripped up. Wix’s own developer documentation outlines specific API rate limits that heavier custom apps need to work within. A developer who’s actually built complex Velo projects should be able to explain this without hesitation. If they look confused by the question, that’s informative.

6. Clarify Who Owns the Code and Site After the Project Ends

Confirm upfront that you retain full ownership and access once the project is delivered and paid for. This matters more with custom Velo code than with a template-based build, since custom logic is harder to hand off cleanly to a new developer if the relationship ends badly.

7. Start With a Small Paid Task Before the Full Project

Here’s the practical step most hiring guides skip entirely, and it’s the one I actually recommend to clients myself. Before committing to a full custom build, pay for one small, contained Velo task — a single form integration, for example. It’s a low-cost way to see their actual code quality, communication style, and turnaround time before larger money is on the line.

I’ve used this exact approach with new collaborators myself. A small paid test reveals far more than any portfolio review, because it shows you how someone actually works under real project conditions, not just how they present themselves.

[INSERT: a real hiring example here — e.g., a client who used this small-task approach before a larger Velo project, and what it revealed]

What Should This Actually Cost You?

Based on current market rates, expect roughly $15–$35 an hour for basic Wix customization work, $50–$150 an hour for experienced Velo specialists, and $150-plus for elite developers handling complex, high-stakes custom builds. For project-based pricing, simple Velo customizations often run a few hundred dollars, while full custom systems — booking platforms, pricing portals, API-driven dashboards — can run into the thousands.

If you want a realistic number for your specific project before requesting quotes, my website cost calculator gives you a grounded starting estimate.

A Mistake That Costs Clients More Than the Hire Itself

The biggest mistake I see isn’t hiring someone unqualified outright — it’s hiring someone qualified for design work and assuming that covers Velo too. The two skill sets overlap less than people expect. A gorgeous, well-designed Wix site with a broken custom booking flow underneath is a common and entirely avoidable outcome. Separate these two evaluations explicitly when you’re interviewing candidates.

Should You Even Need Velo, or Is This Overkill?

Before you go through this whole hiring process, it’s worth confirming your project actually needs custom Velo development in the first place. I’ve written a full breakdown of that distinction in when you actually need a Wix Velo developer — a surprising number of “custom Velo” requests can be solved with existing Wix apps at a fraction of the cost.

Frequently Asked Questions

How much does it cost to hire a Wix Velo developer?
Rates typically range from $50 to $150 per hour for experienced Velo specialists, with elite developers handling complex projects charging $150 or more. Basic Wix customization without custom code runs closer to $15–$35 per hour.

How do I know if a Wix developer actually knows Velo?
Ask to see real custom Velo code from a past project, not just design screenshots, and ask them to briefly explain what that code does. General Wix experience doesn’t guarantee real coding ability.

Is Wix’s official Partner directory a reliable way to find developers?
Yes. Wix’s own marketplace lists verified professionals with client reviews tied to their actual account activity, making it a more reliable starting point than an unverified personal portfolio site.

Should I get a written contract for Velo development work?
Absolutely. A written scope should clearly separate custom Velo code from built-in app configuration, and should specify that you retain full code and site ownership after payment.

Can I test a Wix Velo developer before committing to a full project?
Yes, and it’s a smart approach. Paying for one small, contained task first reveals code quality, communication, and turnaround time before you commit to a larger, more expensive project.

Do I need a Velo developer, or would a regular Wix designer work?
It depends on your project. If you only need design and layout work using existing Wix apps, a regular Wix designer is sufficient. Custom functionality beyond what apps provide requires genuine Velo experience.

Want a Straight Assessment Before You Hire Anyone?

If you’d rather have someone experienced look at your project scope first, message me on WhatsApp and I’ll tell you honestly what it actually needs. Start the conversation here.

Developer showing a client custom code in the Velo panel, explaining when a Wix Velo developer is needed

What Is Wix Velo and When Do You Need a Velo Developer

You need a Wix Velo developer when Wix’s drag-and-drop editor and built-in apps genuinely can’t do what your business needs — custom pricing logic, live external data, or complex booking rules, for example. If your site just needs pages, a store, and standard forms, you don’t need Velo at all, and paying for one would be a waste of money.

Wix has grown fast. According to W3Techs, Wix now powers 4.3% of all websites, making it the fastest-growing major content management system by year-over-year growth. That growth brings more businesses asking the same question: “I’ve outgrown the basic editor, do I need custom code?”

Here’s how I actually answer that question with clients, instead of just saying “yes, hire a developer” by default.

What Is Wix Velo, Exactly?

Velo is Wix’s built-in development platform. It lets you write real JavaScript, connect to databases, and call external APIs, directly inside your Wix site, without setting up separate hosting or a database server yourself.

According to Wix’s own developer documentation, coding with Wix Studio means working in what Wix describes as an open, extendable platform, where you write code in a built-in panel, in Wix’s own IDE, or in your own editor connected through GitHub. That’s a meaningfully different tier than the standard Wix editor, which relies entirely on pre-built apps and settings panels.

Put simply: normal Wix is drag-and-drop. Velo adds a real coding layer underneath it, for when drag-and-drop hits its limit.

The Three Tiers I Actually Explain to Clients

Most articles present this as a binary choice — Wix or custom code. That’s not how it actually works. I walk clients through three tiers instead, because jumping straight to “you need a developer” skips two perfectly viable, cheaper options.

Tier 1: Standard Wix Editor or Wix Studio, no code. Fine for most small businesses — a marketing site, a simple store, a booking page using Wix’s built-in apps. No Velo needed here at all.

Tier 2: Wix Studio with light Velo customization. This covers most of what I actually build for clients — small tweaks to existing app behavior, custom form logic, or connecting one specific third-party tool that doesn’t have a native Wix integration.

Tier 3: Deep Velo development. Full custom booking logic, live external data feeds, personalized B2B pricing portals, or backend automation. This is where a dedicated Wix Velo developer genuinely earns their fee.

Most businesses I talk to assume they’re in Tier 3 when they’re actually in Tier 1 or 2. That assumption costs them money before we’ve even started.

What Does Velo Actually Solve That Standard Wix Can’t?

Here are real examples of the kind of problems Velo solves, based on the type of projects Velo developers commonly take on:

  • Dynamic B2B pricing, where different logged-in customers see different prices, minimums, or product catalogs
  • Live external data feeds, pulling information from a third-party API and displaying it natively on the page, without an ugly embedded iframe
  • Complex booking logic beyond what Wix Bookings offers by default — multi-location scheduling, resource assignment, or time-based dynamic pricing
  • Backend automation, like scoring and routing form submissions to the right sales rep automatically

If your business need matches one of these patterns, that’s a strong signal you’re actually in Velo territory, not just feeling stuck with the standard editor.

Where I See Businesses Waste Money on Unnecessary Custom Code

Here’s my honest take, and it might surprise you coming from someone who does this work: I turn down more “we need custom Velo code” requests than I take on. A huge number of requests I get can be solved with an existing Wix app or a smarter use of Wix Studio’s native features, at a fraction of the cost of custom development.

The mistake I see constantly is treating “I want this to look and work exactly a certain way” as automatically requiring custom code. Often, a different combination of existing apps gets 90% of the way there, and the remaining 10% isn’t worth thousands of dollars in custom development.

What Does Hiring a Wix Velo Developer Actually Cost?

Costs vary based on complexity, similar to any custom development work. A small Velo customization — a custom form validation, a minor integration — might run a few hundred dollars. A full custom booking system or B2B pricing portal, built entirely in Velo, can run into the thousands, depending on how many moving pieces it involves.

If you’re trying to figure out where your specific project falls, run it through my website cost calculator for a realistic starting estimate before requesting quotes from anyone.

Wix Velo vs. Fully Custom Code: A Quick Comparison

This is worth addressing directly, since it’s a question I get right after “do I need Velo?” Velo keeps you inside the Wix ecosystem, meaning hosting, security patching, and infrastructure are handled for you. Fully custom code (a separate React or Node.js build, for example) gives you total control but means managing hosting, security, and scaling yourself.

I’ve written more broadly about this trade-off in WordPress vs. custom code — the same underlying logic applies here. Velo is the middle ground: more powerful than a no-code builder, less overhead than a fully custom build from scratch.

[INSERT: a real client example here — e.g., a specific Wix Velo project you built, what business problem it solved, and roughly how long it took]

A Checklist Before You Hire a Velo Developer

Ask yourself these questions first:

  1. Have I actually tested Wix’s existing apps for this? Many businesses skip this step and assume custom code immediately.
  2. Is this a one-time need or an ongoing feature? One-time needs sometimes have cheaper manual workarounds.
  3. Does this involve external data or a genuinely unique business rule? If yes, that’s a real Velo signal.
  4. Do I understand the ongoing maintenance this creates? Custom Velo code, like any code, needs someone available if something breaks later.

If you’re still unsure which tier your project falls into, or whether Wix is even the right platform compared to WordPress or a fully custom build, my platform finder quiz gives you a clearer starting point in a couple of minutes.

Frequently Asked Questions

What is Wix Velo used for?
Velo is used for custom functionality Wix’s standard editor can’t provide — things like dynamic pricing logic, custom booking systems, live external data integrations, and backend automation.

Do I need to know how to code to use Wix Velo?
No, but building anything beyond basic customizations typically requires JavaScript knowledge, which is why most businesses hire a Velo developer rather than learning it themselves.

Is Wix Velo free to use?
Velo itself doesn’t have a separate fee beyond your existing Wix Studio or Editor plan, though certain advanced features and higher site plans may be required depending on what you’re building.

How is Wix Velo different from the regular Wix editor?
The regular Wix editor relies entirely on drag-and-drop tools and pre-built apps. Velo adds a real coding layer underneath, letting you write custom JavaScript and connect to databases and external APIs.

Should a small business use Wix Velo or just the standard editor?
Most small businesses don’t need Velo. If your site needs custom pricing rules, unique booking logic, or live external data, Velo becomes worth considering. Otherwise, the standard editor and existing apps are usually enough.

Can a Wix Velo developer build a custom booking system?
Yes. Velo developers commonly build booking systems that go beyond Wix Bookings’ default features, including multi-location scheduling, resource assignment, and dynamic time-based pricing.

Not Sure Which Tier Your Project Falls Into?

If you want a straight answer on whether you actually need custom Velo development, message me on WhatsApp and I’ll tell you honestly, even if the answer is “you don’t need it.” Start the conversation here.

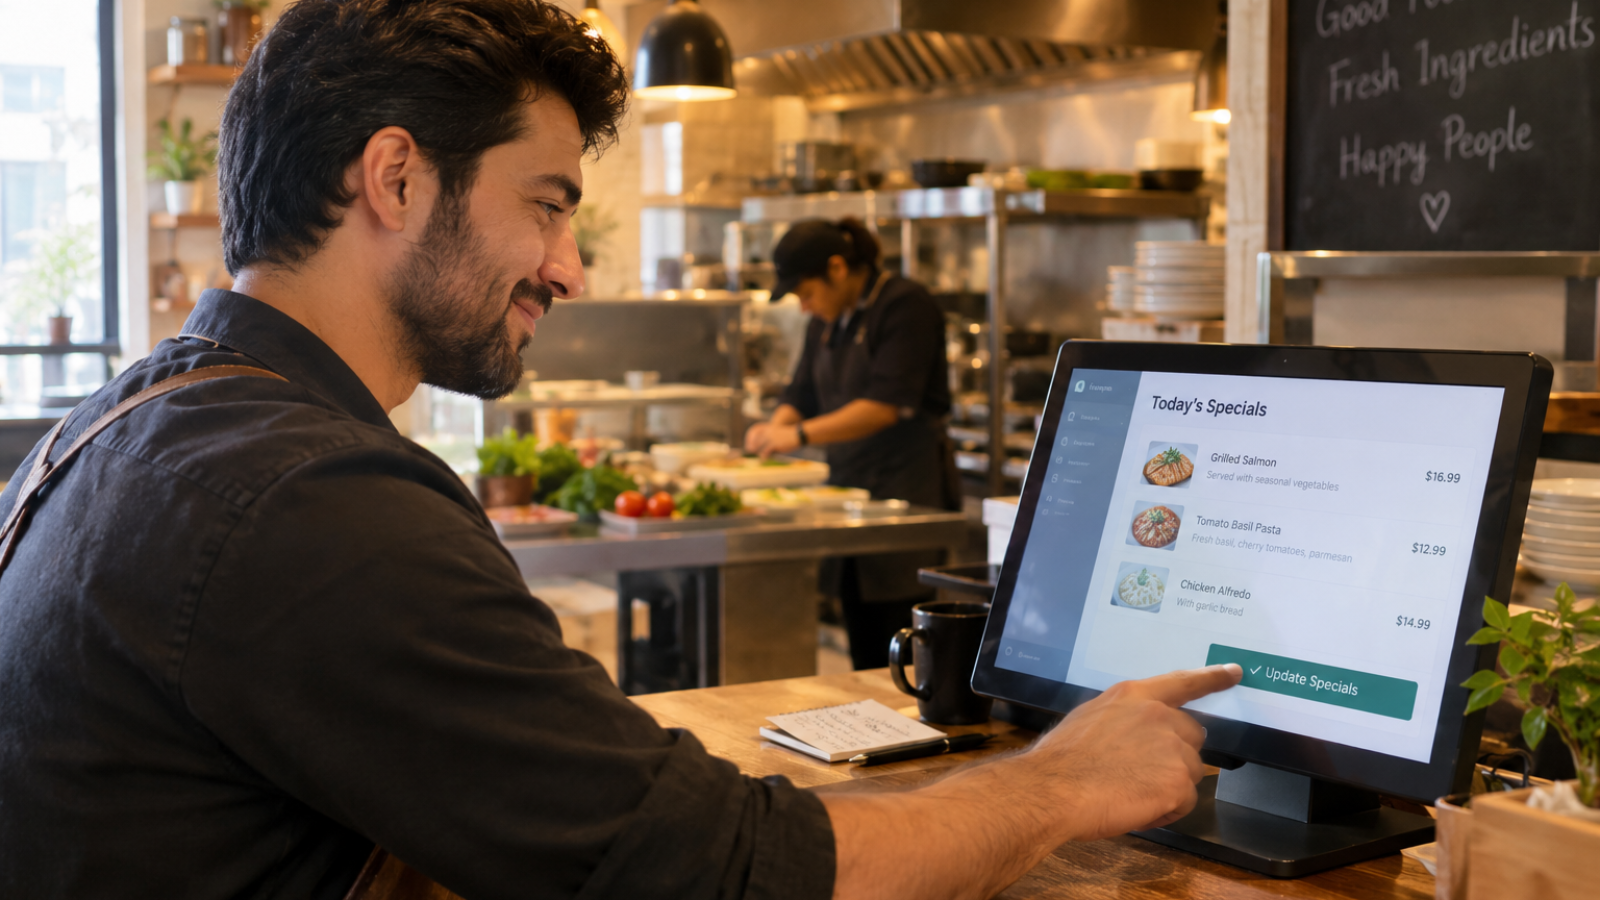
Restaurant owner updating daily specials through a custom WordPress dashboard at the counter

 Custom WordPress Dashboard for Restaurant Owners: What Clients Really Want

A custom WordPress dashboard for restaurant owners usually isn’t about a fancy redesign of wp-admin. It’s about hiding everything a busy owner doesn’t need to see, and surfacing the three or four things they update constantly — daily specials, hours, and menu prices — without a single confusing setting in sight.

Every restaurant client I’ve built one of these for asked for something different on paper, but they all wanted the same underlying thing: stop making me think about WordPress. That’s the real brief behind “custom dashboard,” even when the client doesn’t phrase it that way.

Here’s what clients actually ask for, what I actually build, and where I push back on requests that sound good but create more problems later.

Why Do Restaurant Owners Need a Custom Dashboard at All?

Standard WordPress admin is built for developers and content managers, not people running a kitchen at 6pm on a Friday. It’s cluttered with settings, menus, and options that mean nothing to someone whose job is food, staff, and customers.

That mismatch matters more than it seems. According to the National Restaurant Association’s 2026 State of the Restaurant Industry report, over half of operators are actively investing in back-office technology this year, specifically to reduce time spent on administrative tasks that pull attention away from running the business. A cluttered WordPress dashboard works against that goal entirely.

What Do Clients Actually Ask For?

Here’s the pattern I see across almost every restaurant project, regardless of cuisine or size.

“I want to update the menu myself.” This is the most common request, and it’s usually the easiest to solve well. Owners don’t want to learn WordPress; they want a simple form where they type in a dish name, price, and description, and it appears on the live site.

“I don’t want my staff seeing everything.” Once more than one person touches the site, owners want to limit what staff members can access. A part-time social media hire shouldn’t have access to plugin settings or payment configuration.

“Can I see today’s reservations without logging into three different systems?” This one comes up more than people expect. Owners are often juggling a booking platform, a POS system, and WordPress separately, and just want one place to glance at.

What I Actually Build, and Why It’s Simpler Than It Sounds

Most “custom dashboard” requests don’t need a from-scratch admin rebuild. They need the default WordPress admin trimmed down and reorganized around what one specific person actually does.

Here’s my usual approach:

  1. Custom post types for menu items, so updating a dish feels like filling out a simple form, not editing raw content
  2. Restricted user roles, built on WordPress’s own capabilities system, so staff see only the sections relevant to their job
  3. A simplified admin menu, hiding plugin settings, theme options, and anything the owner will never need to touch
  4. A dashboard widget summary, pulling key info (recent bookings, low-stock alerts, pending orders) onto one screen instead of scattered across plugins

WordPress’s own developer documentation on roles and capabilities explains exactly how this restriction works under the hood — it’s a built-in system, not something requiring a rebuild from scratch. That’s worth knowing if a developer quotes you for a fully custom user-permission system when the standard WordPress framework already handles most of it.

Where This Overlaps With Custom Plugin Work

Some of what clients ask for genuinely needs custom code — a reservation summary pulling from a booking platform’s API, for example, or a specific report format an owner wants on login. That’s where this crosses into custom plugin development, and it’s worth knowing the difference before you request a quote, since “simplify my dashboard” and “build me a custom reporting integration” are very different scopes.

I always separate these two conversations with clients early. Simplifying the existing admin experience is usually quick and inexpensive. Pulling live data from external systems into a custom dashboard view is a bigger, more technical project.

The Mistake I See Other Developers Make Here

This is where I push back on a common approach. Some developers build restaurant clients an entirely separate custom admin panel, completely disconnected from standard WordPress admin. It looks impressive in a demo. It’s also a long-term trap.

Here’s why: the moment that developer isn’t available, the owner is stuck with a bespoke system nobody else can maintain or extend. Standard WordPress admin, even heavily customized, still follows patterns any competent WordPress developer can pick up. A fully custom, disconnected panel doesn’t. I’d rather build something 90% as polished that any future developer can actually support, than something flashier that locks a client into one person indefinitely.

[INSERT: a real client example here — e.g., a specific restaurant dashboard you built, what the owner originally asked for versus what you actually delivered, and why]

A Decision Checklist Before You Request One

Ask yourself these before hiring someone for a custom dashboard:

  • What do I personally update most often? That’s what should be front and center, not buried three clicks deep.
  • Who else needs access, and to what specifically? Vague answers here lead to either overexposed staff accounts or endless back-and-forth during development.
  • Am I asking for a simplified view, or new functionality? These cost very differently, and knowing which one you need shapes your budget conversation.
  • Will I still understand this dashboard in six months without help? If a proposed design sounds impressive but hard to explain simply, that’s worth questioning before you commit.

Should You Build This Yourself or Hire a Developer?

Basic admin simplification — hiding menu items, adjusting user roles — is achievable with well-reviewed plugins if you’re comfortable experimenting. Custom post types for menus and any integration pulling data from external booking or POS systems usually need a developer, since mistakes here can break how content displays on your live site.

If you’re planning a broader site refresh alongside this — a new restaurant theme plus a simplified dashboard — bundling both into one project is usually more cost-effective than tackling them separately. My website cost calculator gives you a realistic starting estimate for either approach.

Frequently Asked Questions

What is a custom WordPress dashboard for a restaurant?
It’s a simplified version of the standard WordPress admin area, built around exactly what a restaurant owner needs to update — usually the menu, hours, and specials — with everything else hidden from view.

Do I need custom code to simplify my WordPress dashboard?
Not always. Many simplifications, like restricting menus and hiding unused settings, use WordPress’s built-in roles and capabilities system rather than requiring custom development from scratch.

Can staff have limited access to my restaurant’s WordPress dashboard?
Yes. WordPress’s role system allows you to create custom permission levels, so staff members only see the sections relevant to their job, such as menu updates, without access to site-wide settings.

How much does a custom WordPress dashboard cost for a restaurant?
Simple admin simplification typically costs $300–$1,500, while dashboards integrating live data from external booking or POS systems can range from $1,500 to $5,000 depending on complexity.

Should a restaurant dashboard replace standard WordPress admin entirely?
Generally no. Building on top of standard WordPress admin, rather than replacing it entirely, keeps the site maintainable by any future developer instead of locking you into one person.

Can a custom dashboard show reservations and orders in one place?
Yes, if your booking or ordering platform offers an API. This typically requires custom plugin development rather than basic dashboard simplification.

Want a Dashboard Built Around How You Actually Work?

If you’re tired of digging through cluttered WordPress menus just to update a daily special, message me on WhatsApp and let’s talk through what you actually need. Start the conversation here.

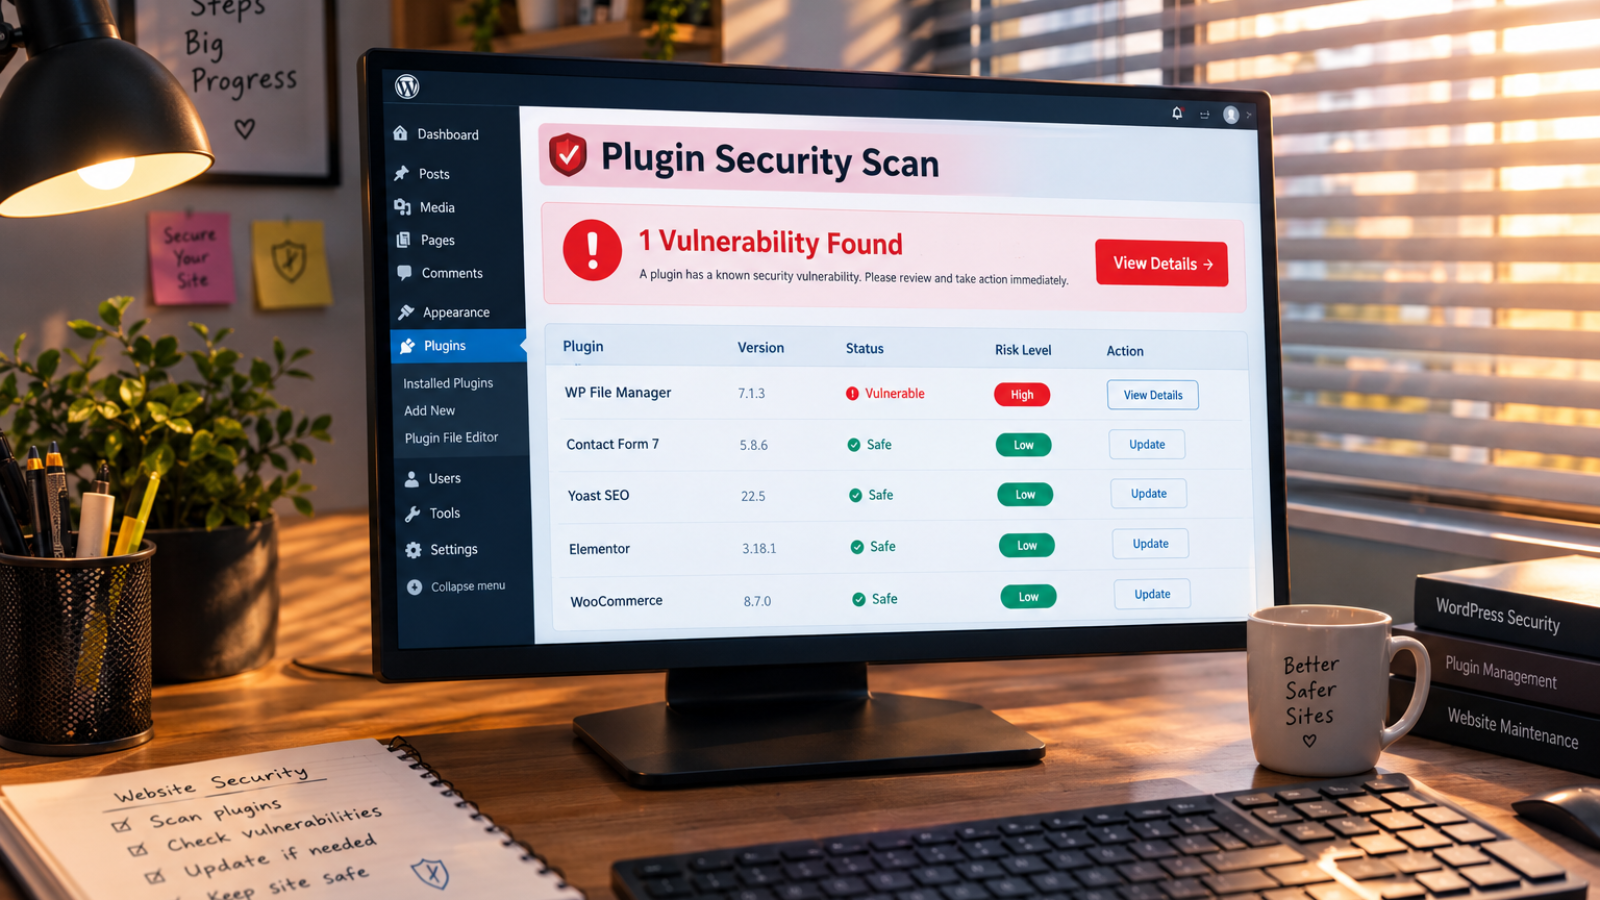
Business owner reviewing a security scan while following a WordPress security checklist

WordPress Security Checklist for Small Business Owners (2026 Guide)

A WordPress security checklist for small business owners in 2026 needs to cover more than “install a firewall plugin.” Given that plugins account for 91% of newly discovered vulnerabilities, the real priorities are reducing plugin count, enforcing strong logins with MFA, keeping backups offsite, and layering protection beyond a single security plugin.

Most WordPress security guides read like they were written in 2018 and never updated. They tell you to change your login URL and install a firewall plugin, then call it done. That advice isn’t wrong, exactly. It’s just dangerously incomplete for what’s actually happening on WordPress right now.

Here’s the checklist I actually walk small business clients through, based on current data, not outdated assumptions.

Why Is WordPress Security a Bigger Concern in 2026?

The numbers this year are genuinely alarming, and I say that as someone who works with WordPress every day, not as a scare tactic. According to Patchstack’s official State of WordPress Security in 2026 whitepaper, 11,334 new vulnerabilities were discovered across the WordPress ecosystem in 2025, a 42% increase over the previous year.

Here’s the detail that matters most for small business owners: 91% of those vulnerabilities were found in plugins, not WordPress core itself. Only six vulnerabilities were reported in core, and all were low risk. That tells you exactly where your real exposure sits — in the plugins you’ve installed, not the platform underneath them.

Worse, nearly half of those vulnerabilities had no patch available when they were publicly disclosed. That means “just keep everything updated” isn’t a complete strategy anymore, even though it’s still essential.

What’s the First Thing You Should Actually Check?

Start with your plugin count, not your firewall settings. Every plugin you install expands your attack surface, whether you use it daily or forgot about it months ago. That’s why my first move on any client audit is a plugin audit: I remove anything inactive, outdated, or duplicating a feature another plugin already handles.

This is the piece most checklists skip entirely. They assume more security plugins mean more protection. In reality, every additional plugin — security tools included — is one more piece of code that could itself become the next vulnerability.

How Should You Handle Logins and Passwords?

Weak logins remain one of the most common entry points, because attackers don’t need a sophisticated exploit if your password is guessable. The Cybersecurity and Infrastructure Security Agency (CISA) recommends multi-factor authentication for exactly this reason — a texted code, an authenticator app, or a security key makes a stolen password far less useful on its own.

For WordPress specifically, I set up three things on every client site: multi-factor authentication for admin accounts, a renamed login URL to reduce automated bot scanning, and a hard limit on failed login attempts. None of these are technically difficult, but skipping them is one of the most common mistakes I see on inherited sites.

Are Updates Really Enough Anymore?

Updates still matter enormously, but they’re no longer sufficient on their own. According to CISA’s official guidance on business software, enabling automatic updates is one of the simplest ways to close known security gaps before attackers exploit them.

However, Patchstack’s data shows a real gap here: with 46% of vulnerabilities having no patch when disclosed, and high-impact vulnerabilities sometimes exploited within just five hours of becoming public, waiting for an update to arrive isn’t always fast enough. That’s why updates need to sit alongside monitoring and backups, not replace them.

What Does “Layered Security” Actually Mean for WordPress?

This is the point most generic checklists get wrong, and it’s the one I push back on hardest with clients. A single security plugin isn’t a complete defense, even a well-reviewed one. Traditional web application firewalls have been shown to block only a fraction of WordPress-specific attack patterns, because attackers constantly adapt their methods faster than generic firewall rules update.

Here’s what I actually set up instead of relying on one tool:

  1. A reputable security plugin for baseline monitoring and malware scanning
  2. Server-level or host-level firewall protection, layered on top rather than instead of a plugin
  3. Automated offsite backups, stored separately from your hosting account, tested at least monthly
  4. A minimal, actively-maintained plugin list, reviewed quarterly

None of these alone stops everything. Together, they close most of the gaps that a single tool leaves open.

The Priority Order I’d Actually Recommend

If you’re overwhelmed by where to start, here’s how I’d sequence it for a typical small business site:

  • Today: Enable multi-factor authentication and change any default or weak admin passwords
  • This week: Audit and remove unused plugins, and confirm automated backups are actually running
  • This month: Set up server-level firewall protection alongside your security plugin, and review user account permissions
  • Ongoing: Review plugin updates weekly rather than monthly, given how quickly high-severity vulnerabilities get exploited

Doing these in the wrong order wastes time. Fixing plugin bloat before locking down logins, for example, leaves your biggest entry point wide open while you tidy up a smaller risk.

[INSERT: a real client example here — e.g., a specific site you audited or cleaned up, what the actual vulnerability was, and what fixing it looked like]

Common Security Mistakes I See Constantly

  • Relying on one security plugin and assuming it covers everything. No single tool blocks every attack pattern.
  • Storing backups on the same host as the live site. If the host is compromised, your backup goes down with it.
  • Ignoring “inactive” plugins. A deactivated plugin can still carry a vulnerability if it’s not fully removed.
  • Treating security as a one-time setup. Given how fast new vulnerabilities appear, this needs ongoing attention, not a single afternoon of fixes.

If you’re evaluating whether to hire someone for this instead of doing it yourself, I’ve written more broadly about what to look for in how to hire a freelance WordPress developer, including the security-specific questions worth asking before you commit.

Should You Handle This Yourself or Get It Checked Professionally?

Basic hardening — MFA, updates, backups — is genuinely doable yourself with a free afternoon. Where I see business owners get stuck is diagnosing whether a site’s already compromised, or untangling which plugin is causing conflicts with a new security setup. If you’re not sure where your site currently stands, run it through my free WordPress security checker before deciding whether you need professional help.

If a full security audit and hardening project makes more sense for your setup, my website cost calculator gives you a realistic starting estimate before you reach out to anyone.

Frequently Asked Questions

What is the most important WordPress security measure for small businesses?
Multi-factor authentication on admin accounts is one of the highest-impact, lowest-effort measures, since it stops most credential-based attacks even if a password is compromised.

Are WordPress plugins a bigger security risk than WordPress core?
Yes, significantly. Patchstack’s 2026 data shows 91% of newly discovered vulnerabilities were found in plugins, compared to only six low-risk vulnerabilities in WordPress core itself.

Is a security plugin enough to protect a WordPress site?
Not on its own. A single security plugin provides useful monitoring and scanning, but layering it with server-level firewall protection and offsite backups closes gaps that one tool alone leaves open.

How often should WordPress plugins be updated?
Weekly reviews are safer than monthly ones in 2026, since high-severity vulnerabilities have been exploited within hours of public disclosure in some cases.

Do small businesses really get targeted by WordPress attacks?
Yes. Most attacks are automated and scan for common WordPress fingerprints rather than targeting specific businesses, meaning any WordPress site, regardless of size, is a potential target.

Should backups be stored on the same hosting account as the website?
No. Backups should be stored offsite, separate from the live hosting account, so a compromised host doesn’t also take down your recovery option.

Not Sure Where Your Site Currently Stands?

If you want a professional set of eyes on your site’s actual security posture, message me on WhatsApp and I’ll walk through it with you honestly. Start the conversation here.

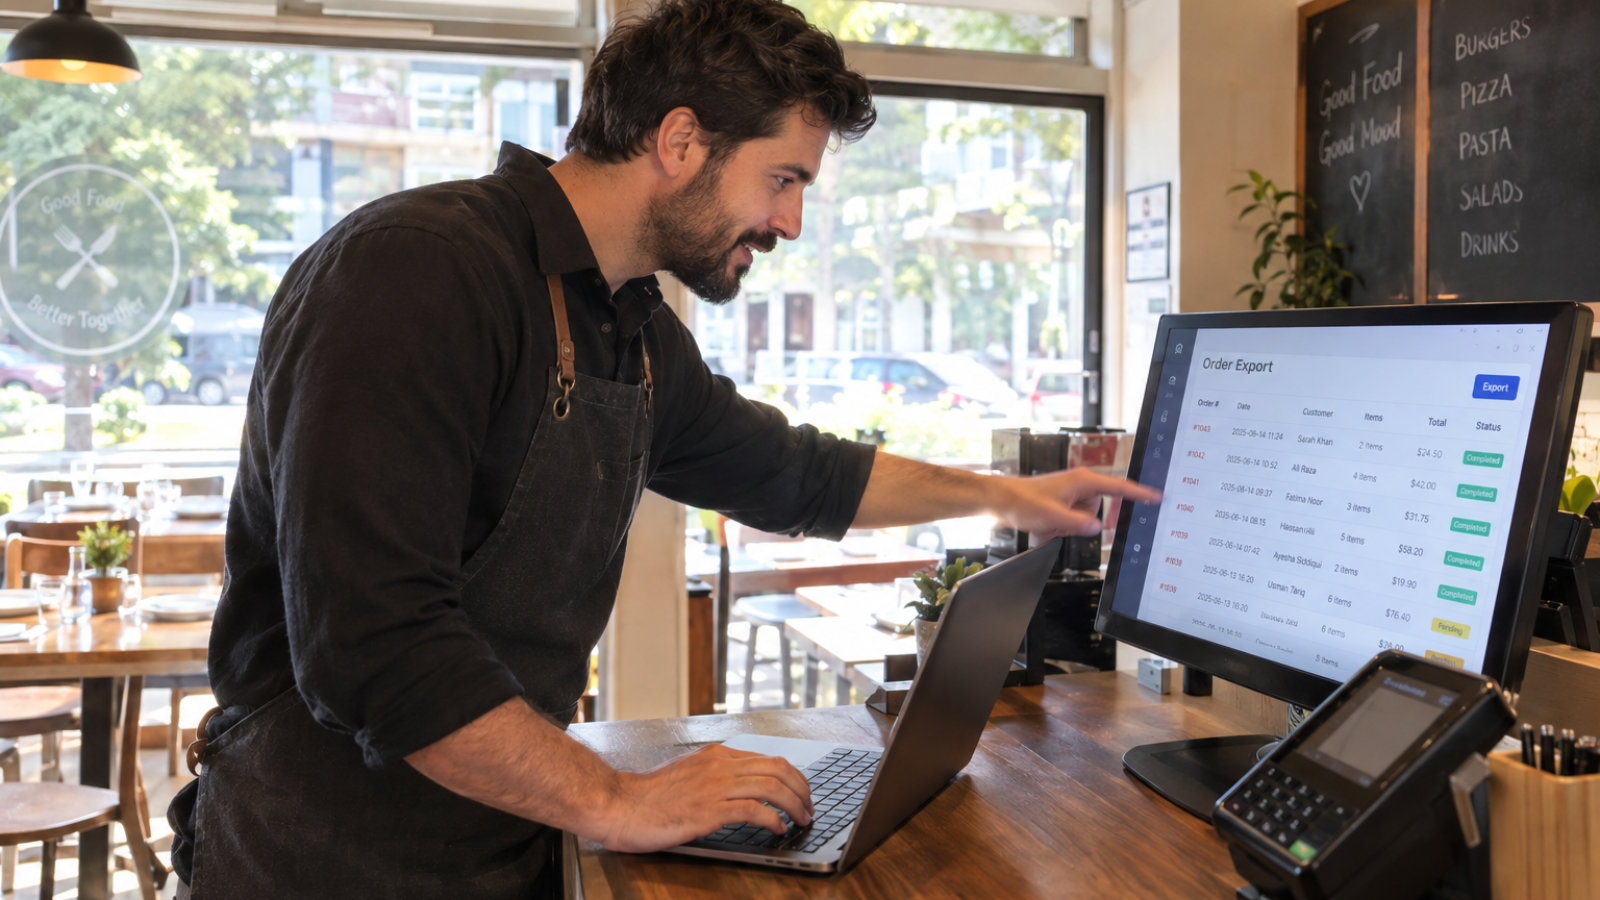
Restaurant manager exporting order data during a GloriaFood to WooCommerce migration

How to Migrate from Gloria Food to WooCommerce Without Losing Orders

A GloriaFood to WooCommerce migration means moving your menu, customer list, and delivery settings to a platform you actually own, before Oracle shuts GloriaFood down on April 30, 2027. You won’t “import” old orders into WooCommerce as live transactions — you’ll archive them for records and rebuild your live menu and ordering flow from scratch on WooCommerce.

If you’re reading this because you got an email or saw a banner inside your GloriaFood dashboard, you’re not imagining it. Oracle acquired GloriaFood back in 2021, and it’s now retiring the entire platform. This isn’t a price increase or a forced upgrade — it’s a full shutdown, with no Oracle-built replacement and no official migration tool.

I’ve been getting questions about this from restaurant clients, so here’s the actual plan I’d recommend, not just a generic “how to switch platforms” checklist.

Why Is This Migration Suddenly Urgent?

GloriaFood built a loyal following of independent restaurants because it offered commission-free online ordering for free. That’s exactly why so many small businesses leaned on it for years without a backup plan.

According to an independently maintained shutdown timeline, GloriaFood has already stopped accepting new signups and is running in maintenance mode with no new features. April 30, 2027 is the confirmed final date, and after that, ordering pages, QR codes, and connected POS integrations all stop working at once — with no data recovery available afterward.

That deadline sounds distant, but here’s the catch: a clean migration takes real planning time, not a weekend. Menu mapping, testing, and running both systems in parallel for a couple of weeks all add up. Starting in early 2027 is starting too late.

What Actually Happens If You Wait Too Long?

If your account isn’t migrated before the cutoff, you lose access to your entire menu setup, your customer contact list, your delivery zone configuration, and your order history — all at once, with no advance warning beyond what’s already been communicated. There’s no “read-only” grace period once the platform goes dark.

The customer list is the part I’d worry about most. Menus and photos can be rebuilt slowly on a new platform. A list of customers built from years of repeat orders cannot be recreated once it’s gone.

The Migration Checklist I’d Actually Follow

Here’s the order I’d tackle this in, based on what actually breaks when people rush it.

1. Export Everything From GloriaFood First

Before touching WooCommerce, pull every piece of data GloriaFood lets you export: menu items, categories, modifiers, prices, photos, delivery zones, hours, and your customer contact list. Do this now, regardless of when you plan to actually launch on WooCommerce, because export access could tighten as the shutdown date approaches.

2. Set Up WooCommerce and Map Your Menu

This is usually the most time-consuming part, not the most technical. Every menu item, variation, add-on, and modifier group needs to be manually mapped into WooCommerce’s product structure, since there’s no direct one-click importer between the two platforms. WooCommerce’s own CSV import/export documentation covers the bulk-upload process once your menu data is formatted correctly.

3. Decide What Happens to Historical Orders

Here’s the nuance most migration guides skip entirely: you’re not actually “importing” your old GloriaFood orders into WooCommerce as live transactions. WooCommerce’s order system expects orders created through its own checkout flow, so forcing historical GloriaFood orders into that structure creates messy, unreconciled records that don’t match your payment processor or accounting software.

What I actually recommend instead: export your GloriaFood order history as a CSV or PDF archive for your own records and accounting, and start WooCommerce with a clean order table going forward. You’re not losing your order history — you’re separating “records you need to keep” from “orders your new system needs to process.” That distinction saves hours of unnecessary cleanup.

4. Reconnect Payments and Delivery Zones

Confirm your Stripe or payment gateway connects cleanly to WooCommerce, since GloriaFood’s payment integration doesn’t carry over automatically. Rebuild your delivery zones and radius settings directly in WooCommerce or your chosen delivery plugin, testing each zone before launch.

5. Run Both Systems in Parallel Before Cutover

Don’t switch overnight. Keep GloriaFood live while your WooCommerce ordering page runs in a soft-launch mode for at least one to two weeks. That overlap window catches configuration mistakes before real customers hit them.

6. Redirect Old Links and Update Every Mention

Set up 301 redirects from your old GloriaFood ordering URL to your new WooCommerce ordering page, since skipping this step causes both an SEO hit and confused customers hitting a dead link. Update your Google Business Profile, social media bios, and any printed menus or QR codes pointing to the old system.

What I’d Do Differently Than a Generic Migration Guide

Most guides treat this as a pure data-export exercise. I treat it as a chance to fix what GloriaFood never let you control in the first place — your site’s design, your menu presentation, and your page speed. If you’re already rebuilding your ordering flow, it’s worth pairing this migration with a proper look at your site’s theme and performance rather than just bolting WooCommerce onto whatever you had before. I’ve written separately about choosing the right WordPress theme for a restaurant, which matters even more once ordering, not just browsing, happens directly on your site.

If your restaurant has unusual modifier logic, loyalty rules, or a delivery-zone setup GloriaFood handled in a way WooCommerce doesn’t natively support, that’s often where custom plugin development actually earns its cost — rebuilding one specific missing piece, not the whole system.

[INSERT: a real client migration example here — e.g., a specific restaurant’s GloriaFood-to-WooCommerce switch, what broke, and how long it actually took]

Common Mistakes That Cause Real Problems

  • Waiting until early 2027 to start. The last few months before any platform shutdown always get chaotic, as support slows and other restaurants scramble simultaneously.
  • Skipping the parallel-running period. Switching overnight risks a gap where customers simply can’t place orders.
  • Forgetting 301 redirects. This causes an immediate, avoidable SEO and traffic loss on your ordering page.
  • Not exporting the customer list separately. Menu items can be rebuilt. A customer contact database built over years cannot.

Should You Migrate This Yourself or Hire Someone?

If your menu is small and simple, a motivated business owner can handle this migration solo with a weekend of focused work. If you’re running complex modifiers, multiple delivery zones, loyalty promotions, or integrations with a POS system, I’d bring in a developer who’s done a WooCommerce food-ordering setup before, since those are exactly the details that go wrong when rushed.

If you want a realistic estimate of what a proper migration and rebuild would cost for your specific setup, my website cost calculator gives you a starting number in a couple of minutes.

Frequently Asked Questions

Why is GloriaFood shutting down?
Oracle, which acquired GloriaFood in 2021, has confirmed the platform will be permanently retired on April 30, 2027. New signups have already closed, and no official replacement or migration tool has been announced.

Can I import my GloriaFood order history directly into WooCommerce?
Not cleanly. WooCommerce’s order system is built for its own checkout flow, so historical GloriaFood orders should be archived as a CSV or PDF for your records rather than force-imported as live WooCommerce orders.

How long does a GloriaFood to WooCommerce migration take?
A careful migration typically takes several weeks, covering menu mapping, testing, and a parallel-running period before full cutover. Rushing it into a few days increases the risk of missed data or broken ordering flows.

What data will I lose if I don’t migrate before the shutdown?
You’ll lose access to your entire menu setup, customer contact list, order history, and delivery zone configuration once GloriaFood goes offline, with no data recovery available afterward.

Does WooCommerce charge commission on orders like GloriaFood does?
No. WooCommerce itself doesn’t charge order commissions, though you’ll still pay standard payment processing fees through whichever gateway (like Stripe) you connect.

Do I need a developer to migrate from GloriaFood to WooCommerce?
Simple menus can be migrated by a business owner directly. Complex setups with custom modifiers, multiple delivery zones, or POS integrations usually benefit from a developer experienced with WooCommerce food-ordering builds.

Want This Migration Handled Properly?

If you’d rather not risk losing your menu or customer data before the 2027 deadline, message me on WhatsApp and I’ll walk through your specific setup. Start the conversation here.

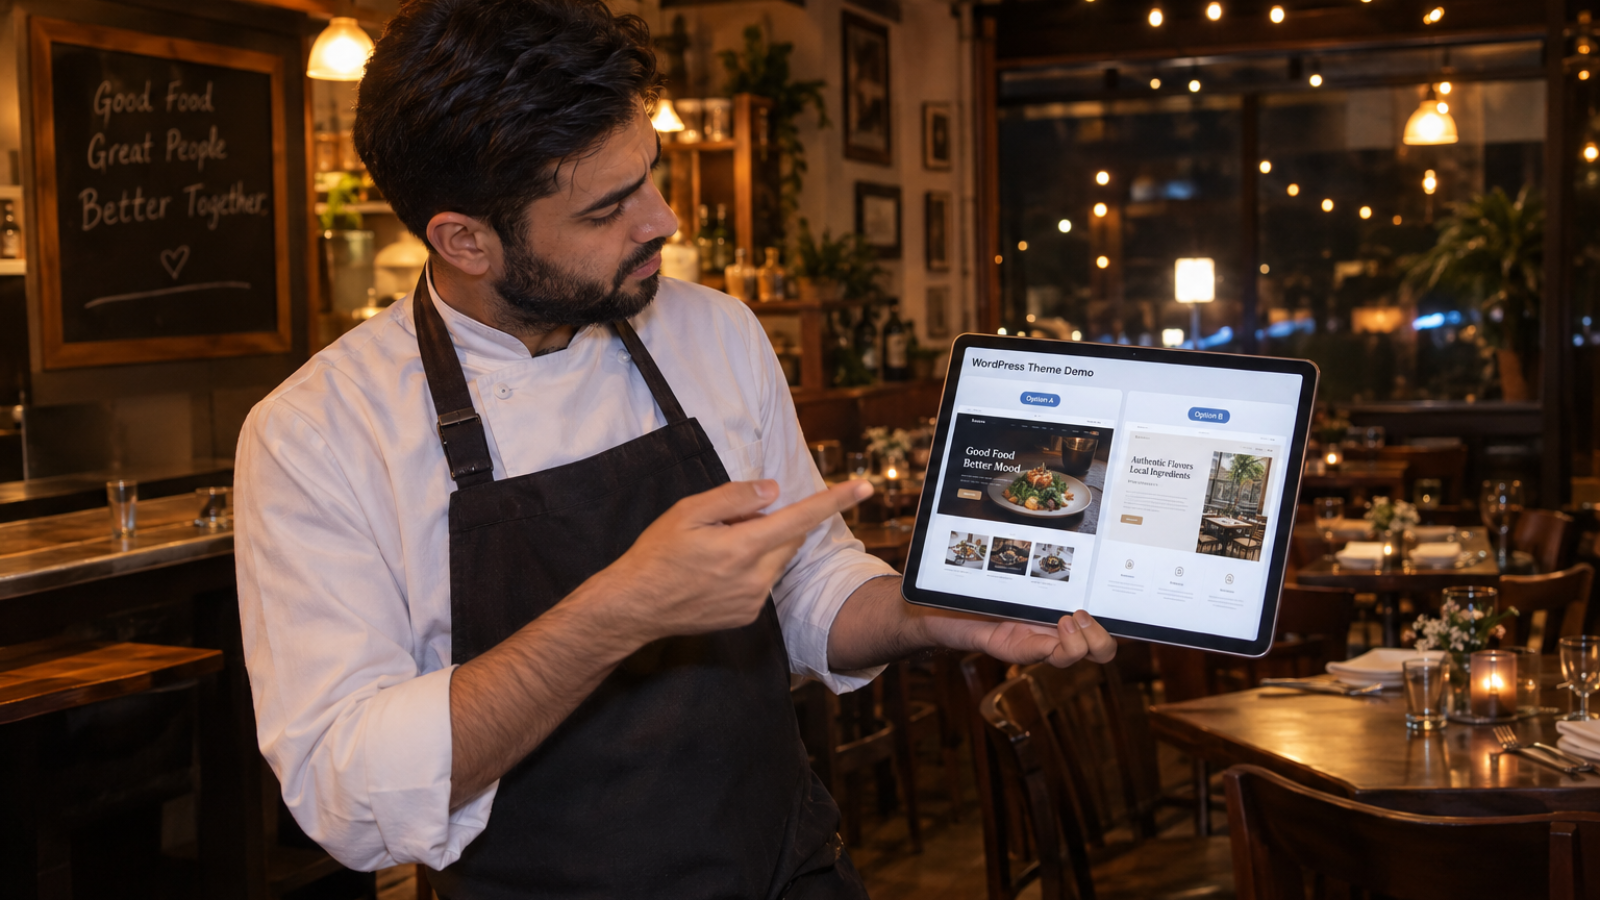
Restaurant owner comparing WordPress themes for restaurants on a tablet in his dining room

Best WordPress Themes for Restaurant Websites in 2026

The best WordPress themes for restaurants in 2026 aren’t necessarily the ones with the flashiest food photography demos. Lightweight, well-coded themes like Astra, Kadence, and GeneratePress consistently outperform heavy niche “restaurant” themes on speed and reliability, which matters because slow menu pages cost you hungry visitors before they ever see your food.

Every “best restaurant themes” list I’ve read online ranks themes by how good the demo photos look. That’s the wrong metric. A restaurant site has one job: get someone from “I’m hungry” to “I booked a table” or “I placed an order” as fast as possible. Speed and clarity beat visual flair almost every time.

Here’s how I actually pick a theme for restaurant clients, and which ones I reach for first.

Why Does Theme Choice Matter More for Restaurants Than Other Businesses?

Restaurant websites get impulsive traffic. Someone’s hungry right now, searching on their phone, deciding fast. According to the National Restaurant Association’s 2026 State of the Restaurant Industry report, restaurant and foodservice sales are projected to reach $1.55 trillion this year, with operators continuing to invest heavily in digital ordering and technology to capture that demand.

That demand is mostly mobile, and it’s mostly impatient. A theme that loads slowly on a phone, or buries the menu behind a heavy image slider, loses that visitor to the next search result. That’s why I judge restaurant themes on performance first, design second — not the other way around.

The Debate Nobody Has: Niche “Restaurant” Themes vs. Lightweight Frameworks

Most theme marketplaces sell you a “restaurant theme” packed with a video hero, animated menu cards, parallax scrolling, and a built-in reservation widget. It looks impressive in a demo. It’s also often bloated with CSS and JavaScript you’ll never fully use.

Here’s my actual stance: I build most restaurant sites on a lightweight, general-purpose theme — Astra, Kadence, or GeneratePress — paired with Elementor, rather than a heavy niche restaurant theme. These frameworks load fast by default, and I only add the specific features (menu layout, reservation embed, gallery) the client actually needs, instead of inheriting a theme’s entire feature bloat.

That’s a deliberate trade-off. A niche theme gets you to a finished-looking demo faster. A lightweight framework takes a bit more setup time but gives you a site that stays fast as Google’s Core Web Vitals standards keep raising the bar. According to Google’s own web.dev documentation, pages need to load their main content in under 2.5 seconds to be considered “good” — a threshold that heavy demo themes struggle to hit out of the box.

The Themes I Actually Recommend

Astra

Astra is my default starting point for most small restaurant sites. It’s lightweight, has solid Elementor compatibility, and its restaurant starter templates give clients a familiar layout to customize without extra bloat.

Kadence

Kadence offers more built-in design flexibility than Astra while staying performance-focused. For restaurants that want more visual control over menu layouts and featured-dish sections without sacrificing speed, this is often my second pick.

GeneratePress

GeneratePress’s modular system lets you enable only the features you need, keeping the site genuinely lightweight. I recommend this specifically for restaurants focused on local SEO, since page speed directly affects how well you rank for “restaurants near me” searches.

Delicio (for Turnkey Demo Setups)

If a client wants a faster path to a finished-looking site and is comfortable with a slightly heavier build, Delicio includes a built-in reservation system and menu builder designed specifically for restaurants. It’s a reasonable choice when budget or timeline doesn’t allow for custom setup, as long as you’re aware of the performance trade-off.

What to Check Before Choosing Any Theme

Don’t pick based on screenshots alone. Check these first:

  1. WooCommerce compatibility, if you plan to add online ordering or gift card sales later
  2. Reservation plugin compatibility — confirm the theme works cleanly with OpenTable, Tock, or whatever booking tool you use
  3. Mobile menu display, since a cramped or hard-to-tap menu on mobile directly costs you orders
  4. Real performance numbers, not marketing claims — test the actual demo site through PageSpeed Insights before committing
  5. Update frequency, since an abandoned theme becomes a security and compatibility risk within a year or two

I’ve written more about diagnosing and fixing WordPress speed issues in how I improve Core Web Vitals on WordPress — the same principles apply directly to restaurant sites, since menu pages with heavy image galleries are one of the most common Core Web Vitals failure points I see.

A Mistake I See Restaurant Owners Make Constantly

Restaurant owners often pick a theme based purely on how the demo food photography looks, then load their own lower-quality phone photos into that same layout. The result looks worse than a simpler theme with properly shot images would. A great theme with mediocre photos underperforms a simple theme with excellent photos, every time. If your budget only stretches to one investment, spend it on professional food photography before spending it on a premium theme.

[INSERT: a real client example here — e.g., a restaurant site where switching from a heavy niche theme to a lightweight framework improved load time or bookings]

Red Flags When Choosing a Restaurant Theme

  • No recent updates. A theme untouched for over a year risks compatibility issues with current WordPress versions.
  • Demo looks fast, live sites don’t. Always test a theme’s actual customer sites, not just the polished demo.
  • Reservation or ordering features locked behind a separate paid add-on you didn’t budget for.
  • No mobile-specific menu layout, which is a serious problem given how much restaurant traffic comes from phones.

Should You DIY This or Hire Someone?

If you’re comfortable with WordPress basics, a lightweight theme plus a simple booking plugin is genuinely doable yourself. Where I see clients get stuck is customizing menu layouts to look clean on mobile, or connecting a reservation system without breaking page speed. That’s usually where a few hours of professional setup pays for itself quickly.

If you want a realistic number for a full restaurant site build before you commit to a theme or a developer, run it through my website cost calculator first. It takes a couple of minutes and gives you a grounded starting point.

Frequently Asked Questions

What is the best free WordPress theme for a restaurant?
Astra and GeneratePress both offer strong free versions that work well for restaurant sites, especially when paired with Elementor for menu and gallery customization.

Do restaurant websites need a special WordPress theme?
Not necessarily. A lightweight, general-purpose theme with good page-building flexibility often outperforms a heavy niche “restaurant” theme, especially on page speed and mobile usability.

Should a restaurant theme include a built-in reservation system?
It’s convenient but not essential. Many restaurants achieve better results pairing a lightweight theme with a dedicated reservation plugin like OpenTable or Tock, rather than relying on a theme’s built-in system.

Does theme choice affect restaurant website SEO?
Yes, significantly. Slow-loading themes hurt Core Web Vitals, which Google factors into rankings, and can cause potential customers to leave before your menu even loads.

How much does a restaurant WordPress website cost?
Costs vary based on features and design complexity, typically ranging from $1,500 for a simple menu-and-contact site to $8,000+ for a build with online ordering and custom reservation integration.

Can I add online ordering to any WordPress restaurant theme?
Most modern themes support WooCommerce or dedicated food-ordering plugins, but it’s worth confirming compatibility before choosing a theme if online ordering is a priority from day one.

Not Sure Which Theme Fits Your Restaurant?

If you’d rather skip the trial-and-error and get a straight recommendation for your specific setup, message me on WhatsApp and I’ll tell you honestly what I’d build. Start the conversation here.

Developer reacting to a passing score after work to improve Core Web Vitals on WordPress

WordPress Speed Optimization: How I Improved Core Web Vitals for Client Sites

To improve Core Web Vitals on WordPress, fix the three things that actually break scores on this platform specifically: bloated page builders slowing Largest Contentful Paint, third-party scripts delaying Interaction to Next Paint, and unstyled image placeholders causing layout shift. I’ve fixed all three across multiple client sites, and the pattern repeats almost every time.

A lot of “Core Web Vitals” advice online is generic enough to apply to any website. That’s the problem. WordPress has its own specific failure points — Elementor widgets, WooCommerce scripts, page-builder CSS — and fixing those requires knowing where WordPress actually breaks, not just installing a caching plugin and hoping.

Here’s what I actually check, in the order I check it, based on real client work.

What Are Core Web Vitals, and Why Do They Matter on WordPress?

Core Web Vitals are three metrics Google uses to measure real user experience: Largest Contentful Paint (loading speed), Interaction to Next Paint (responsiveness), and Cumulative Layout Shift (visual stability). According to Google’s own web.dev documentation, a page needs LCP under 2.5 seconds, INP under 200 milliseconds, and CLS under 0.1 to count as “good.”

That data doesn’t come from a lab test. It comes from the Chrome UX Report, which Google’s Chrome team describes as real-user data collected from actual Chrome visitors over a rolling period. That distinction matters, because a site can look fast in a quick PageSpeed test and still fail in Search Console if real visitors on slower connections or older phones experience something different.

WordPress makes this harder than a hand-coded site because so much of the front end comes from third parties — themes, plugins, page builders — each adding its own scripts and styles you didn’t write yourself.

Why Does LCP Break So Often on WordPress Sites?

Largest Contentful Paint usually fails for one of two reasons on WordPress: an oversized hero image, or a page builder wrapping that image in layers of unnecessary CSS before it can render.

I start every audit by checking what element counts as the LCP target, using Chrome DevTools rather than guessing. Nine times out of ten, it’s a hero image or heading that’s loading late because it’s buried under render-blocking CSS from the theme or builder.

The fix isn’t just “compress the image,” though that helps. It’s compressing the image, marking it for priority loading, and stripping out the CSS layers a builder adds around it that delay rendering. I’ve covered the image side of this in more depth in my guide to WordPress image optimization — this article focuses on the parts that guide doesn’t cover.

Why Is Interaction to Next Paint the Hardest One to Fix?

INP is the metric most WordPress sites fail, and it’s also the one generic speed guides handle worst. It measures how quickly a page responds after a visitor clicks, taps, or types — not how fast the page loads, but how fast it reacts.

On WordPress, INP problems almost always trace back to JavaScript. Page builders load their own JS bundles. Plugins add more. Analytics and chat widgets add even more. Each one competes for the browser’s main thread, and every millisecond that thread is busy is a millisecond your visitor’s tap goes unanswered.

Here’s what I actually do differently: instead of removing plugins one at a time and re-testing (which takes forever), I use Chrome’s Performance panel to find the specific long tasks blocking the main thread, then trace each one back to its source script. That tells me exactly which plugin or builder feature to defer or replace, instead of guessing and hoping removal helps.

What Causes Layout Shift on WordPress Sites?

Cumulative Layout Shift is usually the easiest fix once you find the cause. On WordPress, it’s almost always one of these: images without defined width and height attributes, web fonts loading late and reflowing text, or ads and embeds injecting content after the page has already rendered.

Setting explicit dimensions on images and using font-display: swap correctly handles most of it. The embeds and ad-injection cases need a reserved space in the layout before the content loads, so the page doesn’t jump when it finally does.

The Diagnostic Order I Actually Use

Most guides tell you to “run PageSpeed Insights and fix the red items.” That’s not wrong, but it’s incomplete, because PageSpeed’s lab data and your real Search Console field data often disagree — and field data is what actually affects rankings.

Here’s my actual order:

  1. Check Search Console’s Core Web Vitals report first, since it reflects real visitors over 28 days, not a single test run
  2. Confirm the exact LCP element in DevTools rather than assuming it’s the hero image
  3. Profile main-thread activity to find INP-blocking scripts, not just plugin count
  4. Fix layout shift last, since it’s usually the fastest win and doesn’t need real-user data to diagnose

That order matters because fixing things in the wrong sequence wastes hours chasing a lab score that doesn’t match what real visitors experience.

A Nuance Most Articles Skip: Mobile and Desktop Score Differently

Google evaluates Core Web Vitals separately for mobile and desktop. A site can pass comfortably on desktop and still fail on mobile, since most real traffic is mobile and mobile devices have less processing power for JavaScript-heavy pages.

I always test both separately before telling a client their site “passes.” A desktop-only pass is a false sense of security when the majority of their visitors are on phones.

[INSERT: a specific client site here — before/after LCP or INP numbers, what plugin or builder element was the actual cause, and how long the fix took]

Common Mistakes That Waste Time and Money

  • Installing every “speed” plugin at once. Stacking caching, minification, and lazy-load plugins together often creates conflicts that cause new problems instead of solving old ones.
  • Chasing a perfect lab score instead of fixing field data. A 100/100 PageSpeed score means little if Search Console still shows real visitors failing INP.
  • Ignoring mobile entirely. Desktop-only testing hides the actual problem most visitors experience.
  • Removing plugins blindly. Without profiling which script actually blocks the main thread, removal is guesswork that might fix nothing.

Should You Fix This Yourself or Hire Someone?

If your site fails one metric slightly, a good caching plugin and image compression might get you there yourself. If you’re failing INP specifically, or failing across multiple pages with different causes, that usually needs someone profiling the actual scripts — not another round of plugin installs.

Before you spend on a full rebuild, it’s worth getting a realistic sense of what a proper speed audit and fix actually costs for your site’s specific problems. My website cost calculator gives you a starting estimate before you commit to anything.

Frequently Asked Questions

What are good Core Web Vitals scores for WordPress?
Google considers a page “good” when Largest Contentful Paint is under 2.5 seconds, Interaction to Next Paint is under 200 milliseconds, and Cumulative Layout Shift is under 0.1, measured across real visitor data at the 75th percentile.

Why does my WordPress site fail Interaction to Next Paint?
INP usually fails because of JavaScript from page builders, plugins, or third-party widgets competing for the browser’s main thread. Profiling long tasks in Chrome DevTools identifies the exact script causing the delay.

Does Elementor hurt Core Web Vitals?
Elementor can slow down Core Web Vitals if a page uses many nested sections and widgets, since each adds its own CSS and JavaScript. A leaner page structure and deferred non-critical scripts significantly reduce this impact.

Do Core Web Vitals affect Google rankings?
Yes, but as a supporting signal rather than the primary factor. Google’s own documentation confirms Core Web Vitals are part of its ranking systems, though content quality and relevance still carry more overall weight.

How long does it take to fix Core Web Vitals on WordPress?
Simple fixes like image optimization and layout shift corrections can take a few hours. Diagnosing and fixing INP issues caused by scattered JavaScript across plugins and builders often takes several days of profiling and testing.

Can I improve Core Web Vitals without a developer?
Basic improvements like a caching plugin, image compression, and font-loading fixes are doable yourself. Diagnosing INP issues from multiple plugin scripts usually requires someone who can profile main-thread activity directly.

Want Your Site’s Real Numbers Checked?

If you’re not sure which metric is actually failing on your site, or why, message me on WhatsApp and I’ll take a real look before you spend money guessing. Start the conversation here.

Tour operator pointing at a mobile booking calendar, showcasing must-have tour booking website features

15 Must-Have WordPress Features for Tourism & Tour Booking Websites

The tour booking website features that actually matter in 2026 aren’t decorative — they’re the ones that remove friction between browsing and paying. Real-time availability, a mobile-first booking flow, and OTA integration matter more than a pretty homepage. I build tourism sites on WordPress for a living, and this is the exact list I check before calling any project done.

Most “top features” articles for tourism websites read like a generic web design checklist with a palm tree added. That’s not helpful if you’re a tour operator deciding what to actually spend money on. So here’s the list I use with real clients, grouped by what it actually protects: bookings, trust, and visibility.

Why Tourism Websites Need a Different Feature Set

A tour or activity website isn’t a brochure site. It’s a live booking engine with a storefront attached. That distinction matters because a missing feature here doesn’t just look bad — it directly costs a sale.

Mobile makes this urgent. According to Phocuswright’s Travel Forward 2026 analysis, online travel bookings are rising sharply worldwide, and mobile devices already drive the majority of travel research and a large share of bookings. If your booking flow isn’t built mobile-first, you’re losing customers mid-tap, not mid-thought.

The Booking & Conversion Features That Actually Move the Needle

1. Real-Time Availability Calendar

Nothing kills trust faster than a booking request that bounces back “sorry, that’s full.” A live calendar synced to your actual capacity, not a static form, prevents that entirely.

2. Mobile-First Booking Flow

Design the booking journey for a thumb on a phone, not a mouse on a desktop. That means large tap targets, minimal typing, and a calendar that doesn’t require pinch-zooming to read.

3. Secure Online Payment Gateway

Travelers expect to pay upfront, not “confirm by email.” A PCI-compliant gateway (Stripe, PayPal, or your booking platform’s built-in processor) isn’t optional anymore — it’s the baseline.

4. Multi-Currency and Multi-Language Pricing

If you serve travelers from the US, UK, and EU, showing prices in their home currency reduces cart abandonment. Even a simple currency switcher makes your site feel built for international visitors, not just locals.

5. Integration With an OTA or Booking Engine

Platforms like FareHarbor, Viator, or Bokun handle scheduling and payments so you don’t have to build that logic yourself. I’ve walked through exactly how I built a FareHarbor-integrated booking site on WordPress, including the mistakes that slow these integrations down.

6. Instant Confirmation Emails and SMS

A booking without immediate confirmation creates anxiety, and anxious customers cancel. Automated confirmations, ideally with a calendar file attached, close that gap instantly.

The Trust Features That Convert Hesitant Visitors

Booking a tour involves more trust than buying a t-shirt. You’re asking someone to hand over money for an experience they can’t touch or return.

7. High-Quality Image and Video Galleries

Grainy stock photos are an instant credibility killer. Real photos and short video clips of the actual tour outperform generic imagery every time, because visitors want to see what they’re paying for.

8. Verified Review and Testimonial Display

Star ratings pulled from TripAdvisor, Google, or your own verified customers do more convincing than any sales copy. Display them near the booking button, not buried on a separate page.

9. Clear Cancellation and Refund Policy

Hidden or vague refund terms create hesitation at the worst possible moment — right before checkout. A clear, visible policy actually increases bookings, because it removes a silent objection.

10. Group and Private Booking Options

Not every visitor wants the standard group slot. Offering private bookings or group-size pricing tiers, shown clearly during checkout, captures customers who’d otherwise leave to compare elsewhere.

The Technical Features Nobody Notices Until They’re Missing

This is the category most tourism site owners skip, and it’s exactly where I see sites lose the most silent revenue.

11. Schema Markup for Tours and Events

Structured data (schema.org’s TouristTrip and Event types) helps Google show your tour with star ratings, pricing, and dates directly in search results. Most WordPress tourism sites I inherit have none of this set up.

12. Fast-Loading, Core Web Vitals-Compliant Pages

A slow booking page loses mobile visitors before they even see your calendar. Page speed isn’t a technical nice-to-have here — it’s a direct revenue lever, especially since most travel research now happens on mobile connections that aren’t always fast.

13. Accessible Booking Forms

Accessibility isn’t just compliance box-ticking. The W3C’s Web Content Accessibility Guidelines exist because a form that’s hard to navigate with a keyboard or screen reader locks out real paying customers, not just an edge case.

14. GDPR-Compliant Cookie Consent

If you’re marketing to EU travelers, this isn’t optional. A properly configured cookie consent banner protects you legally and signals to European visitors that your business takes their data seriously.

15. A Blog or Local Guide Section

This is the feature owners cut first to save budget, and it’s usually the wrong call. A blog answering questions like “best time to visit X” or “what to pack for Y tour” brings in organic search traffic long after your ad budget runs out.

The Checklist I Actually Use Before Launch

Here’s what separates a tourism site that converts from one that just looks nice: I ask whether each feature reduces friction or just adds decoration. A rotating homepage slider? Decoration. A visible cancellation policy next to the booking button? Friction reducer. When budget is tight, I always prioritize the friction-reducing features first, even if that means a simpler design.

[INSERT: a real example here — e.g., a specific tourism client where adding one of these features (reviews, mobile booking, schema markup) measurably changed booking behavior]

What I’d Skip If Budget Is Tight

Not every feature on this list needs to launch on day one. If you’re bootstrapping, I’d tell you to skip the multi-language switcher and group-pricing tiers first — you can add those once you have real booking volume. Never skip the mobile booking flow or secure payment gateway, even on a tight budget. Those two failures cost you customers you’ll never see in your analytics, because they simply leave without telling you why.

If you’re not sure which of these your current site is missing, that’s worth a proper look before you spend more on marketing traffic that won’t convert. My WordPress development service covers exactly this kind of audit and build for tourism and activity businesses.

Frequently Asked Questions

What features does a tour booking website need most?
Real-time availability, a mobile-first booking flow, and a secure payment gateway matter most, because these directly affect whether a browsing visitor completes a purchase.

Does a tourism website need multi-language support?
It depends on your audience. If you regularly attract international travelers from Europe or beyond, multi-language and multi-currency support noticeably reduce booking hesitation and cart abandonment.

Is schema markup important for tour websites?
Yes. Structured data helps Google display your tours with ratings, pricing, and availability directly in search results, which improves click-through rates without any extra ad spend.

Should a small tour operator use FareHarbor or a custom booking system?
For most small to mid-size tour operators, an established platform like FareHarbor is more cost-effective than custom-built booking logic, since it already handles scheduling, payments, and availability reliably.

How much does a tour booking website cost to build?
Costs vary based on integrations and design complexity, typically ranging from $2,000 for a simple booking-enabled WordPress site to $15,000+ for a fully custom, multi-language build with OTA integrations. Use a cost calculator for a project-specific estimate.

Do tour booking websites need to be mobile-optimized?
Yes, absolutely. Mobile devices drive the majority of travel research and a large share of bookings, so a booking flow that isn’t mobile-first will lose customers before they even reach checkout.

Want a Straight Assessment of Your Site?

If you already have a tourism site and want to know which of these 15 features you’re missing, message me on WhatsApp and I’ll take an honest look. Start the conversation here.

Developer comparing mobile and desktop views during a FareHarbor WordPress integration build

How I Built a Fast FareHarbor-Integrated Booking Site on WordPress

A fast FareHarbor WordPress integration comes down to three things — using the official plugin correctly, avoiding page-builder bloat around the booking widget, and testing the mobile experience separately from desktop. I built exactly this for a tour operator, and the biggest speed wins came from cleanup, not from custom code.

Most tutorials on this topic stop at “install the plugin, paste the shortcode, done.” That’s technically true. But it skips the part that actually matters for a tour or activity business: making sure the booking calendar loads fast and doesn’t fight with your theme, because a slow booking widget costs you live conversions, not just rankings.

Here’s how I actually approached this build, what broke along the way, and what I’d tell any small tourism business before they start.

What Is FareHarbor, and Why Does WordPress Integration Get Tricky?

FareHarbor is a booking and reservation platform built for tour operators, activity providers, and rental businesses. It handles availability, payments, and scheduling behind the scenes, while your WordPress site just needs to display the booking calendar.

The official FareHarbor for WordPress plugin adds simple shortcodes for this — a calendar embed, a grid of activities, and a button that opens a booking overlay. On paper, that sounds simple. In practice, three things usually go wrong: the shortcode gets dropped inside a heavy page-builder section, the site doesn’t have SSL configured properly (FareHarbor widgets require HTTPS to load at all), or nobody tests the mobile booking flow separately from desktop.

How I Set Up the Core Booking Integration

I started with the basics done properly, because skipping this step is where most builds go wrong later.

First, I confirmed the client’s FareHarbor account was active with bookable items marked “Active,” not “Draft” — a surprisingly common reason booking widgets show up empty. Then I installed the official plugin rather than a third-party workaround, since FareHarbor maintains it directly and it stays compatible with WordPress core updates.

For the actual calendar and grid, I used the [fareharbor] and [itemgrid] shortcodes rather than embedding raw iframes. That kept the markup clean and let FareHarbor’s own script handle responsiveness, instead of me fighting layout issues inside a page builder.

Why Did the Booking Widget Feel Slow at First?

This is the part most guides skip entirely. The plugin itself is lightweight. The slowdown came from everywhere else on the page.

The original build stacked FareHarbor’s widget inside three nested Elementor sections, each loading its own CSS and JavaScript. That’s a common pattern, and it’s exactly what drags down Largest Contentful Paint. According to Google’s own web.dev documentation, a page needs an LCP under 2.5 seconds to count as “good” — measured at the 75th percentile of real visits, not just a lab test.

So I flattened the section structure around the booking embed, deferred non-critical scripts, and made sure the hero image above the calendar was properly compressed and sized. None of that touched FareHarbor’s code directly. It just stopped surrounding bloat from slowing the one element visitors actually came to use.

What Actually Made the Site Feel Fast?

Three specific changes made the biggest difference, in this order:

  1. Reducing nested page-builder containers around the booking widget, since every extra wrapper adds render-blocking overhead
  2. Enabling FareHarbor’s auto-Lightframe setting, which opens the booking overlay without a full page reload — this alone made the mobile flow feel noticeably snappier
  3. Testing mobile separately from desktop, because FareHarbor explicitly recommends checking the mobile booking experience on its own, not assuming desktop testing covers it

I also checked Interaction to Next Paint specifically, since it measures how responsive the page feels across every click and tap, not just the first one. A calendar that looks fine but lags when a visitor taps a date is a silent conversion killer.

What I’d Do Differently on the Next Booking Site

If I were starting this project again, I’d test SSL and mobile Lightframe behavior before writing a single line of theme customization, not after. Most of the “slow booking widget” complaints I see trace back to page structure around the widget, not FareHarbor itself. That’s a decision-checklist worth having before you even hire someone: ask whether they plan to test mobile booking separately, and whether they’ll audit surrounding page bloat instead of just dropping in the shortcode and calling it done.

[INSERT: the specific tour operator’s name/niche, load time before and after, or a real detail from that FareHarbor project you built]

Is FareHarbor the Right Choice, or Should You Consider Custom Code?

For most tour and activity businesses, FareHarbor plus WordPress is the right call. It’s purpose-built for scheduling and payments, and rebuilding that logic from scratch rarely makes financial sense. I’ve written more broadly about when custom plugin development actually earns its cost — booking logic this specialized almost always falls on the “use the existing platform” side of that decision.

Where custom work does help is around the widget: cleaning up page structure, building a faster theme foundation, or connecting FareHarbor data to other business tools. That’s development work worth budgeting for separately from the booking platform itself. If you want a realistic number before reaching out to anyone, my website cost calculator gives you a starting estimate in a couple of minutes.

Frequently Asked Questions

Does FareHarbor work with any WordPress theme?
Yes, in most cases. The official FareHarbor for WordPress plugin uses shortcodes, so it works with standard themes and most page builders. Problems usually come from heavy page-builder sections around the widget, not the plugin itself.

Why does my FareHarbor booking calendar show up empty?
The most common cause is bookable items still marked as “Draft” instead of “Active” in your FareHarbor dashboard. Missing SSL (HTTPS) on your WordPress site can also block the widget from loading.

Does a FareHarbor booking widget slow down my website?
The plugin itself is lightweight. Slowdowns usually come from surrounding page-builder bloat, uncompressed images, or too many nested sections around the widget, not from FareHarbor’s code.

What is a good Core Web Vitals score for a booking page?
Google considers a page “good” when Largest Contentful Paint is under 2.5 seconds, Interaction to Next Paint is under 200 milliseconds, and Cumulative Layout Shift is under 0.1, measured across real visitor data.

Should I use custom code instead of FareHarbor for bookings?
Rarely, for small to mid-size tour operators. FareHarbor already handles scheduling, payments, and availability reliably. Custom development is better spent on page speed and design around the widget, not replacing the booking engine itself.

Can FareHarbor bookings be tested on mobile separately?
Yes, and you should. FareHarbor’s own setup guidance recommends testing the mobile booking flow independently, since tap responsiveness and overlay behavior can differ from the desktop experience.

Want This Done Right the First Time?

If you run a tour, rental, or activity business and want a FareHarbor integration that actually loads fast, message me on WhatsApp and I’ll walk through your setup with you. Start the conversation here.

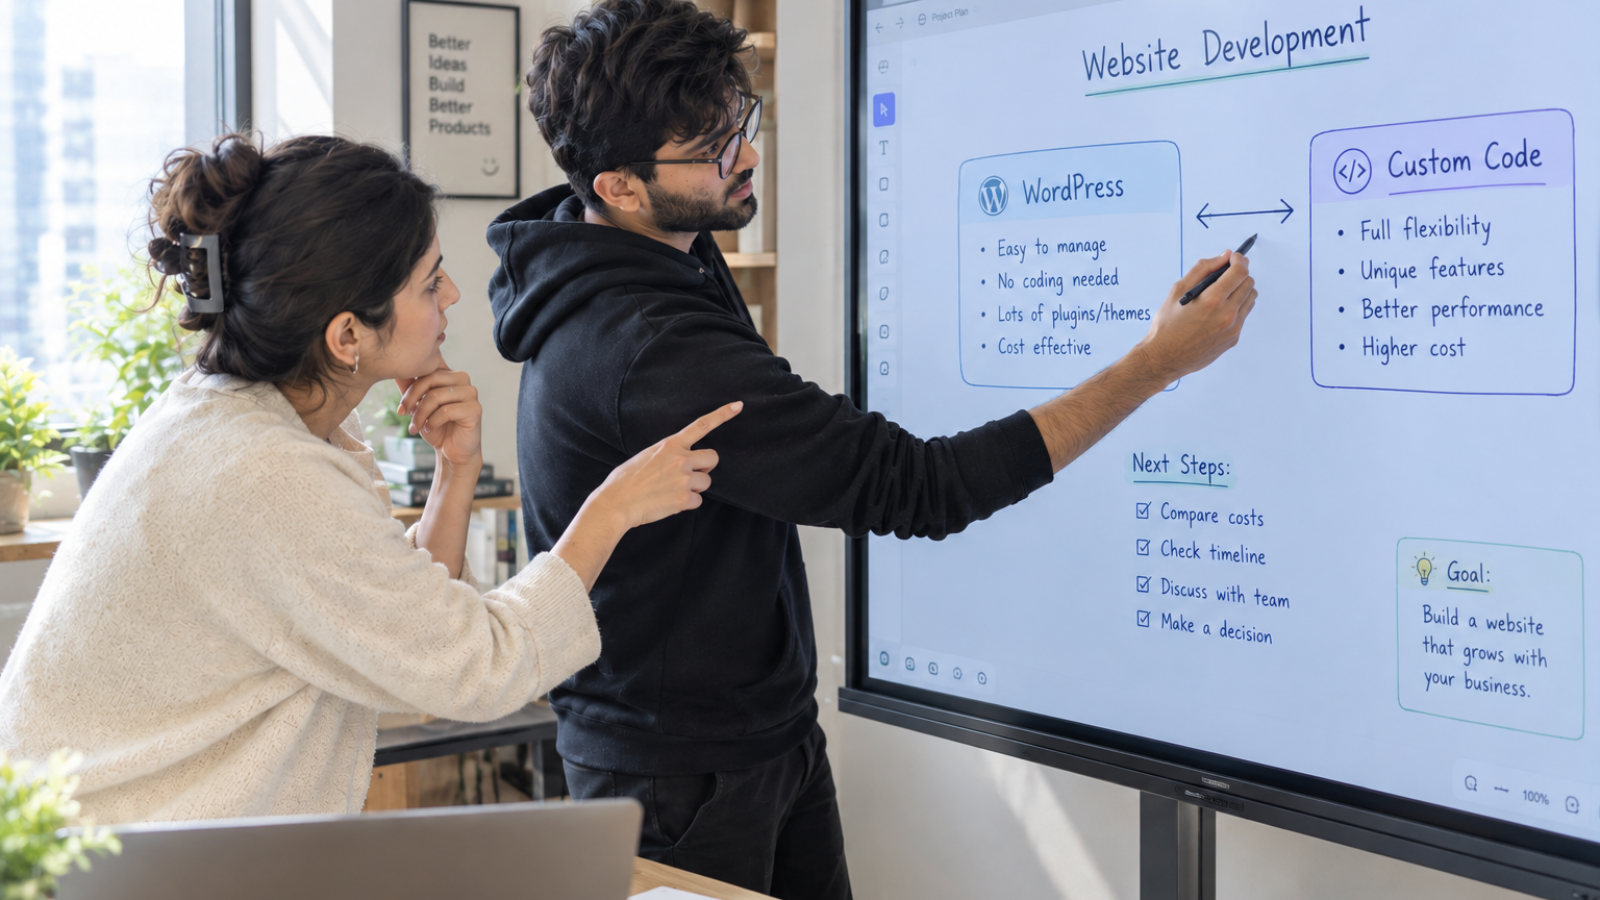
Developer and business owner comparing WordPress vs custom code options on a whiteboard

WordPress vs Custom Code: Which Is Better for Your Business Website?

For most small businesses, WordPress wins on cost and speed to launch. WordPress vs custom code really comes down to one question: is your website a marketing tool, or is it the product itself? If it’s the former, WordPress usually wins. If your business runs on the site — dashboards, logins, custom workflows — custom code earns its higher price tag.

I get asked this question almost every week, usually by a founder who’s been told two completely different things by two different developers. One says “just use WordPress, it’s cheaper.” The other says “custom code is the only way to do this properly.” Both are right, depending on the project. Neither is right for every project.

Here’s how I actually walk clients through this decision, with real 2026 numbers instead of vague opinions.

Why This Comparison Gets Confusing

WordPress now powers a huge share of the internet. According to W3Techs, WordPress runs roughly 41–43% of all websites as of 2026, which means most agencies default to it without questioning whether it actually fits your project. That default isn’t wrong most of the time — but “most of the time” isn’t “always.”

Custom code, on the other hand, gets sold as the premium option almost automatically, even when a client’s needs are simple. Both defaults cost businesses money. The right answer depends entirely on what your site actually needs to do.

What Does Each Option Actually Cost?

Real numbers matter more than general claims here, so let’s compare them directly.

WordPress:

  • A professional small business build: $2,000–$15,000
  • A fully custom WordPress theme with advanced functionality: $15,000–$20,000
  • Ongoing hosting, premium plugins, and maintenance: roughly $500–$2,000/year

Custom code (built from scratch, e.g., React, Next.js, or a custom backend):

  • A straightforward custom marketing site: starts around $15,000–$30,000
  • A complex web application with logins, dashboards, or integrations: $50,000–$150,000+
  • Ongoing maintenance: no plugin fees, but you pay a developer for every future change

A 2026 industry-wide survey found that 35% of respondents quoted $20,000–$50,000 for a custom web application, with delivery timelines mostly landing between 8 and 28 weeks. That’s a useful reality check if someone’s quoting you $5,000 for “fully custom” work — the numbers usually don’t add up at that price.

If you want a number specific to your project instead of an industry average, run it through my website cost calculator before you request quotes from anyone.

When WordPress Actually Wins

I recommend WordPress when most of the following are true:

  • Your site is mainly informational, or sells through a standard store (WooCommerce covers most e-commerce needs well)
  • Non-technical staff need to edit content themselves, weekly or more often
  • You need to launch in weeks, not months
  • Your budget is finite and needs to stretch across design, content, and marketing too

WordPress’s plugin ecosystem is genuinely its biggest strength here. Need a booking form, a membership area, or SEO tools? There’s almost certainly a well-built plugin for it already — no need to build from scratch. I’ve written separately about when custom plugin development actually makes sense versus when an existing plugin will do the job just as well.

When Custom Code Actually Wins

Custom code earns its cost when the website is the business, not just a brochure for it. That means:

  • You’re building a SaaS product, member dashboard, or app with user accounts
  • You need tight integrations with internal tools, CRMs, or custom APIs that don’t have a plugin equivalent
  • Performance is a competitive lever, not a nice-to-have — every extra second of load time costs you conversions or rankings
  • You expect to scale well beyond what a plugin-based site can handle cleanly

Here’s the part most comparisons skip: custom code doesn’t automatically mean better security or performance. A poorly built custom site can be just as slow and vulnerable as a poorly built WordPress site. What custom code buys you is control — no plugin conflicts, no forced updates from third parties, no bloat you didn’t choose. That control costs money and time. It’s worth it only if you’ll actually use it.

The Framework I Use With Clients

Before quoting either direction, I ask three questions:

  1. Is the website a marketing surface or the product itself? A brochure site rarely justifies custom code. A booking platform or dashboard usually does.
  2. Who owns this in year two? A perfectly built site with no one maintaining it fails either way. If you don’t have ongoing developer support lined up, factor that into which option is realistic for you.
  3. What does the three-year cost actually look like? WordPress wins upfront almost every time. But stack premium plugins, security monitoring, and plugin-conflict fixes over three years, and the gap narrows — sometimes it closes entirely for complex, heavily-plugged builds.

Most articles stop at comparing sticker prices. The year-two ownership question is the one I’ve seen actually predict whether a project succeeds or turns into a mess six months after launch.

Security: A Real Difference, Not a Scare Tactic

WordPress’s popularity is also what makes it a bigger target. Because so many sites run it, automated attacks scan for known plugin vulnerabilities constantly — when a popular plugin has a flaw, bots exploit it across thousands of sites within hours. That’s a real, documented pattern, not fear-mongering.

Custom code isn’t automatically safer — a developer can still write vulnerable code. But it doesn’t share vulnerabilities with millions of other unrelated sites. If security compliance is a serious concern for your industry (finance, healthcare, anything handling sensitive data), that’s a real point in custom code’s favor.

[INSERT: a real example here — e.g., a project where you migrated a client from a heavily plugged WordPress site to something leaner, or a case where WordPress was clearly the right call and saved a client money]

What I’d Actually Tell You to Do

If you’re still unsure which side of this you’re on, don’t guess — most businesses aren’t as unique as they think, and most “we need custom” requests turn out to be solvable with WordPress and the right plugin setup. My platform finder quiz takes a few minutes and gives you a clearer starting point before you talk to anyone about pricing.

Frequently Asked Questions

Is WordPress or custom code cheaper?
WordPress is almost always cheaper upfront, typically $2,000–$15,000 for a professional small business site, compared to $15,000–$150,000+ for custom code depending on complexity.

Is custom code more secure than WordPress?
Not automatically. Custom code doesn’t share vulnerabilities with other sites the way WordPress plugins can, but a poorly built custom site can still have serious security flaws. Security depends more on the developer’s practices than the platform itself.

How long does it take to launch a WordPress site versus a custom site?
A WordPress site typically launches in 2–8 weeks. A custom web application usually takes 8–28 weeks, according to a 2026 industry-wide cost survey, depending on scope and integrations required.

Can WordPress handle complex business logic?
WordPress can handle a surprising amount through plugins and custom development, but truly unique workflows, dashboards, or user account systems are usually better served by custom code.

Does custom code cost less over time than WordPress?
Sometimes. WordPress carries ongoing plugin, hosting, and maintenance costs that compound over years. For heavily customized, high-traffic sites, custom code can end up cheaper over a three-year period, even with a higher upfront cost.

Should a small business ever choose custom code over WordPress?
Yes, if the website itself is the product — a booking platform, member portal, or app with logins — rather than a marketing site. For most small businesses, WordPress remains the more practical choice.

Not Sure Which Side You’re On?

If you want a straight opinion on your specific project instead of a generic recommendation, message me on WhatsApp and I’ll tell you honestly which direction fits. Start the conversation here.