DNS propagation issue during restaurant website migration showing old and new site conflict

DNS Propagation Issues When Migrating a Restaurant Website — How to Fix Them

DNS propagation issues during a restaurant website migration can bring your entire online ordering system to a halt at the worst possible moment — during a busy lunch service, on a Friday evening, or right after you’ve told customers about your new site.

I’ve migrated multiple restaurant websites including Danish restaurants registered at Punkt.um, and DNS propagation problems came up every single time. This guide covers exactly what causes DNS propagation issues, how to fix them fast, and how to structure your migration so your restaurant never goes dark during the switch.

If you’re mid-migration and your site is currently down or flipping between old and new — scroll straight to the Fix section. If you’re planning a migration, read everything so you don’t hit these problems at all.

What DNS Propagation Actually Means

Before fixing the problem, it helps to understand what’s actually happening.

Every domain name (like yourrestaurant.com) points to an IP address — the physical location of the server where your website lives. DNS (Domain Name System) is the global system that translates your domain name into that IP address so browsers can find your site.

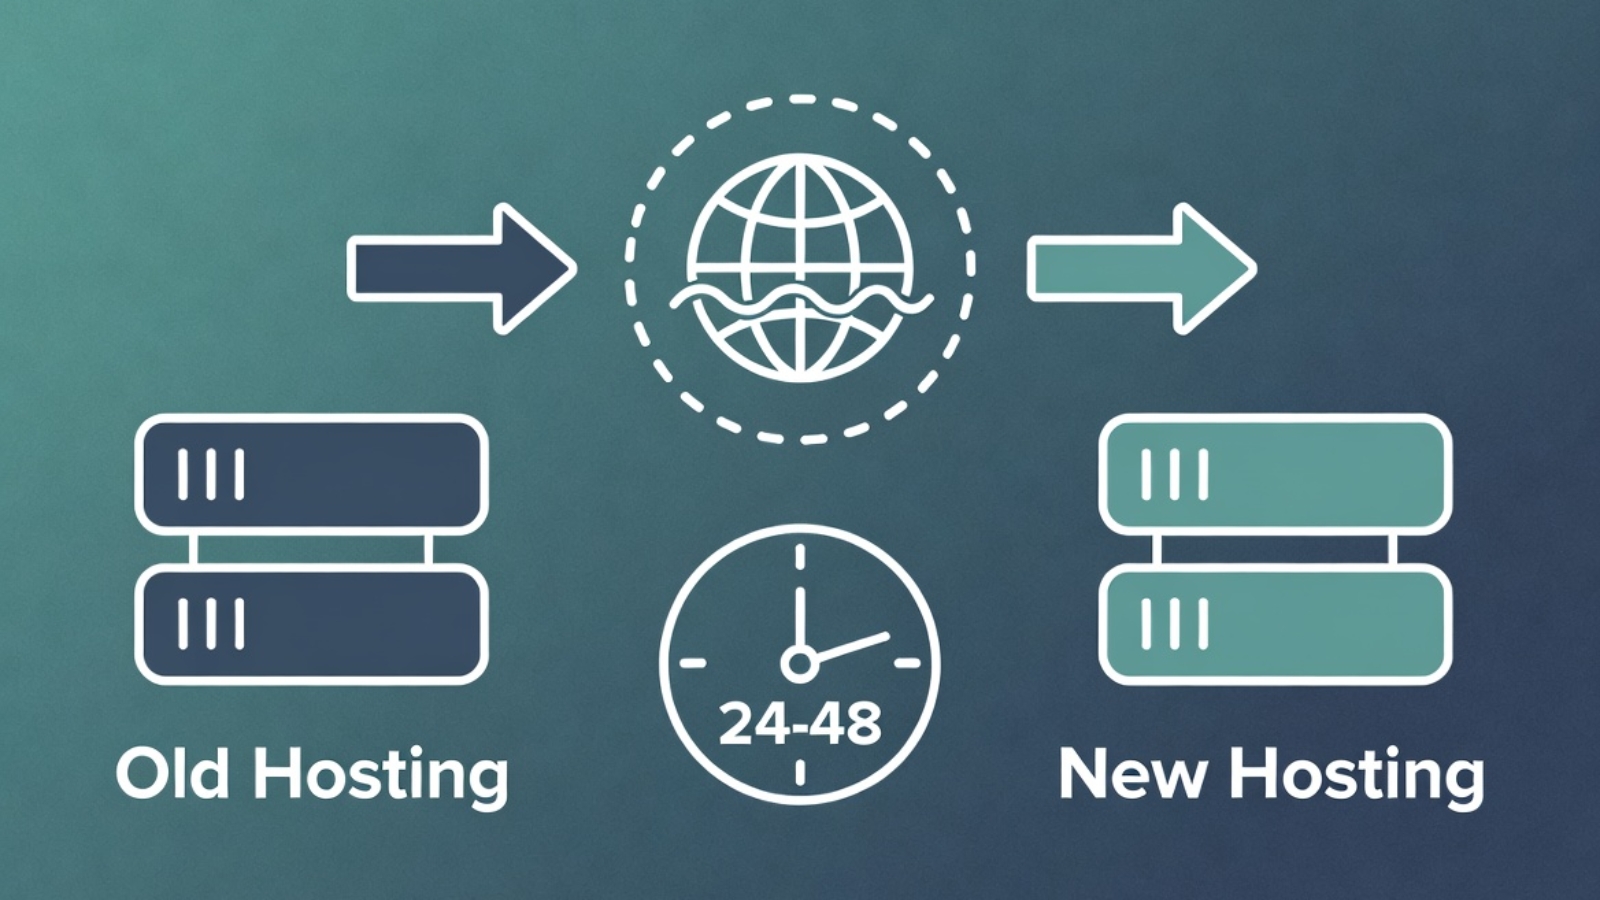
When you migrate a restaurant website to new hosting, you change the IP address your domain points to. DNS propagation is the time it takes for this change to spread across all DNS servers worldwide.

The problem: DNS servers around the world cache (store) your old IP address. Until their cache expires and they fetch the new record, some visitors see your old site and some see the new one — depending on which DNS server their internet provider uses.

This propagation period typically takes 24–48 hours. Some providers update within minutes. Others hold the old record for the full 48 hours. You have no direct control over this.

⚠️ Watch Out: During propagation, you might test your new site from your laptop and see it working perfectly — while a customer in another city still sees the old site or gets a blank page. This is normal propagation behavior, not a sign something is broken.

Why Restaurant Websites Are Especially Vulnerable

Most websites can afford a few hours of reduced visibility during a DNS change. Restaurant websites can’t — especially ones taking online orders.

A customer who hits a blank page or error during your migration doesn’t wait for propagation to finish. They order from somewhere else. If your DNS change happens on a Friday evening before a busy weekend, that’s real lost revenue.

Restaurant websites also typically involve more moving parts than a simple brochure site:

  • An active ordering system (WooCommerce, Gloria Food, or a booking platform)
  • Payment gateway connections that are IP or domain-specific
  • Email order notifications that may be tied to the old hosting
  • Google My Business listing pointing to the domain
  • Third-party delivery platform integrations

All of these need to keep working during and after the migration.

✅ Pro Tip: Never schedule a DNS change on a Friday, Saturday, or any day before a known busy period for your restaurant. Tuesday or Wednesday morning is ideal — lower traffic, your hosting support team is available, and you have the rest of the week to fix anything unexpected.

The Right Way to Migrate — Zero Downtime Approach

The single most important thing you can do to avoid DNS propagation problems is to never actually take your restaurant offline during the migration.

Here’s the approach I use for every restaurant migration:

Step 1 — Build the New Site on a Temporary URL

Build and fully test the new WordPress site on a staging URL or a temporary subdomain provided by your new host. For example:

staging.yourrestaurant.com
OR
yourrestaurant.newhost.com/staging

The old site stays completely live and taking orders throughout this entire phase. Customers never see anything different.

Step 2 — Test Everything on the Staging URL

Before touching any DNS settings, confirm all of the following work on the staging URL:

  • Full menu loads correctly with all items and prices
  • Add to cart and checkout work end to end
  • Payment processes successfully (use a real test transaction)
  • Order confirmation email arrives
  • All images load correctly
  • Site loads on mobile in Safari and Chrome

Do not change DNS until every item on this list passes.

Step 3 — Lower Your TTL Before Changing DNS

TTL (Time To Live) is the number of seconds DNS servers cache your record before checking for updates. Most domains default to 3600 seconds (1 hour) or 86400 seconds (24 hours).

Lower your TTL to 300 seconds (5 minutes) at least 24 hours before you plan to change your DNS records. This means when you do make the change, it propagates in minutes rather than hours.

To lower TTL:

  1. Log in to your domain registrar (Punkt.um, GoDaddy, Namecheap, etc.)
  2. Go to DNS management
  3. Find your A record for @ (root domain) and www
  4. Change the TTL value to 300
  5. Save and wait 24 hours before proceeding

✅ Pro Tip: Most restaurant owners don’t know about TTL and skip this step. It’s the single most effective thing you can do to speed up propagation. A 5-minute TTL means your DNS change reaches most of the world within 15–30 minutes instead of 24–48 hours.

Step 4 — Change Your DNS Records

Once your new site is fully tested and your TTL has been lowered for 24 hours, make the DNS change.

Option A — Change Nameservers (Recommended)

Nameservers control all DNS for your domain. Pointing them to your new host means the new host manages all DNS records.

Find your new host’s nameservers in your hosting control panel — they look like:

ns1.hostinger.com
ns2.hostinger.com

At your registrar, replace the current nameservers with these. Save.

Option B — Update A Records Only

If you want to keep your domain’s DNS managed at your registrar, update only the A records:

  1. Find your new hosting server’s IP address in your hosting control panel
  2. At your registrar, edit the A record for @ (root domain) — change IP to new hosting IP
  3. Edit the A record for www — same new IP
  4. Save

A record changes propagate faster than nameserver changes in most cases.

Step 5 — Keep the Old Site Live During Propagation

This is critical. Do not cancel your old hosting until propagation is fully complete.

During the propagation window, some visitors will reach the old site and some will reach the new one. If your old hosting is still live, old-site visitors still see a working restaurant — they can still order. The only downside is you’re running two hosting accounts temporarily.

Wait at least 48 hours after the DNS change before cancelling old hosting. Check propagation status at whatsmydns.net — enter your domain and confirm it shows the new IP from locations around the world before cancelling anything.

Punkt.um Specific — Danish Domain Registrar

If your restaurant domain is registered at Punkt.um — common for Danish restaurants — here’s what you need to know that their documentation doesn’t make obvious.

Finding DNS settings in Punkt.um:

Punkt.um’s interface is in Danish. The sections you need:

  • Nameservers: look for “Navneservere” in your domain management panel
  • DNS records (A records): look for “DNS-zoner”

Punkt.um propagation is slow. In my experience migrating Danish restaurant domains through Punkt.um, propagation consistently took 36–48 hours — longer than most registrars. Build this into your timeline and warn the client upfront.

Punkt.um TTL settings: TTL adjustment is available in the DNS-zoner section. Lower it to 300 before your migration window exactly as described above — it makes a significant difference even with Punkt.um’s slower propagation.

⚠️ Watch Out: Punkt.um requires you to confirm DNS changes via email. After saving your nameserver or A record change, check the email address registered with your Punkt.um account immediately — the change won’t apply until you click the confirmation link. This confirmation requirement catches people out, especially if the registered email is an old address they don’t check regularly.

How to Check If DNS Has Propagated

Don’t rely on your own browser to check propagation — your local DNS cache may be showing you the old site even after the change.

Use these tools instead:

whatsmydns.net — shows your domain’s DNS resolution from servers in 20+ countries simultaneously. Enter your domain, select A record, and click Search. Green checkmarks mean that location sees the new IP. This is the most reliable way to see real-world propagation status.

dnschecker.org — similar tool with a slightly different server list. Use both for a complete picture.

Clear your local DNS cache:

On Windows:

ipconfig /flushdns

On Mac:

sudo dscacheutil -flushcache; sudo killall -HUP mDNSResponder

On Chrome browser: go to chrome://net-internals/#dns → click Clear host cache.

After clearing cache, open your domain in an incognito window to see which version of the site your connection currently resolves to.

Common DNS Propagation Problems and Fixes

Problem: Site shows blank page or connection error during propagation

This usually means your new hosting is live but SSL hasn’t been issued yet for the domain. Most hosting providers issue a free SSL certificate automatically when your domain points to their servers — but this can take 10–30 minutes after DNS resolves.

Fix: Wait 30 minutes after DNS propagates and check again. If still no SSL, log in to your hosting control panel and manually trigger SSL issuance (Hostinger: hPanel → SSL → Install, SiteGround: Site Tools → Security → SSL Manager).

Problem: Old site showing after 48 hours

Fix: Your local DNS cache is still showing the old site. Clear your cache using the commands above and test in incognito. If whatsmydns.net shows the new IP globally but you still see the old site locally, it’s definitely a local cache issue — not a real propagation problem.

Problem: Email stops working after migration

Fix: When you change nameservers, you move DNS management to your new host — which may not have your MX records (email routing) set up. Before changing nameservers, log your existing MX records at your old registrar and recreate them at the new host.

Check MX records with:

nslookup -type=MX yourrestaurant.com

Problem: WooCommerce ordering breaks after migration

Fix: Check two things. First, your SSL certificate is active on the new host — WooCommerce checkout requires HTTPS. Second, your WordPress site URL is set correctly. Go to Settings → General and confirm both WordPress Address and Site Address show the correct domain with https://.

Problem: Google My Business still showing old site

Fix: This isn’t a DNS issue — it’s a Google cache issue. After migration, log in to your Google Business Profile and update the website URL to confirm it’s correct. Google will recrawl your site within a few days.

Migration Checklist — Full Timeline

One week before migration:

  • Build and fully test new site on staging URL
  • Confirm all payment gateways work on new host
  • Screenshot all existing DNS records at old registrar
  • Lower TTL to 300 on all A records

Day of migration:

  • Confirm TTL has been low for at least 24 hours
  • Run final test on staging URL
  • Change nameservers or A records at registrar
  • Confirm Punkt.um email confirmation if applicable
  • Monitor whatsmydns.net every 30 minutes

48 hours after DNS change:

  • Confirm full propagation on whatsmydns.net
  • Test complete ordering flow on live domain
  • Confirm order confirmation emails arriving correctly
  • Confirm SSL active with green padlock in browser
  • Clear your local DNS cache and test in incognito

After full confirmation:

  • Cancel old hosting
  • Restore TTL to 3600 on DNS records
  • Submit new sitemap to Google Search Console
  • Update any hardcoded old hosting URLs in WordPress database using Search Replace DB

Common Questions

Q: How long does DNS propagation actually take?
A: Typically 24–48 hours globally. With a low TTL set in advance it can be as fast as 15–30 minutes for most locations. Punkt.um specifically tends toward the 36–48 hour end of the range.

Q: Can I speed up DNS propagation?
A: Yes — lower your TTL to 300 seconds at least 24 hours before the change. This is the most effective method. You cannot force other DNS servers to update faster than their cache expiry.

Q: Will my restaurant lose orders during migration?
A: Not if you keep the old hosting live during propagation. Visitors hitting the old site during propagation still see a working restaurant and can still order. Only cancel old hosting after full propagation is confirmed.

Q: Do I need to change DNS if I’m keeping the same domain?
A: Yes — if you’re moving to new hosting, you need to update DNS regardless of whether you keep the same domain. The domain name stays the same but it needs to point to the new server’s IP address.

Q: What if my domain registrar doesn’t let me change TTL?
A: Some budget registrars don’t expose TTL settings. In this case, change your DNS records on a Tuesday morning when traffic is lowest and accept the standard 24–48 hour propagation window.

Final Thoughts

DNS propagation issues during a restaurant website migration are almost entirely avoidable with the right preparation. Lower your TTL a day before the switch, keep the old site live during propagation, use whatsmydns.net to monitor in real time, and never schedule a DNS change before a busy trading period.

The Punkt.um-specific issues — Danish confirmation emails, slower propagation, Danish-language interface — add complexity that catches people out if they haven’t worked with that registrar before. Now you know what to expect.

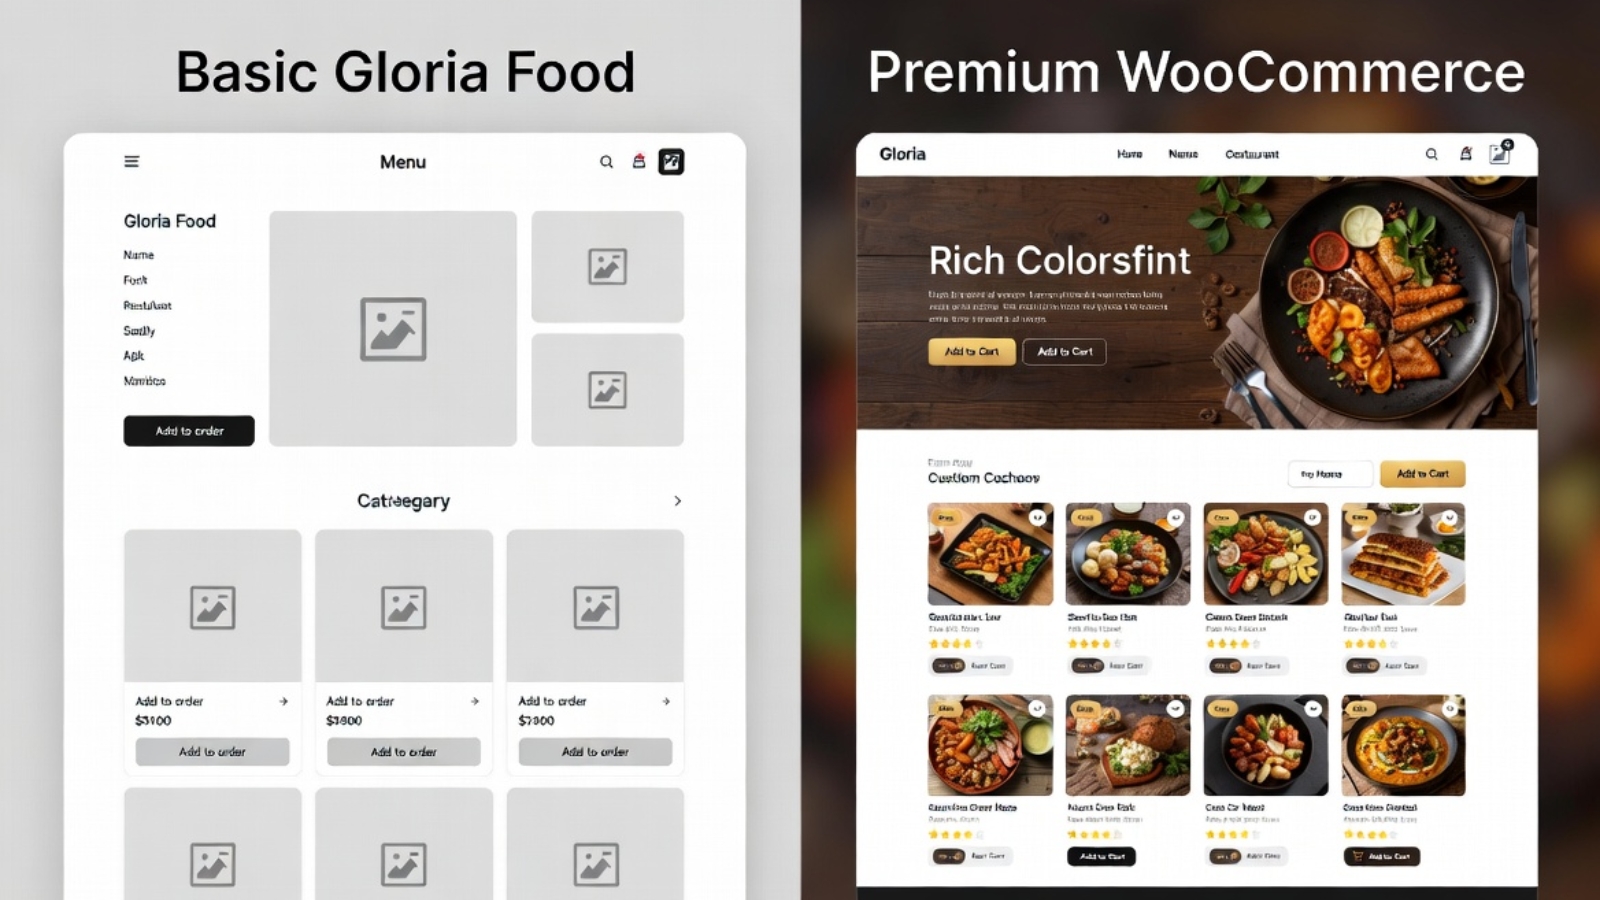
If you’re migrating a restaurant website — from Gloria Food to WooCommerce, from one host to another, or from a third-party platform to a self-hosted WordPress site — and want a developer who has done this before without taking the restaurant offline, Contact me and let’s get it done properly.

Slow WordPress restaurant website speed test showing poor mobile score before optimization

How to Speed Up a Slow WordPress Restaurant Website

A slow WordPress restaurant website loses you customers before they even see your menu. Studies by Google show that 53% of mobile visitors leave a page that takes longer than 3 seconds to load — and restaurant customers searching for a place to eat are not patient people.

If your WordPress restaurant website feels sluggish, ordering pages take forever to respond, or your Google PageSpeed score is embarrassingly low — this guide covers every real fix, in order of impact. I’ve optimized WordPress restaurant sites for clients across Europe and the Caribbean, so these are hands-on solutions, not theoretical advice.

Start with a baseline score before touching anything. Run your site through Google PageSpeed Insights and GTmetrix — both are free. Screenshot your current scores. You’ll want to compare before and after each fix.

Why Restaurant Websites Are Especially Slow

Restaurant websites have specific speed problems that generic WordPress sites don’t always face.

Food photography is heavy. A single unoptimized hero image of your signature dish can be 4–6MB — enough to tank your entire page load on mobile. Multiply that across a full menu with 40 items and you have a serious problem.

Ordering plugins add weight. WooCommerce plus a restaurant ordering plugin like Orderable loads significantly more JavaScript and CSS than a simple brochure site. Every extra plugin adds to the page weight.

Google Maps embeds are slow. Almost every restaurant site has a map embed — and Google Maps is one of the heaviest third-party scripts you can load on a page.

Third-party ordering widgets add latency. If you’re using FareHarbor, Gloria Food, or any external booking widget, each one makes additional network requests that slow initial page load.

⚠️ Watch Out: Don’t try to fix everything at once. Make one change, test your PageSpeed score, then make the next. If you change ten things simultaneously and something breaks, you won’t know what caused it.

Fix 1 — Compress and Convert All Your Food Photos

This is the single highest-impact fix for almost every restaurant website. Food photos are the #1 cause of slow load times and the easiest problem to fix.

What to do:

Convert every image on your site to WebP format. WebP files are 25–35% smaller than JPEG at the same visual quality — invisible difference to the customer, massive difference to load time.

Use Squoosh.app — it’s free, runs in your browser, and converts images to WebP with a quality slider so you can see the difference before downloading.

Target file sizes:

  • Hero images: under 200KB
  • Menu item photos: under 80KB each
  • Logo: under 30KB

In WordPress, install Smush or ShortPixel — both have free tiers that automatically compress new uploads and bulk-optimize your existing media library.

Enable lazy loading so images below the fold only load as the visitor scrolls down — not all at once when the page first opens. Smush handles this automatically. WordPress also has native lazy loading built in since version 5.5.

✅ Pro Tip: Resize images before uploading, not after. WordPress generates multiple image sizes from every upload — if you upload a 4000px wide photo, WordPress creates five versions of that massive file. Resize to 1200px wide maximum before uploading and you cut the storage and processing load significantly.

Fix 2 — Install a Caching Plugin

Caching stores a static version of your pages so WordPress doesn’t rebuild them from scratch on every visit. For a restaurant site, this alone can cut load time in half.

LiteSpeed Cache (Best Option if on Hostinger)

If your restaurant site runs on Hostinger — which supports LiteSpeed servers natively — install LiteSpeed Cache. It’s free and the most powerful caching plugin available for WordPress because it works directly with the server rather than around it.

After installing, go to LiteSpeed Cache → Presets → apply the recommended preset for WooCommerce sites.

WP Rocket (Best Paid Option)

WP Rocket is the gold standard paid caching plugin at $59/year. It handles page caching, file minification, lazy loading, and database cleanup in one dashboard — without requiring any technical knowledge. Worth it if you’re managing multiple restaurant sites or want a set-and-forget solution.

W3 Total Cache (Free Alternative)

W3 Total Cache is a solid free option if you’re not on a LiteSpeed server and don’t want to pay for WP Rocket. More configuration required than LiteSpeed Cache but very capable.

Fix 3 — Enable a CDN (Content Delivery Network)

A CDN stores copies of your site’s static files (images, CSS, JavaScript) on servers around the world. When a customer visits your site from Denmark, they load files from a nearby server rather than wherever your hosting is physically located — dramatically reducing latency.

Cloudflare free plan is the easiest option. Go to cloudflare.com, add your site, and update your domain’s nameservers to Cloudflare’s. The free plan includes a CDN, basic DDoS protection, and SSL — all relevant for a restaurant site taking online orders.

Hostinger also has a built-in CDN in their hPanel — enable it under your hosting settings if you’re on a Business plan or higher.

✅ Pro Tip: After enabling Cloudflare, go to Cloudflare dashboard → Speed → Optimization → enable Auto Minify for JavaScript, CSS, and HTML. This removes unnecessary whitespace from your code files, reducing their size without any visible change to your site.

Fix 4 — Fix Your Google Maps Embed

Google Maps is one of the heaviest things you can put on a restaurant website — and almost every restaurant has it. A standard Google Maps iframe loads the entire Maps JavaScript API, which can add 500KB–1MB to your page weight.

The fix: lazy load your map.

Replace your standard Google Maps iframe with a click-to-load version. The map shows as a static image initially — only loading the full interactive map when the visitor clicks on it.

Install WP Google Maps or use this simple approach — replace your iframe with a static map image linked to Google Maps:

html

<a href="https://maps.google.com/?q=YOUR+RESTAURANT+ADDRESS" target="_blank">
  <img 
    src="https://maps.googleapis.com/maps/api/staticmap?center=YOUR+ADDRESS&zoom=15&size=600x300&key=YOUR_API_KEY" 
    alt="Restaurant location map — click to open in Google Maps"
    loading="lazy"
  />
</a>

This loads a static image instead of the full Maps JavaScript library — much faster, still shows your location, still links to full Google Maps when clicked.

Fix 5 — Minify CSS and JavaScript

Your WordPress theme and plugins generate a lot of CSS and JavaScript files. Minification removes unnecessary whitespace, comments, and formatting from these files — making them smaller without changing how they work.

LiteSpeed Cache handles this automatically under its CSS/JS settings. WP Rocket does the same. If you’re using W3 Total Cache, enable Minify under the performance settings.

⚠️ Watch Out: Minification occasionally breaks things — especially JavaScript. After enabling it, click through your entire site including the ordering flow. If anything breaks, disable JS minification first (CSS minification is almost always safe).

Fix 6 — Reduce Plugin Bloat

Every active WordPress plugin adds load to your site — some a tiny amount, some a significant amount. Restaurant sites often accumulate plugins over time without anyone reviewing whether they’re all still needed.

Audit your plugins:

  1. Go to Plugins → Installed Plugins
  2. Deactivate any plugin you’re not actively using
  3. Delete deactivated plugins entirely — deactivated plugins still appear in file scans

Test each plugin’s impact:
Install Query Monitor — a free developer plugin that shows exactly how much load time each plugin adds. You might discover one plugin is responsible for 40% of your page load time.

Common restaurant site plugin offenders:

  • Page builder plugins loaded on pages that don’t use them
  • Slider plugins loading JavaScript on every page even when the slider only appears on the homepage
  • Social media feed plugins that make external API calls on every page load

Fix 7 — Optimize Your WooCommerce Database

WooCommerce stores a lot of data — every cart session, every order, every product revision. Over time this bloats your database and slows down queries.

Install WP-Optimize — free plugin that cleans up:

  • Post revisions (WordPress saves a new revision every time you save a post)
  • Expired transients (temporary data WooCommerce stores that builds up over time)
  • Orphaned order data
  • Spam comments

Run a database cleanup once a month. Schedule it to happen automatically overnight so it doesn’t interfere with ordering hours.

✅ Pro Tip: In WooCommerce → Settings → Advanced, limit the number of saved product revisions to 3 or 5. By default WordPress saves unlimited revisions — on a menu with 50+ products that gets updated regularly, this adds up fast.

Fix 8 — Choose Better Hosting

If you’ve done everything above and your site is still slow, the problem might be your hosting. Shared hosting plans at the cheapest tier put hundreds of sites on one server — when other sites on that server get traffic spikes, your restaurant site slows down too.

For a restaurant site taking live orders, consider:

  • Hostinger Business plan — good performance, LiteSpeed server support, reasonable price
  • SiteGround GrowBig — excellent performance, good WooCommerce support
  • Cloudways — managed cloud hosting on DigitalOcean or AWS, more technical to set up but significantly faster than shared hosting

Migrating hosting is the most disruptive fix on this list — do it last, after trying everything else first.

Checking Your Results

After making these fixes, run your site through Google PageSpeed Insights and GTmetrix again. Compare to your baseline scores.

Target scores for a restaurant site:

  • Google PageSpeed Mobile: 70+ (aim for 85+)
  • Google PageSpeed Desktop: 85+
  • GTmetrix Grade: B or higher
  • Fully loaded time: under 3 seconds on mobile

If you’re still under 70 on mobile after all fixes, the problem is almost always unoptimized images or hosting quality.

Common Questions

Q: Will caching break my WooCommerce ordering?
A: Good caching plugins like LiteSpeed Cache and WP Rocket automatically exclude cart, checkout, and account pages from caching. These pages need to be dynamic. Always test your full ordering flow after enabling caching.

Q: My site was fast before, now it’s slow — what changed?
A: The most common causes are a recently added plugin, a large image upload, or a hosting issue. Install Query Monitor and check which queries are slowest. Also check if a new plugin was installed around the time the slowdown started.

Q: Does page speed affect my Google ranking?
A: Yes — Google uses Core Web Vitals (LCP, CLS, FID) as ranking signals, especially on mobile. A faster site ranks better and converts better. Both matter for a restaurant taking online orders.

Q: How often should I check my speed?
A: Run a PageSpeed check once a month and after any major change — new plugin, theme update, or large content addition.

Final Thoughts

Speeding up a WordPress restaurant website comes down to four things done well: compressed images, server-side caching, a CDN, and a lean plugin setup. Fix those four and most restaurant sites go from embarrassingly slow to genuinely fast without touching a line of code.

The order matters — start with images, then caching, then CDN. These three fixes alone will move the needle more than anything else on the list.

If your restaurant website is slow and you’d rather have a developer handle the optimization properly — including WooCommerce performance tuning and hosting migration if needed — Contact me and I’ll get it running fast.

Best WordPress plugins for restaurant online ordering shown on a website

Best WordPress Plugins for Restaurant Online Ordering in 2026

The best WordPress plugins for restaurant online ordering let you take full control of your menu, delivery zones, and customer data — without paying ongoing commissions to third-party platforms like Gloria Food or Just Eat.

If you run a restaurant and you’re still relying on a third-party ordering platform, you’re giving away two things: money (platform fees on every order) and data (your customer order history lives on their server, not yours). Moving your online ordering to WordPress with WooCommerce puts both back in your hands.

This guide covers the best plugins for restaurant ordering on WordPress in 2026— what each one does, who it’s for, and how they compare. I’ve worked with several of these directly while building and migrating restaurant websites, so these recommendations come from real project experience.

Why Use WordPress for Restaurant Online Ordering

Before diving into plugins, it’s worth being clear on what you actually get by running ordering through WordPress instead of a dedicated platform.

You own everything. Your menu lives in your WordPress database. Your customer orders are yours. You can export them, analyze them, run promotions on them — without asking anyone’s permission.

You pay less over time. Gloria Food, Just Eat, and similar platforms charge per-order commissions or monthly fees that compound fast. With WordPress you pay hosting (typically $5–$15/month) and a one-time or annual plugin cost. That’s it.

You control the experience. Your ordering page looks like your website, not a generic platform template. Your brand stays consistent from homepage to checkout.

✅ Pro Tip: If you’re migrating from Gloria Food to WordPress, keep Gloria Food live during the transition. Run both systems in parallel until your WooCommerce ordering is fully tested — then switch DNS and retire the old platform. Never go dark between systems.

The Best WordPress Plugins for Restaurant Online Ordering

1. Orderable — Best Overall for Restaurants

Orderable is built specifically for restaurant ordering on WordPress and WooCommerce. It’s the plugin I recommend first to any restaurant client because it solves the problems standard WooCommerce doesn’t handle out of the box — delivery time slots, opening hours enforcement, and a checkout flow designed for food ordering rather than physical product shipping.

Key features:

  • Time slot selection for delivery and pickup
  • ASAP ordering toggle
  • Opening hours enforcement — no orders when you’re closed
  • Minimum order value for delivery
  • Product add-ons (extras, sauces, toppings)
  • Clean, mobile-friendly ordering layout

Pricing: Free tier available. Pro starts at $149/year.

Best for: Restaurants that need a complete, dedicated ordering experience without heavy custom development.

⚠️ Watch Out: Orderable’s free tier is functional but limited. If you need time slots and opening hours enforcement — which most restaurants do — you’ll need the Pro version. Factor this into your budget before starting the build.

2. WooCommerce — The Foundation Every Plugin Builds On

WooCommerce itself isn’t a restaurant plugin, but it’s the e-commerce layer that makes all of these solutions possible. It handles the product catalog (your menu), cart, checkout, and payment processing.

On its own, WooCommerce treats food items like physical products — which means you’ll need at least one additional plugin (like Orderable or one of the others below) to turn it into a proper food ordering system. But as the foundation, it’s free, incredibly well-supported, and powers millions of online stores worldwide.

Key features:

  • Product catalog with categories and variants
  • Cart and checkout
  • Payment gateway integrations (Stripe, PayPal, MobilePay, and 100+ more)
  • Order management dashboard
  • Customer email notifications

Pricing: Free. Extensions vary.

Best for: Every restaurant ordering setup on WordPress — this is the base layer, not optional.

3. WooCommerce Product Add-Ons — Best for Extras and Toppings

WooCommerce Product Add-Ons solves a specific but critical restaurant problem: how do customers add extras, toppings, or special instructions to an item during ordering?

Standard WooCommerce product variants work for size (small/medium/large), but they don’t handle optional extras cleanly. This plugin adds checkboxes, dropdowns, and text fields to any product — so a customer ordering a pizza can tick “extra cheese” and “extra jalapeños” and see the price update in real time.

Key features:

  • Checkboxes, radio buttons, dropdowns, and text fields on products
  • Per-extra pricing that updates the cart total live
  • “Special instructions” text field for custom requests
  • Works with variable products (size variants)

Pricing: $79/year (official WooCommerce extension).

Best for: Any restaurant with menu items that have add-ons, extras, or customization options.

4. Delivery Drivers for WooCommerce — Best for Managing Delivery

If your restaurant does its own delivery rather than using a third-party courier, Delivery Drivers for WooCommerce gives you a driver assignment and tracking system built into WordPress.

Restaurant owners can assign orders to specific drivers from the WooCommerce orders panel. Drivers get a mobile-friendly interface to accept and update orders. Customers can track their delivery status.

Key features:

  • Driver accounts with mobile-friendly order dashboard
  • Order assignment from WooCommerce admin
  • Customer delivery status notifications
  • Driver location tracking (Pro version)

Pricing: Free core plugin. Pro version available.

Best for: Restaurants running their own delivery fleet rather than outsourcing to a courier service.

5. WP Mail SMTP — Essential Supporting Plugin

This isn’t a restaurant-specific plugin, but it belongs on this list because without it your WooCommerce order confirmation emails will frequently land in spam — and customers who don’t receive confirmation emails cancel orders, call the restaurant, and leave bad reviews.

WP Mail SMTP replaces WordPress’s unreliable built-in mail with a proper SMTP connection through Gmail, Brevo, or another mail provider, making sure every order confirmation actually reaches the customer.

Pricing: Free tier handles most restaurant needs.

Best for: Every WordPress restaurant site — this should be installed before you take a single live order.

Comparing the Top Plugins

PluginPurposeFree TierPaid From
OrderableFull restaurant orderingYes (limited)$149/year
WooCommerceE-commerce foundationYesFree
Product Add-OnsExtras and toppingsNo$79/year
Delivery DriversDriver managementYesPaid Pro
WP Mail SMTPOrder email deliveryYesFree

Which Setup Is Right for Your Restaurant

If you want the simplest possible setup: WooCommerce free + Orderable free tier. Gets you a functional ordering page with basic delivery and pickup options. Good starting point before committing to paid plugins.

If you have extras and toppings: Add WooCommerce Product Add-Ons to the above. Most restaurants with any menu complexity need this.

If you run your own delivery drivers: Add Delivery Drivers for WooCommerce so you can manage and track your own fleet inside WordPress.

If you’re migrating from Gloria Food: Start with WooCommerce + Orderable Pro. The time slot and opening hours features in Orderable Pro directly replace what Gloria Food handled, making the transition feel seamless to customers.

What About Payment Gateways for Restaurants

Payment gateways are configured inside WooCommerce settings, not as separate ordering plugins. For most restaurants:

  • Stripe — best all-around card payment option, works globally
  • MobilePay — essential for Danish restaurants, large share of Danish customers pay this way
  • PayPal — useful if your customer base expects it, less common for restaurant ordering
  • Cash on Delivery — always enable this as a fallback for pickup orders

Each gateway installs as a WooCommerce extension. Stripe’s official WooCommerce plugin is free and available at wordpress.org/plugins/woocommerce-gateway-stripe.

Common Problems With Restaurant Ordering Plugins

Orders arriving at wrong times
Fix: Enable opening hours in Orderable so customers can’t order outside your working hours. Set your timezone correctly in WordPress Settings → General first.

Extras not showing at checkout
Fix: Make sure WooCommerce Product Add-Ons is active and the add-ons are assigned to the correct products. Check that the product type is set to Simple — add-ons sometimes don’t display on Variable products without additional configuration.

Order confirmation emails going to spam
Fix: Install WP Mail SMTP immediately and connect it to a Gmail account or Brevo free tier. Test by placing a real order and checking the inbox, not just the spam folder.

Delivery zone not restricting correctly
Fix: In WooCommerce → Settings → Shipping, set up Shipping Zones with specific postcodes or regions. Only customers within those zones see the delivery option at checkout.

Final Thoughts

The best WordPress plugins for restaurant online ordering in 2026 give you everything a third-party platform offers — ordering, payment, delivery management — without the ongoing commissions and without giving up ownership of your customer data.

Start with WooCommerce as your foundation, add Orderable for the restaurant-specific ordering flow, and layer in Product Add-Ons if your menu has extras. Install WP Mail SMTP before you go live — it’s a five-minute setup that prevents a lot of headaches.

If you need help setting up WordPress online ordering for your restaurant — including migrating from Gloria Food or configuring MobilePay for a Danish audience — Contact me and I’ll get it running correctly from day one.

Gloria Food restaurant ordering page vs WooCommerce restaurant website side by side comparison

How to Migrate a Restaurant from Gloria Food to WooCommerce (Step-by-Step Guide)

Table of Contents

  1. Why Restaurants Are Leaving Gloria Food
  2. What You Need Before You Start
  3. Step 1 — Set Up WordPress and WooCommerce
  4. Step 2 — Rebuild Your Menu in WooCommerce
  5. Step 3 — Configure Online Ordering and Delivery
  6. Step 4 — Set Up Payment Gateways
  7. Step 5 — Handle Your Domain and DNS
  8. Step 6 — Go Live and Test Everything
  9. Common Problems and How to Fix Them
  10. Gloria Food vs WooCommerce — Quick Comparison

1. Why Restaurants Are Leaving Gloria Food

Gloria Food was a popular choice for small restaurants when it launched — it was free, quick to set up, and had a decent ordering interface. But over time, restaurant owners started running into the same walls.

The platform was acquired by Oracle in 2021, and since then the free tier has become increasingly limited. Features that used to be free now require paid plans. Customization is almost nonexistent — you get what Gloria Food gives you, and that’s it. Your menu lives on their servers, your customer data is theirs, and if they change their pricing or shut down a feature, you have no control.

The restaurants I worked with in Denmark made the switch for a simple reason: they wanted to own their online ordering system. With WooCommerce, your menu, your customer data, your orders — everything lives on your own WordPress site. You control the design, the fees, the integrations, and the customer experience.

Here’s what you actually gain by switching:

  • Full control over your menu layout and design
  • No platform commission on orders (just payment gateway fees)
  • Your own customer database — build loyalty programs, send emails, run promotions
  • Integration with any payment provider you choose
  • A real website, not just a Gloria Food subdomain

📸 Image 1 Alt text: Gloria Food restaurant ordering page vs WooCommerce restaurant website side by side comparison AI Prompt: Split-screen comparison image showing a basic Gloria Food ordering page on the left (simple white layout, limited branding) versus a fully designed WooCommerce restaurant website on the right (custom colors, logo, beautiful food photos, add to cart buttons). Clean flat design, no people.


2. What You Need Before You Start

Before you touch anything, gather these:

  • Your current Gloria Food menu — take screenshots or export if possible. You’ll be rebuilding this in WooCommerce, so having it documented saves significant time.
  • Your domain name login — you’ll need to update DNS records. Know which registrar controls your domain (GoDaddy, Namecheap, or in the case of Danish restaurants, often Punkt.um or One.com).
  • WordPress hosting — you need a hosting account where WordPress will be installed. Hostinger, SiteGround, or any cPanel host works fine.
  • A list of your payment methods — do you want to accept card online? Cash on delivery? Specific local payment gateways?
  • Your restaurant’s photos — logo, food photos, interior shots. These will make your WooCommerce site look significantly better than Gloria Food ever did.

Pro Tip: Before migrating, keep Gloria Food running in parallel. Don’t shut it down until your WooCommerce site is fully tested and live. Run both simultaneously for at least one week.


3. Step 1 — Set Up WordPress and WooCommerce

Install WordPress

Most hosting providers have a one-click WordPress installer. In Hostinger it’s under hPanel → Websites → Auto Installer. In SiteGround it’s under Site Tools → WordPress installer. Run it, set your admin username and password, and you’re in.

Install WooCommerce

Once inside WordPress:

  1. Go to Plugins → Add New
  2. Search for WooCommerce
  3. Click Install Now → then Activate
  4. WooCommerce will run a setup wizard — go through it and select:
    • Your store location and currency
    • What you’re selling (select Physical products for food items)
    • Payment methods (you can add more later)
    • Shipping (for delivery) or local pickup

Install a Restaurant-Friendly Theme

Your theme controls how your site looks. For restaurants, these free themes work well:

  • Astra — lightweight, fast, works with any page builder
  • Kadence — excellent WooCommerce support out of the box
  • OceanWP — solid free option with restaurant demo sites

If you want a premium look without paying for a theme, use Astra free + Elementor free. This combination gives you full visual control.


4. Step 2 — Rebuild Your Menu in WooCommerce

This is the most time-consuming part, but it’s also where you gain the most control. Every menu item becomes a WooCommerce product.

Set Up Product Categories First

Before adding items, create your menu categories. Go to Products → Categories and add categories that match your menu sections:

  • Starters / Appetizers
  • Pizzas
  • Burgers
  • Pasta
  • Salads
  • Drinks
  • Desserts

Add Menu Items as Products

For each menu item, go to Products → Add New:

  1. Product Name — e.g. “Pepperoni Pizza”
  2. Description — short description of the dish (ingredients, allergens)
  3. Product Image — upload a food photo. This is where WooCommerce destroys Gloria Food — real photos on every item
  4. Price — set the regular price
  5. Product Category — assign to the correct menu section
  6. Product Type — set to Simple Product for standard items

Handling Variations (Size, Extras, Toppings)

This is where WooCommerce gets powerful. For items that come in different sizes or with optional extras, use Variable Products:

  1. In the Product Data panel, change Product Type to Variable product
  2. Go to the Attributes tab
  3. Add attribute: Size → values: Small | Medium | Large
  4. Check “Used for variations”
  5. Go to Variations tab → Generate All Variations
  6. Set individual prices for each variation

For extras and add-ons (extra cheese, extra sauce), install the free plugin WooCommerce Product Add-Ons or use Flexible Checkout Fields.

⚠️ Watch Out: If you have a large menu (50+ items), consider using a bulk product import via CSV. Export your Gloria Food menu data, format it as a WooCommerce-compatible CSV, and import via Products → Import. This can save hours of manual entry.


5. Step 3 — Configure Online Ordering and Delivery

WooCommerce handles ordering natively, but for a restaurant you need to fine-tune a few things.

Install a Restaurant Ordering Plugin

Standard WooCommerce is built for physical product shipping, not food delivery. Install one of these to add restaurant-specific features:

  • Orderable (free tier) — adds time slots, ASAP ordering, minimum order amounts, and a beautiful checkout flow built for restaurants
  • WooCommerce Restaurant Ordering — dedicated plugin for food businesses, adds category-based ordering page

Set Up Delivery Zones

In WooCommerce → Settings → Shipping:

  1. Add a Shipping Zone for your delivery area (e.g. Copenhagen City Center)
  2. Set a flat delivery fee or free delivery above a minimum order
  3. Add a Local Pickup option for customers collecting in person

Set Ordering Hours

With Orderable or similar plugins, you can restrict ordering to your opening hours. This prevents customers from placing orders at 3am when you’re closed.

Minimum Order Amount

Go to WooCommerce → Settings → Minimum Order plugin (or Orderable settings) and set a minimum order value for delivery..


6. Step 4 — Set Up Payment Gateways

This is where Denmark-specific and regional requirements matter. WooCommerce supports almost every payment provider through free plugins.

For Danish Restaurants specifically:

  • MobilePay — install MobilePay WooCommerce plugin (this is essential for Danish customers, almost everyone pays with MobilePay)
  • Stripe — handles Visa, Mastercard, and international cards
  • Cash on Delivery — enable this in WooCommerce → Settings → Payments for cash collection on delivery

For General International Restaurants:

  • Stripe — best all-around choice
  • PayPal — widely trusted
  • Square — good for businesses already using Square POS

Install Stripe for WooCommerce:

  1. Go to Plugins → Add New → search “WooCommerce Stripe Payment Gateway”
  2. Install and activate
  3. Go to WooCommerce → Settings → Payments → Stripe
  4. Enter your Stripe API keys (from your Stripe dashboard)
  5. Enable test mode first, complete a test order, then switch to live

Pro Tip: Always enable at least two payment methods. If Stripe has an outage or a customer’s card fails, they need a fallback option or you lose that order.


7. Step 5 — Handle Your Domain and DNS

This is the step that trips up most people — and it’s where I spent significant time with my Danish restaurant clients, particularly with the Danish registrar Punkt.um.

Understanding What Needs to Change

Your domain is currently pointed to Gloria Food’s servers. To make it point to your new WordPress site, you need to update the DNS records at your domain registrar.

Find Your New Hosting IP Address

In your hosting control panel (Hostinger hPanel, SiteGround, etc.), find your hosting account’s IP address or nameservers. It’ll look like:

  • IP: 185.XXX.XXX.XXX
  • Or nameservers: ns1.hostinger.com / ns2.hostinger.com

Update DNS at Your Registrar

Log in to wherever your domain is registered:

If using nameservers (recommended):

  1. Find the nameserver settings at your registrar
  2. Replace the current nameservers (which point to Gloria Food or their host) with your new hosting nameservers
  3. Save

If updating A records only:

  1. Find the DNS management section
  2. Edit the A record for @ (root domain) — change the IP to your new hosting IP
  3. Edit the A record for www — same new IP
  4. Save

⏱ DNS Propagation

DNS changes take 15 minutes to 48 hours to fully propagate worldwide. During this time your site may be inaccessible or flipping between old and new. This is normal. You can check propagation status at whatsmydns.net.

⚠️ Watch Out — Punkt.um Specific (Danish registrar): Punkt.um’s DNS interface is in Danish and can be confusing. The nameserver field is under “Navneservere” and the A record section is under “DNS-zoner”. If you change nameservers at Punkt.um, it can take up to 48 hours — longer than most registrars. Don’t panic if it takes a full day.


8. Step 6 — Go Live and Test Everything

Before announcing the switch to your customers, run through this complete checklist:

Ordering Test

  • Place a test order for delivery — go through the full checkout flow
  • Place a test order for local pickup
  • Test with each payment method you’ve enabled
  • Check that the order confirmation email arrives and looks correct
  • Log in to WooCommerce → Orders and confirm the test order appears

Menu Check

  • Every item has a photo
  • Prices match your Gloria Food menu exactly
  • Variations (sizes, extras) work correctly
  • Categories display in the right order

Mobile Check

  • Browse the menu on an iPhone (Safari)
  • Add items to cart on mobile
  • Complete checkout on mobile — this is where most customers will order from

Speed Check

  • Run your site through Google PageSpeed Insights
  • Target a score above 70 on mobile
  • If slow: install LiteSpeed Cache (if on Hostinger) or W3 Total Cache

Turn Off Gloria Food Once everything above passes, log in to Gloria Food and either:

  • Set your store to Closed permanently
  • Or delete your Gloria Food account if you no longer need it

Redirect your old Gloria Food ordering URL to your new WooCommerce ordering page if possible.


9. Common Problems and How to Fix Them

Problem: Customers can’t find the ordering page Fix: Add a prominent “Order Now” button to your homepage hero and your navigation menu. Make it a different color from everything else on the page.

Problem: MobilePay isn’t processing Fix: Make sure you’ve completed MobilePay’s business verification. The plugin won’t process live payments until your MobilePay business account is fully verified.

Problem: Orders aren’t sending email notifications Fix: WooCommerce uses WordPress’s built-in mail which often ends up in spam. Install the free WP Mail SMTP plugin and connect it to Gmail SMTP or Brevo (free tier) for reliable email delivery.

Problem: Menu loads slowly Fix: Compress all food photos before uploading. Use Squoosh.app to convert to WebP format and resize to 800×600px maximum. Uncompressed food photos are the #1 cause of slow restaurant websites.

Problem: Delivery area isn’t restricted correctly Fix: In WooCommerce → Shipping, set up Shipping Zones with specific postcodes or regions. Only customers within those zones will see the delivery option at checkout.


10. Gloria Food vs WooCommerce — Quick Comparison

FeatureGloria FoodWooCommerce
Monthly CostFree / Paid tiersFree (hosting cost only)
Commission on OrdersYes (paid plan to remove)No (only payment gateway %)
Custom DesignVery limitedFull control
Own Customer DataNoYes
Menu VariationsBasicAdvanced (unlimited)
Payment OptionsLimited100+ gateways
SEOPoor (subdomain)Full control
Mobile App for OrdersYesVia plugin
Delivery Zone ControlBasicFull postcode control

11. Final Thoughts

Migrating from Gloria Food to WooCommerce isn’t something you do in an afternoon — but it’s absolutely worth it. Once it’s done, you own your entire ordering system. No platform can change their pricing, shut down features, or limit your customization. Your restaurant’s online presence is yours.

The migration for my Danish restaurant clients took approximately 2–3 days of work per site — one day for setup and menu rebuild, one day for payment and ordering configuration, and one day for DNS, testing, and going live.

If you’re a restaurant owner who wants this done professionally — without the DNS headaches, plugin conflicts, or ordering flow bugs — I’ve done this exact migration multiple times and I’m available for freelance projects.

Get in touch at syedaounraza or WhatsApp directly.