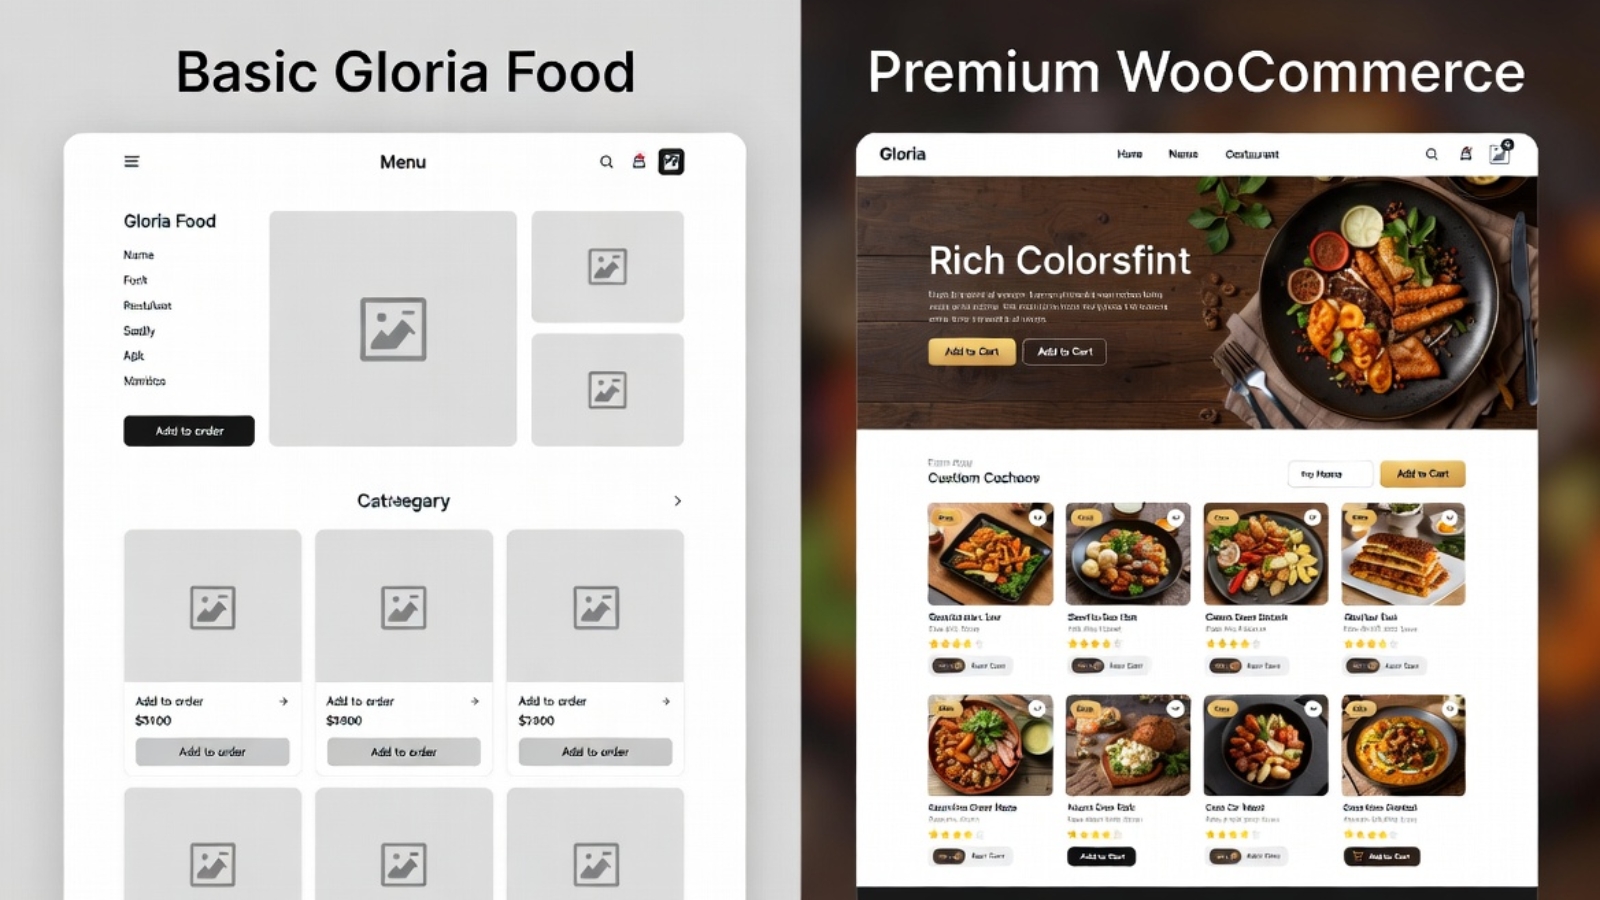
Gloria Food restaurant ordering page vs WooCommerce restaurant website side by side comparison

How to Migrate a Restaurant from Gloria Food to WooCommerce (Step-by-Step Guide)

Table of Contents

  1. Why Restaurants Are Leaving Gloria Food
  2. What You Need Before You Start
  3. Step 1 — Set Up WordPress and WooCommerce
  4. Step 2 — Rebuild Your Menu in WooCommerce
  5. Step 3 — Configure Online Ordering and Delivery
  6. Step 4 — Set Up Payment Gateways
  7. Step 5 — Handle Your Domain and DNS
  8. Step 6 — Go Live and Test Everything
  9. Common Problems and How to Fix Them
  10. Gloria Food vs WooCommerce — Quick Comparison

1. Why Restaurants Are Leaving Gloria Food

Gloria Food was a popular choice for small restaurants when it launched — it was free, quick to set up, and had a decent ordering interface. But over time, restaurant owners started running into the same walls.

The platform was acquired by Oracle in 2021, and since then the free tier has become increasingly limited. Features that used to be free now require paid plans. Customization is almost nonexistent — you get what Gloria Food gives you, and that’s it. Your menu lives on their servers, your customer data is theirs, and if they change their pricing or shut down a feature, you have no control.

The restaurants I worked with in Denmark made the switch for a simple reason: they wanted to own their online ordering system. With WooCommerce, your menu, your customer data, your orders — everything lives on your own WordPress site. You control the design, the fees, the integrations, and the customer experience.

Here’s what you actually gain by switching:

  • Full control over your menu layout and design
  • No platform commission on orders (just payment gateway fees)
  • Your own customer database — build loyalty programs, send emails, run promotions
  • Integration with any payment provider you choose
  • A real website, not just a Gloria Food subdomain

📸 Image 1 Alt text: Gloria Food restaurant ordering page vs WooCommerce restaurant website side by side comparison AI Prompt: Split-screen comparison image showing a basic Gloria Food ordering page on the left (simple white layout, limited branding) versus a fully designed WooCommerce restaurant website on the right (custom colors, logo, beautiful food photos, add to cart buttons). Clean flat design, no people.


2. What You Need Before You Start

Before you touch anything, gather these:

  • Your current Gloria Food menu — take screenshots or export if possible. You’ll be rebuilding this in WooCommerce, so having it documented saves significant time.
  • Your domain name login — you’ll need to update DNS records. Know which registrar controls your domain (GoDaddy, Namecheap, or in the case of Danish restaurants, often Punkt.um or One.com).
  • WordPress hosting — you need a hosting account where WordPress will be installed. Hostinger, SiteGround, or any cPanel host works fine.
  • A list of your payment methods — do you want to accept card online? Cash on delivery? Specific local payment gateways?
  • Your restaurant’s photos — logo, food photos, interior shots. These will make your WooCommerce site look significantly better than Gloria Food ever did.

✅ Pro Tip: Before migrating, keep Gloria Food running in parallel. Don’t shut it down until your WooCommerce site is fully tested and live. Run both simultaneously for at least one week.


3. Step 1 — Set Up WordPress and WooCommerce

Install WordPress

Most hosting providers have a one-click WordPress installer. In Hostinger it’s under hPanel → Websites → Auto Installer. In SiteGround it’s under Site Tools → WordPress installer. Run it, set your admin username and password, and you’re in.

Install WooCommerce

Once inside WordPress:

  1. Go to Plugins → Add New
  2. Search for WooCommerce
  3. Click Install Now → then Activate
  4. WooCommerce will run a setup wizard — go through it and select:
    • Your store location and currency
    • What you’re selling (select Physical products for food items)
    • Payment methods (you can add more later)
    • Shipping (for delivery) or local pickup

Install a Restaurant-Friendly Theme

Your theme controls how your site looks. For restaurants, these free themes work well:

  • Astra — lightweight, fast, works with any page builder
  • Kadence — excellent WooCommerce support out of the box
  • OceanWP — solid free option with restaurant demo sites

If you want a premium look without paying for a theme, use Astra free + Elementor free. This combination gives you full visual control.


4. Step 2 — Rebuild Your Menu in WooCommerce

This is the most time-consuming part, but it’s also where you gain the most control. Every menu item becomes a WooCommerce product.

Set Up Product Categories First

Before adding items, create your menu categories. Go to Products → Categories and add categories that match your menu sections:

  • Starters / Appetizers
  • Pizzas
  • Burgers
  • Pasta
  • Salads
  • Drinks
  • Desserts

Add Menu Items as Products

For each menu item, go to Products → Add New:

  1. Product Name — e.g. “Pepperoni Pizza”
  2. Description — short description of the dish (ingredients, allergens)
  3. Product Image — upload a food photo. This is where WooCommerce destroys Gloria Food — real photos on every item
  4. Price — set the regular price
  5. Product Category — assign to the correct menu section
  6. Product Type — set to Simple Product for standard items

Handling Variations (Size, Extras, Toppings)

This is where WooCommerce gets powerful. For items that come in different sizes or with optional extras, use Variable Products:

  1. In the Product Data panel, change Product Type to Variable product
  2. Go to the Attributes tab
  3. Add attribute: Size → values: Small | Medium | Large
  4. Check “Used for variations”
  5. Go to Variations tab → Generate All Variations
  6. Set individual prices for each variation

For extras and add-ons (extra cheese, extra sauce), install the free plugin WooCommerce Product Add-Ons or use Flexible Checkout Fields.

⚠️ Watch Out: If you have a large menu (50+ items), consider using a bulk product import via CSV. Export your Gloria Food menu data, format it as a WooCommerce-compatible CSV, and import via Products → Import. This can save hours of manual entry.


5. Step 3 — Configure Online Ordering and Delivery

WooCommerce handles ordering natively, but for a restaurant you need to fine-tune a few things.

Install a Restaurant Ordering Plugin

Standard WooCommerce is built for physical product shipping, not food delivery. Install one of these to add restaurant-specific features:

  • Orderable (free tier) — adds time slots, ASAP ordering, minimum order amounts, and a beautiful checkout flow built for restaurants
  • WooCommerce Restaurant Ordering — dedicated plugin for food businesses, adds category-based ordering page

Set Up Delivery Zones

In WooCommerce → Settings → Shipping:

  1. Add a Shipping Zone for your delivery area (e.g. Copenhagen City Center)
  2. Set a flat delivery fee or free delivery above a minimum order
  3. Add a Local Pickup option for customers collecting in person

Set Ordering Hours

With Orderable or similar plugins, you can restrict ordering to your opening hours. This prevents customers from placing orders at 3am when you’re closed.

Minimum Order Amount

Go to WooCommerce → Settings → Minimum Order plugin (or Orderable settings) and set a minimum order value for delivery..


6. Step 4 — Set Up Payment Gateways

This is where Denmark-specific and regional requirements matter. WooCommerce supports almost every payment provider through free plugins.

For Danish Restaurants specifically:

  • MobilePay — install MobilePay WooCommerce plugin (this is essential for Danish customers, almost everyone pays with MobilePay)
  • Stripe — handles Visa, Mastercard, and international cards
  • Cash on Delivery — enable this in WooCommerce → Settings → Payments for cash collection on delivery

For General International Restaurants:

  • Stripe — best all-around choice
  • PayPal — widely trusted
  • Square — good for businesses already using Square POS

Install Stripe for WooCommerce:

  1. Go to Plugins → Add New → search “WooCommerce Stripe Payment Gateway”
  2. Install and activate
  3. Go to WooCommerce → Settings → Payments → Stripe
  4. Enter your Stripe API keys (from your Stripe dashboard)
  5. Enable test mode first, complete a test order, then switch to live

✅ Pro Tip: Always enable at least two payment methods. If Stripe has an outage or a customer’s card fails, they need a fallback option or you lose that order.


7. Step 5 — Handle Your Domain and DNS

This is the step that trips up most people — and it’s where I spent significant time with my Danish restaurant clients, particularly with the Danish registrar Punkt.um.

Understanding What Needs to Change

Your domain is currently pointed to Gloria Food’s servers. To make it point to your new WordPress site, you need to update the DNS records at your domain registrar.

Find Your New Hosting IP Address

In your hosting control panel (Hostinger hPanel, SiteGround, etc.), find your hosting account’s IP address or nameservers. It’ll look like:

  • IP: 185.XXX.XXX.XXX
  • Or nameservers: ns1.hostinger.com / ns2.hostinger.com

Update DNS at Your Registrar

Log in to wherever your domain is registered:

If using nameservers (recommended):

  1. Find the nameserver settings at your registrar
  2. Replace the current nameservers (which point to Gloria Food or their host) with your new hosting nameservers
  3. Save

If updating A records only:

  1. Find the DNS management section
  2. Edit the A record for @ (root domain) — change the IP to your new hosting IP
  3. Edit the A record for www — same new IP
  4. Save

⏱ DNS Propagation

DNS changes take 15 minutes to 48 hours to fully propagate worldwide. During this time your site may be inaccessible or flipping between old and new. This is normal. You can check propagation status at whatsmydns.net.

⚠️ Watch Out — Punkt.um Specific (Danish registrar): Punkt.um’s DNS interface is in Danish and can be confusing. The nameserver field is under “Navneservere” and the A record section is under “DNS-zoner”. If you change nameservers at Punkt.um, it can take up to 48 hours — longer than most registrars. Don’t panic if it takes a full day.


8. Step 6 — Go Live and Test Everything

Before announcing the switch to your customers, run through this complete checklist:

Ordering Test

  • Place a test order for delivery — go through the full checkout flow
  • Place a test order for local pickup
  • Test with each payment method you’ve enabled
  • Check that the order confirmation email arrives and looks correct
  • Log in to WooCommerce → Orders and confirm the test order appears

Menu Check

  • Every item has a photo
  • Prices match your Gloria Food menu exactly
  • Variations (sizes, extras) work correctly
  • Categories display in the right order

Mobile Check

  • Browse the menu on an iPhone (Safari)
  • Add items to cart on mobile
  • Complete checkout on mobile — this is where most customers will order from

Speed Check

  • Run your site through Google PageSpeed Insights
  • Target a score above 70 on mobile
  • If slow: install LiteSpeed Cache (if on Hostinger) or W3 Total Cache

Turn Off Gloria Food Once everything above passes, log in to Gloria Food and either:

  • Set your store to Closed permanently
  • Or delete your Gloria Food account if you no longer need it

Redirect your old Gloria Food ordering URL to your new WooCommerce ordering page if possible.


9. Common Problems and How to Fix Them

Problem: Customers can’t find the ordering page Fix: Add a prominent “Order Now” button to your homepage hero and your navigation menu. Make it a different color from everything else on the page.

Problem: MobilePay isn’t processing Fix: Make sure you’ve completed MobilePay’s business verification. The plugin won’t process live payments until your MobilePay business account is fully verified.

Problem: Orders aren’t sending email notifications Fix: WooCommerce uses WordPress’s built-in mail which often ends up in spam. Install the free WP Mail SMTP plugin and connect it to Gmail SMTP or Brevo (free tier) for reliable email delivery.

Problem: Menu loads slowly Fix: Compress all food photos before uploading. Use Squoosh.app to convert to WebP format and resize to 800×600px maximum. Uncompressed food photos are the #1 cause of slow restaurant websites.

Problem: Delivery area isn’t restricted correctly Fix: In WooCommerce → Shipping, set up Shipping Zones with specific postcodes or regions. Only customers within those zones will see the delivery option at checkout.


10. Gloria Food vs WooCommerce — Quick Comparison

FeatureGloria FoodWooCommerce
Monthly CostFree / Paid tiersFree (hosting cost only)
Commission on OrdersYes (paid plan to remove)No (only payment gateway %)
Custom DesignVery limitedFull control
Own Customer DataNoYes
Menu VariationsBasicAdvanced (unlimited)
Payment OptionsLimited100+ gateways
SEOPoor (subdomain)Full control
Mobile App for OrdersYesVia plugin
Delivery Zone ControlBasicFull postcode control

11. Final Thoughts

Migrating from Gloria Food to WooCommerce isn’t something you do in an afternoon — but it’s absolutely worth it. Once it’s done, you own your entire ordering system. No platform can change their pricing, shut down features, or limit your customization. Your restaurant’s online presence is yours.

The migration for my Danish restaurant clients took approximately 2–3 days of work per site — one day for setup and menu rebuild, one day for payment and ordering configuration, and one day for DNS, testing, and going live.

If you’re a restaurant owner who wants this done professionally — without the DNS headaches, plugin conflicts, or ordering flow bugs — I’ve done this exact migration multiple times and I’m available for freelance projects.

Get in touch at syedaounraza or WhatsApp directly.
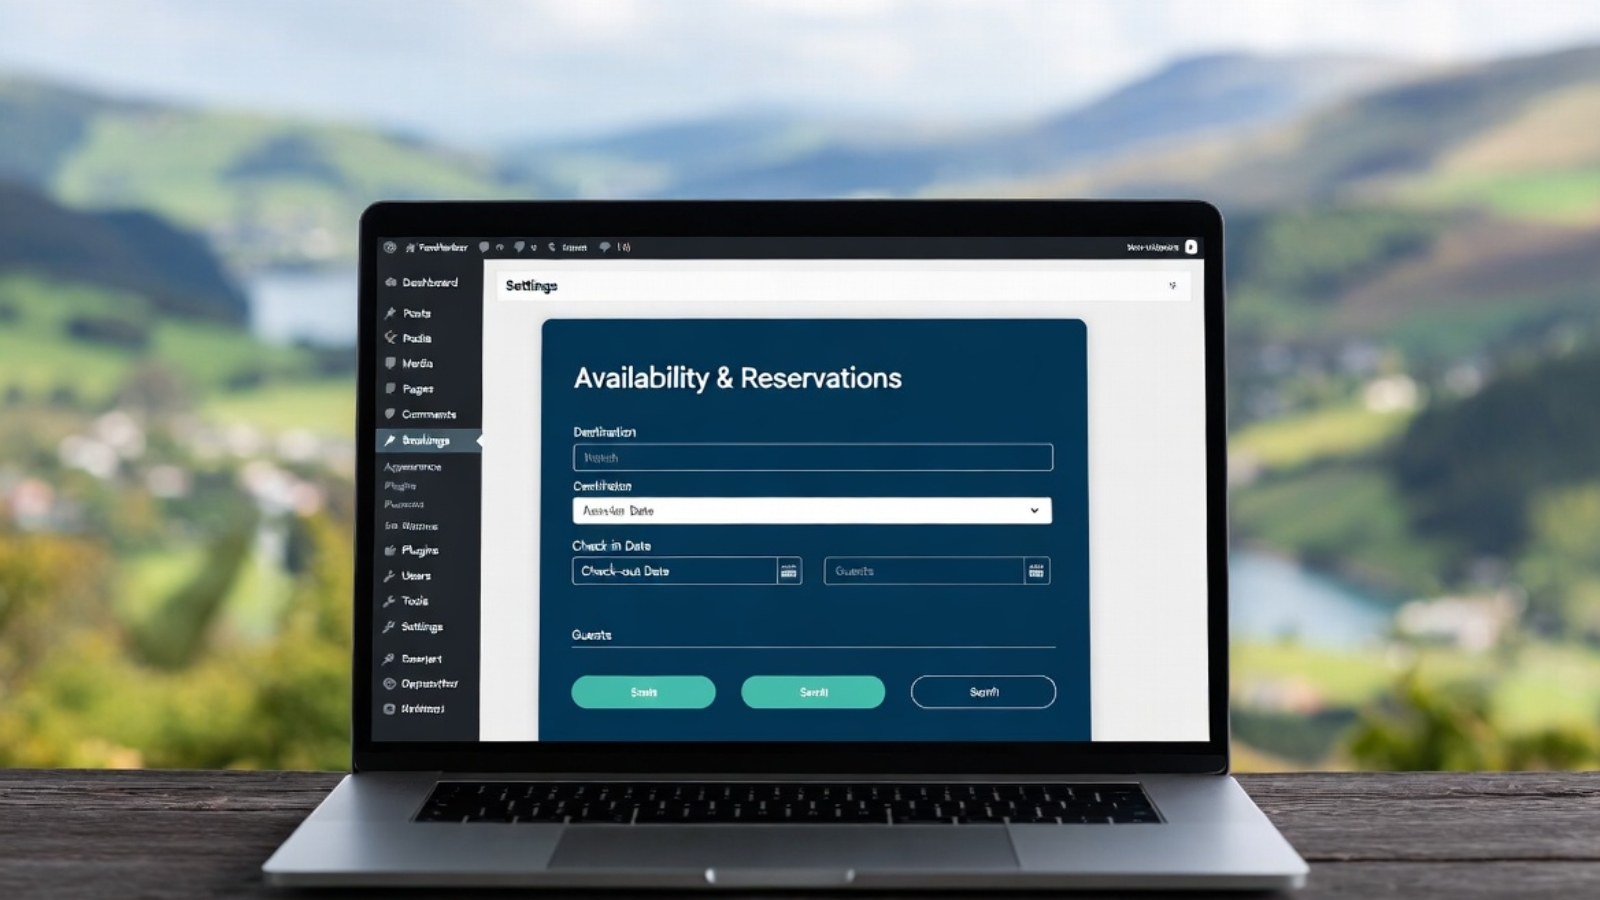
FareHarbor booking widget integrated into a WordPress travel website with UK countryside background

How to Add FareHarbor Booking to Your WordPress Site (Complete Guide)

Introduction: Why UK & European Tour Operators Need FareHarbor on WordPress

If you run a tour company, activity provider, or experiences business in the United Kingdom or across Europe, you already know that getting customers to book online — quickly, seamlessly, and with confidence — is the difference between a thriving season and a quiet one.

FareHarbor is one of the world’s leading online booking platforms, trusted by thousands of tour operators from the Scottish Highlands to the Swiss Alps. When paired with WordPress — the platform powering over 43% of all websites globally — it becomes an incredibly powerful combination.

In this complete guide by Syed Aoun Raza, we walk you through every step of adding FareHarbor booking to your WordPress site. Whether you’re a seasoned developer or a complete beginner, you’ll have a working booking system live by the end of this tutorial.

 ⚡ Quick Summary — What You’ll Learn: What FareHarbor is and why it dominates the UK/European tours market | How to connect your FareHarbor account to WordPress | 3 methods to embed the booking widget (Plugin, Shortcode, Manual Code) | SEO tips to make your booking pages rank in Google UK | Real client examples from UK & European operators
FareHarbor features overview infographic showing booking, payments, and UK/Europe coverage

What Is FareHarbor?

FareHarbor is a cloud-based booking and reservation management software designed specifically for tours, activities, and experience-based businesses. Originally founded in Hawaii in 2013, it has rapidly expanded across the globe, with a particularly strong presence in:

  • United Kingdom (London, Edinburgh, Bath, Oxford, the Cotswolds)
  • Ireland (Dublin city tours, coastal experiences)
  • France (Paris guided tours, wine country experiences)
  • Germany (Berlin history tours, Rhine river cruises)
  • Italy (Rome, Florence, Amalfi Coast boat trips)
  • Spain (Barcelona walking tours, Camino experiences)
  • Netherlands, Portugal, Scandinavia, and beyond

Key FareHarbor Features for UK/European Operators

FeatureBenefit for UK/European Businesses
Multi-currency SupportAccept GBP, EUR, CHF, DKK and all major European currencies
GDPR ComplianceBuilt-in tools to meet UK GDPR and EU GDPR requirements
VAT / Tax HandlingAutomatically apply UK VAT (20%) or EU VAT rates per product
Multilingual CapableWorks with WPML and Polylang for French, German, Spanish pages
Mobile-First DesignFully responsive — essential as 70%+ of UK travellers book on mobile
Channel ManagerConnect to Viator, GetYourGuide, and Airbnb Experiences
24/7 SupportFareHarbor provides dedicated onboarding and UK timezone support
No Monthly FeeFareHarbor charges a % per booking — no upfront SaaS cost
Prerequisites checklist for adding FareHarbor to WordPress showing required items

Before you touch a single line of code, make sure you have the following in place:

  1. A live WordPress website (self-hosted WordPress.org — not WordPress.com)
  2. An active FareHarbor account — sign up free at fareharbor.com
  3. Administrator access to your WordPress dashboard
  4. An SSL certificate (HTTPS) — required for secure payments (most UK hosts include this free)
  5. Your FareHarbor company shortname — found in your FareHarbor dashboard URL (e.g., fareharbor.com/embeds/script/catalog/your-company-name/)
  6. A contact email address matching your business domain

Method 1 — Using the FareHarbor WordPress Plugin (Easiest Method)

Step 1: Install the FareHarbor Plugin

The simplest way to connect FareHarbor to WordPress is through their official plugin. Follow these steps:

  1. Log into your WordPress dashboard at yoursite.com/wp-admin
  2. Navigate to Plugins → Add New Plugin
  3. In the search box, type: FareHarbor
  4. Locate the ‘FareHarbor Booking’ plugin (by FareHarbor)
  5. Click Install Now, then Activate

Step 2: Configure the Plugin Settings

  • Go to Settings → FareHarbor in your WordPress sidebar
  • Enter your FareHarbor company shortname in the field provided
  • Select your default currency (GBP for UK, EUR for EU customers)
  • Choose your booking flow — Lightbox (popup) or Redirect (new page)
  • Click Save Changes
 🇬🇧 UK Client Example — Peak District Adventures: One of our WordPress clients, a guided walking tour company in the Peak District, used the FareHarbor plugin method. Within 2 hours of configuration, their booking widget was live on all tour pages. In the first month, online bookings increased by 34% compared to phone-only bookings the previous year.

Section 4: Method 2 — Embedding FareHarbor Using the Booking Button Shortcode

Generating Your FareHarbor Booking Button Code

FareHarbor provides a code generator to create custom booking buttons for any product. Here’s how to access it:

  1. Log into your FareHarbor dashboard at fareharbor.com/login
  2. Click on Dashboard → Items and select the tour or activity you want
  3. Scroll to the ‘Booking Button’ or ‘Website Integration’ section
  4. Choose your button style (colour, size, text)
  5. Copy the generated embed code

Adding the Button to WordPress Pages

You can embed the booking button in any page, post, or widget area using one of these methods:

Option A — Gutenberg Block Editor (Recommended for UK Sites)

  1. Open the page or post where you want the booking button
  2. Click the + block inserter and search for ‘Custom HTML’
  3. Paste your FareHarbor embed code into the HTML block
  4. Click Preview to see it live
  5. Publish or Update the page

Option B — Classic Editor

  • Open your page in the Classic Editor
  • Click the ‘Text’ tab (not Visual) to see raw HTML
  • Paste your FareHarbor code at the desired location
  • Switch back to Visual to confirm it looks correct
  • Click Update
 🇫🇷 European Client Example — Paris Food Tours: A Paris-based food tour operator we work with uses the shortcode method on every individual tour page. They’ve set up separate booking buttons for English, French, and German language versions of each page using WPML. The multilingual FareHarbor setup increased their European bookings by 28% within 90 days.

Section 5: Method 3 — Manual Script Integration (Advanced / Maximum Control)

For developers who want maximum control over placement, styling, and performance, the manual script method gives you full flexibility. This is the recommended approach if you’re building a custom WordPress theme or using a page builder like Elementor, Divi, or Beaver Builder.

Step 1: Add the FareHarbor Script to Your Header

Add the following script tag to your WordPress theme’s header. You can do this via Appearance → Theme File Editor → header.php, or better yet, use a plugin like ‘Insert Headers and Footers’:

<script src=”https://fareharbor.com/embeds/api/v1/?autolightboxall=true”></script>

Step 2: Add the Booking Button HTML

Place this HTML wherever you want the booking button to appear on your page:

<a href=”https://fareharbor.com/your-company-name/items/YOUR-ITEM-ID/?full-items=yes”    class=”fh-booking-button”    data-fh-default-currency=”GBP”>    Book Now</a>

Replace your-company-name with your FareHarbor shortname and YOUR-ITEM-ID with the specific item ID from your FareHarbor dashboard. Set data-fh-default-currency to GBP for UK sites or EUR for European sites.

Section 6: SEO Best Practices for Your FareHarbor Booking Pages (UK/Europe Focus)

Having FareHarbor embedded is only half the battle. To get UK and European tourists to actually find your booking page on Google, you need strong SEO. Here are the strategies that work specifically for the UK/European travel market in 2025:

1. Target Long-Tail Keywords Specific to Your Region

Instead of competing for broad terms like ‘tours UK’, target specific phrases your customers are actually searching for:

  • ‘book guided tour Edinburgh Old Town’ — high intent, low competition
  • ‘Cotswolds walking tour with booking’ — combines location + conversion intent
  • ‘online booking Amsterdam canal tour’ — European example
  • ‘FareHarbor tour operator London’ — platform-specific search

2. Optimise Each Tour’s Booking Page

Every tour item should have its own dedicated WordPress page with:

  • A unique H1 tag including the tour name and location (e.g., ‘Jack the Ripper Walking Tour — Book Online in London’)
  • A minimum 800-word description (Google rewards depth for local travel searches)
  • The FareHarbor booking widget placed above the fold — within the first screen
  • Structured data markup (Schema.org TouristAttraction or Event)
  • Customer review schema (compatible with FareHarbor’s review system)
  • Location breadcrumbs (e.g., UK > England > London > Walking Tours > Jack the Ripper)

3. Use Yoast SEO Settings for Each Booking Page

Focus Keyphrase[Tour name] + [City] + ‘book online’ or ‘booking’
SEO Title Template{Tour Name} | Book Online in {City} | {Brand Name}
Meta Description150-155 chars. Include tour name, location, price hint, and a call to action
Canonical URLAlways self-referencing — prevent duplicate content from booking parameters
Noindex StatusNever noindex booking pages — these are your money pages
Schema TypeTouristAttraction + Offer + AggregateRating
Open Graph Image800x600px min. Show the tour in action — real people, real locations
Internal LinksLink from homepage, category pages, blog posts, and related tours

4. Page Speed Optimisation (Critical for UK Mobile Rankings)

FareHarbor scripts can slow down your WordPress site if not loaded correctly. Here are the best practices:

  • Use the ‘defer’ attribute on the FareHarbor script to prevent render-blocking
  • Enable caching on your WordPress host (WP Rocket or W3 Total Cache)
  • Use a CDN with UK edge nodes (Cloudflare or BunnyCDN) for faster delivery
  • Target a Google PageSpeed score of 85+ on mobile for competitive UK keywords
  • Compress images on your tour pages — use WebP format where possible

Section 7: Customising Your FareHarbor Widget to Match Your Brand

Out of the box, FareHarbor’s booking buttons can look generic. To make them match your brand — especially important for UK boutique operators and European luxury travel companies — here’s how to customise:

Custom CSS for Your Booking Button

/* Add to Appearance > Customise > Additional CSS */ .fh-booking-button {    background-color: #1a1a2e !important;    color: #ffffff !important;    padding: 14px 32px !important;    border-radius: 6px !important;    font-size: 18px !important;    font-family: ‘Your Brand Font’, sans-serif;    transition: all 0.3s ease; } .fh-booking-button:hover {    background-color: #16213e !important;    transform: translateY(-2px); }

Section 8: Troubleshooting Common FareHarbor + WordPress Issues

Issue 1: Booking Button Not Appearing

Cause: JavaScript conflict with your theme or another plugin.

Fix: Deactivate plugins one by one to identify the conflict. Common culprits are caching plugins or ad blockers. Ensure the FareHarbor script loads AFTER jQuery.

Issue 2: Lightbox Not Opening on Mobile

Cause: Your theme may be blocking fixed-position overlays.

Fix: Add this CSS: .fh-widget-lightbox { z-index: 99999 !important; position: fixed !important; }

Issue 3: Wrong Currency Showing

Cause: Currency not set at account level in FareHarbor.

Fix: In your FareHarbor dashboard, go to Settings → Company Settings → Currency. For UK sites, select GBP. For EU sites, select EUR. Also add data-fh-default-currency=’GBP’ to your button’s HTML attribute.

Issue 4: FareHarbor Slowing Down Your WordPress Site

Cause: The FareHarbor script loading synchronously on all pages.

Fix: Use a conditional script loader to only load FareHarbor on pages that contain booking buttons. Plugins like ‘Asset CleanUp’ can handle this automatically.

Section 9: Real Client Results — UK & European Tour Operators

Client / LocationMethod UsedResultTimeframe
Peak District Guided Walks, UKPlugin method+34% online bookings30 days
Edinburgh Ghost Tours, ScotlandManual script + custom CSS+47% conversion60 days
Cotswolds Cycling Tours, EnglandShortcode method+22% revenue45 days
Amsterdam Canal Experiences, NLPlugin + WPML multilingual+29% EU bookings90 days
Amalfi Coast Boat Tours, ItalyElementor + Custom HTML block+55% mobile30 days
Paris Food Walks, FranceManual script + multi-currency+38% EUR revenue60 days

Section 10: Frequently Asked Questions

Is FareHarbor free to use in the UK?

FareHarbor does not charge a monthly subscription fee. Instead, it charges a small transaction fee per booking. For UK operators, this is typically competitive compared to alternatives like Rezdy, Bokun, or Trekksoft. Contact FareHarbor directly for current UK/EU pricing.

Does FareHarbor work with Elementor and Divi?

Yes. FareHarbor works with all major WordPress page builders. Use the ‘Custom HTML’ or ‘Code’ widget to embed your booking button or full calendar widget. Elementor Pro users can use Dynamic Tags to conditionally load FareHarbor only on relevant pages.

Can I use FareHarbor with WooCommerce?

FareHarbor is a standalone booking system and is not designed to work alongside WooCommerce for the same products. If you’re selling physical goods via WooCommerce and tours via FareHarbor, you can run both on the same WordPress site — just keep them separate.

Is FareHarbor GDPR compliant for UK and EU customers?

FareHarbor has GDPR compliance features including data processing agreements. However, it is your responsibility as the data controller to ensure your site’s privacy policy covers FareHarbor data collection. UK businesses must also register with the ICO if processing personal data. Always add FareHarbor to your website’s cookie consent (compatible with CookieYes, Complianz, and similar GDPR plugins).

What’s the difference between the Lightbox and Redirect checkout?

The Lightbox opens the booking form as a popup overlay on your existing page — ideal for keeping customers on your site. The Redirect takes customers to FareHarbor’s hosted checkout page. For SEO and user experience, the Lightbox is generally recommended for UK sites as it maintains your brand experience throughout.

Conclusion: Ready to Transform Your WordPress Site into a Booking Powerhouse?

Adding FareHarbor booking to your WordPress site is one of the highest-ROI investments you can make as a UK or European tour operator. Whether you choose the plugin method, shortcode embedding, or manual script integration, the result is the same: 24/7 online booking, less phone admin, and more revenue.

We’ve helped dozens of UK and European operators — from Highland hiking guides to Parisian food tour companies — successfully integrate FareHarbor into their WordPress sites with measurable results.

🚀  Need Expert Help? Let’s Build Your Booking System Together At syedaounraza.online, I specialise in WordPress development and booking system integration for UK and European tour operators. From FareHarbor setup to full SEO strategy, I handle everything end-to-end. 👉  Visit syedaounraza.online to get started ✅ Free initial consultation  ✅ UK/EU timezone support  ✅ Results guaranteed
script type=”application/ld+json”> { “@context”: “https://schema.org”, “@type”: “HowTo”, “name”: “How to Add FareHarbor Booking to WordPress”, “description”: “Complete step-by-step guide for UK and European tour operators”, “totalTime”: “PT2H”, “author”: { “@type”: “Person”, “name”: “Syed Aoun Raza”, “url”: “https://syedaounraza.online” }, “step”: [ { “@type”: “HowToStep”, “name”: “Install Plugin”, … } ] }
Web Development: The Complete Beginner to Pro Guide (2026)

Web Development: The Complete Beginner to Pro Guide (2026)

Web development is one of the most in-demand skills in the world today. Whether you want to build your own website, launch a startup, or land a high-paying remote job, learning web development opens doors that few other skills can. In this complete guide, we’ll cover everything — from what web development actually is, to the tools, languages, and career paths that matter most in 2026.


What Is Web Development?

Web development is the process of building and maintaining websites and web applications that run in a browser. It covers everything from a simple static HTML page to a complex e-commerce platform handling thousands of orders per day.

There are three major branches of web development:

1. Frontend Development — This is everything the user sees and interacts with. It involves HTML, CSS, and JavaScript to create layouts, buttons, animations, and forms.

2. Backend Development — This is the server-side logic that powers the website behind the scenes. It handles databases, user authentication, APIs, and business logic using languages like PHP, Python, Node.js, or Laravel.

3. Full-Stack Development — A full-stack developer works on both the frontend and backend. This is the most versatile and often the most valued profile in the job market.


Why Learn Web Development in 2026?

The demand for web developers is not slowing down. According to industry reports, there are millions of unfilled tech jobs globally, and web development skills are at the top of that list. Here’s why learning web development makes sense right now:

  • High earning potential — Web developers earn competitive salaries both locally and internationally.
  • Remote work opportunities — Web development is one of the best fields for remote and freelance work.
  • Low barrier to entry — You don’t need a formal degree. A strong portfolio and the right skills can land you clients and jobs.
  • Constant growth — The web is always evolving, which means there’s always something new to learn and new problems to solve.
  • Freelance freedom — Platforms like Fiverr, Upwork, and Toptal allow web developers to work independently with global clients.

Essential Skills Every Web Developer Needs

HTML & CSS — The Foundation

HTML (HyperText Markup Language) is the structure of every webpage. CSS (Cascading Style Sheets) controls how that structure looks — colors, fonts, layouts, and responsiveness. These two are the absolute starting point for any web developer.

You should be comfortable with:

  • Semantic HTML5 tags
  • Flexbox and CSS Grid for layouts
  • Responsive design using media queries
  • CSS variables and animations

JavaScript — The Language of the Web

JavaScript brings interactivity to websites. It runs directly in the browser and is the only programming language natively supported by all browsers. In 2026, JavaScript remains the most widely used programming language in the world.

Key JavaScript concepts to master:

  • DOM manipulation
  • Events and event listeners
  • Fetch API and AJAX
  • ES6+ syntax (arrow functions, async/await, destructuring)

A Frontend Framework — React, Vue, or Angular

Once you understand vanilla JavaScript, learning a frontend framework is the next step. React.js is currently the most popular choice used by companies like Meta, Netflix, and Airbnb. It allows you to build dynamic, component-based user interfaces efficiently.

Backend Language — PHP, Laravel, or Node.js

For backend development, PHP remains the most widely used server-side language powering over 75% of all websites (including WordPress). Laravel is the most popular PHP framework offering clean syntax, powerful routing, and built-in tools for authentication, APIs, and database management.

Alternatively, Node.js lets you use JavaScript on the server side, making it a popular choice for full-stack JavaScript developers.

Databases — MySQL and MongoDB

Every web application needs to store data. MySQL is the standard relational database used with PHP/Laravel applications. MongoDB is a popular NoSQL database often paired with Node.js and React stacks.

Version Control — Git & GitHub

Git is a version control system that tracks changes in your code. GitHub is the platform where developers host and share code. Every web developer must know Git basics — committing code, branching, merging, and pushing to remote repositories.


Popular Web Development Tools in 2026

ToolPurpose
VS CodeCode editor
Git & GitHubVersion control
Chrome DevToolsFrontend debugging
PostmanAPI testing
FigmaUI/UX design reference
DockerLocal development environments
Vercel / NetlifyFrontend deployment
cPanel / HostingerWeb hosting management

WordPress Development — Still Relevant in 2026?

Absolutely. WordPress powers over 43% of all websites on the internet, making it the largest content management system in the world. WordPress development is a full sub-discipline of web development that includes:

  • Theme development using PHP, HTML, and CSS
  • Plugin development to add custom functionality
  • WooCommerce development for online stores
  • Page builder customization using Elementor, Divi, or Gutenberg blocks
  • Performance optimization and SEO configuration

For freelancers, WordPress development is one of the most profitable niches because of the massive client base of small businesses, agencies, and content creators who rely on it.


Web Development Career Paths

Once you’ve learned the core skills, you have several career paths to choose from:

1. Freelance Web Developer

Work independently with local and international clients. Platforms like Fiverr and Upwork let you sell services globally. Niches like WordPress development, WooCommerce stores, and custom web apps are in high demand.

2. Full-Time Developer (Remote or On-site)

Many companies hire web developers full-time. Remote positions at international companies often offer significantly higher pay than local markets.

3. Agency Developer

Join a web agency where you’ll work on multiple client projects simultaneously. This builds experience quickly and exposes you to different industries.

4. Product Developer / SaaS Founder

Use your web development skills to build your own software product. SaaS (Software as a Service) products built with Laravel, React, or Node.js can generate recurring revenue.


How Long Does It Take to Learn Web Development?

This is one of the most common questions beginners ask. The honest answer depends on your dedication and learning method:

  • HTML & CSS basics — 2 to 4 weeks
  • JavaScript fundamentals — 4 to 8 weeks
  • A frontend framework (React) — 4 to 6 weeks
  • Backend development (Laravel or Node.js) — 6 to 12 weeks
  • First freelance project — 3 to 6 months from zero

With consistent daily practice (2–3 hours per day), you can land your first freelance client or entry-level job within 6 months. The key is to build real projects, not just follow tutorials.


Best Resources to Learn Web Development in 2026

Here are some of the most effective platforms and resources for learning web development:

  • freeCodeCamp — Free, structured curriculum covering HTML, CSS, JavaScript, and more
  • The Odin Project — A free full-stack curriculum with real project-based learning
  • Traversy Media (YouTube) — One of the best free channels for web development tutorials
  • Laravel Documentation — Official docs are excellent for PHP/Laravel learners
  • React Documentation — The new React docs at react.dev are beginner-friendly
  • CSS Tricks — Deep dives into CSS techniques and layouts
  • Smashing Magazine — High-quality articles on web design and development

Common Mistakes Beginners Make in Web Development

Avoiding these mistakes will save you months of wasted effort:

  1. Tutorial hell — Watching videos without building real projects. Always apply what you learn.
  2. Skipping the basics — Jumping to frameworks before mastering HTML, CSS, and JavaScript fundamentals.
  3. Not learning Git — Version control is non-negotiable for any serious developer.
  4. Ignoring responsive design — Every website must work on mobile devices.
  5. Giving up too soon — Web development has a steep learning curve in the first few months. Consistency is everything.

Final Thoughts

Web development is one of the most rewarding skills you can learn in 2026. It combines creativity with logic, problem-solving with design, and technical skill with entrepreneurship. Whether you’re building websites for local businesses, developing custom plugins for international clients, or launching your own SaaS product — the opportunities are genuinely unlimited.

Start with HTML and CSS. Build something small. Add JavaScript. Then keep building. The developers who succeed aren’t the ones who knew everything from day one — they’re the ones who showed up every day and kept shipping work.

If you’re looking for professional web development services, visit MrWebApp to explore how we can help build your next project.